Set a thinking task, then read how it was thought through.
You work in a second application, separate from the one your students use: the management portal. This guide walks through every screen you will meet there, in the order you will meet them, with pictures taken from the live product. The cycle is short - define a challenge as a template, publish a version of it, assign that version to students, read the session it produces - and everything else on this page hangs off it.
Workflow 1
Signing in
Open the management portal, not the student portal
Your institution gives you two addresses. The one your students use opens their challenges; the one in this guide opens the management portal, where templates, rosters, assignments and reports live. Opening the management portal signs you in straight away - there is no landing page to click through, because the portal hands you to Microsoft the moment it sees you are not signed in yet.
Enter your work email address and password
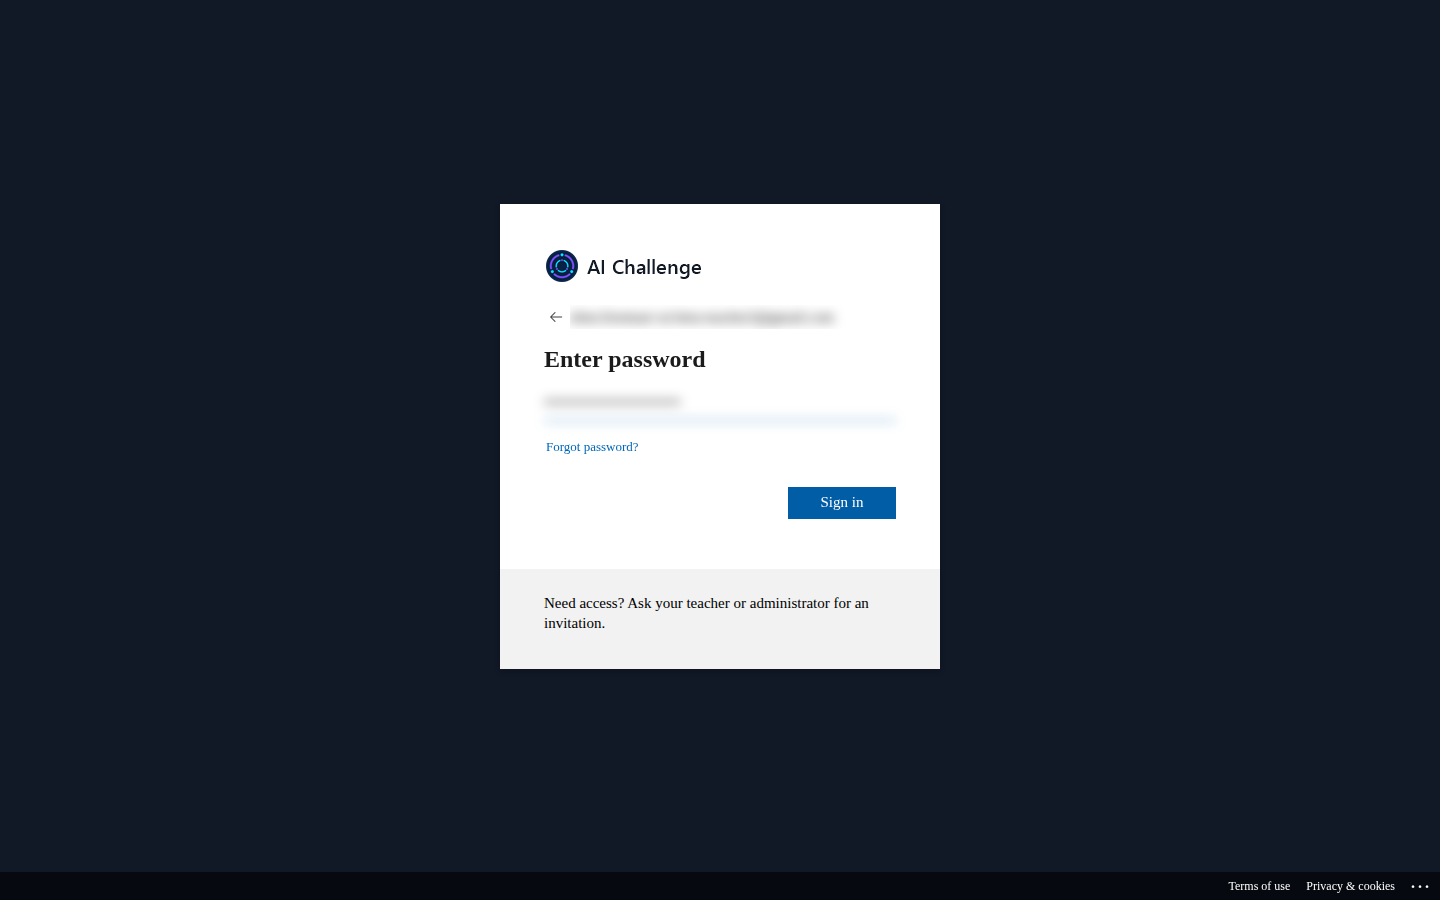
The whole browser tab moves to a Microsoft sign-in page. Your email address is asked for first, then your password on the screen below. This screen belongs to Microsoft rather than to the portal, which is why the portal never sees your password and cannot reset it. Use the "Forgot password?" link here if you need to.
The password screen. The email address and the password box are deliberately blurred in this picture; on your screen they show normally.
Wait for the portal to come back
The tab returns to the portal by itself and lands on the dashboard. Nothing needs to be clicked in between.
The first time only: the privacy policy and terms
Before any page appears for the first time, the portal shows you links to the privacy policy and the terms of use and asks you to tick both boxes and choose Agree. Nothing else loads until you do. Your answer is recorded against the version of each document you accepted, so you will only be asked again if one of them changes.
Workflow 2
Finding your way around
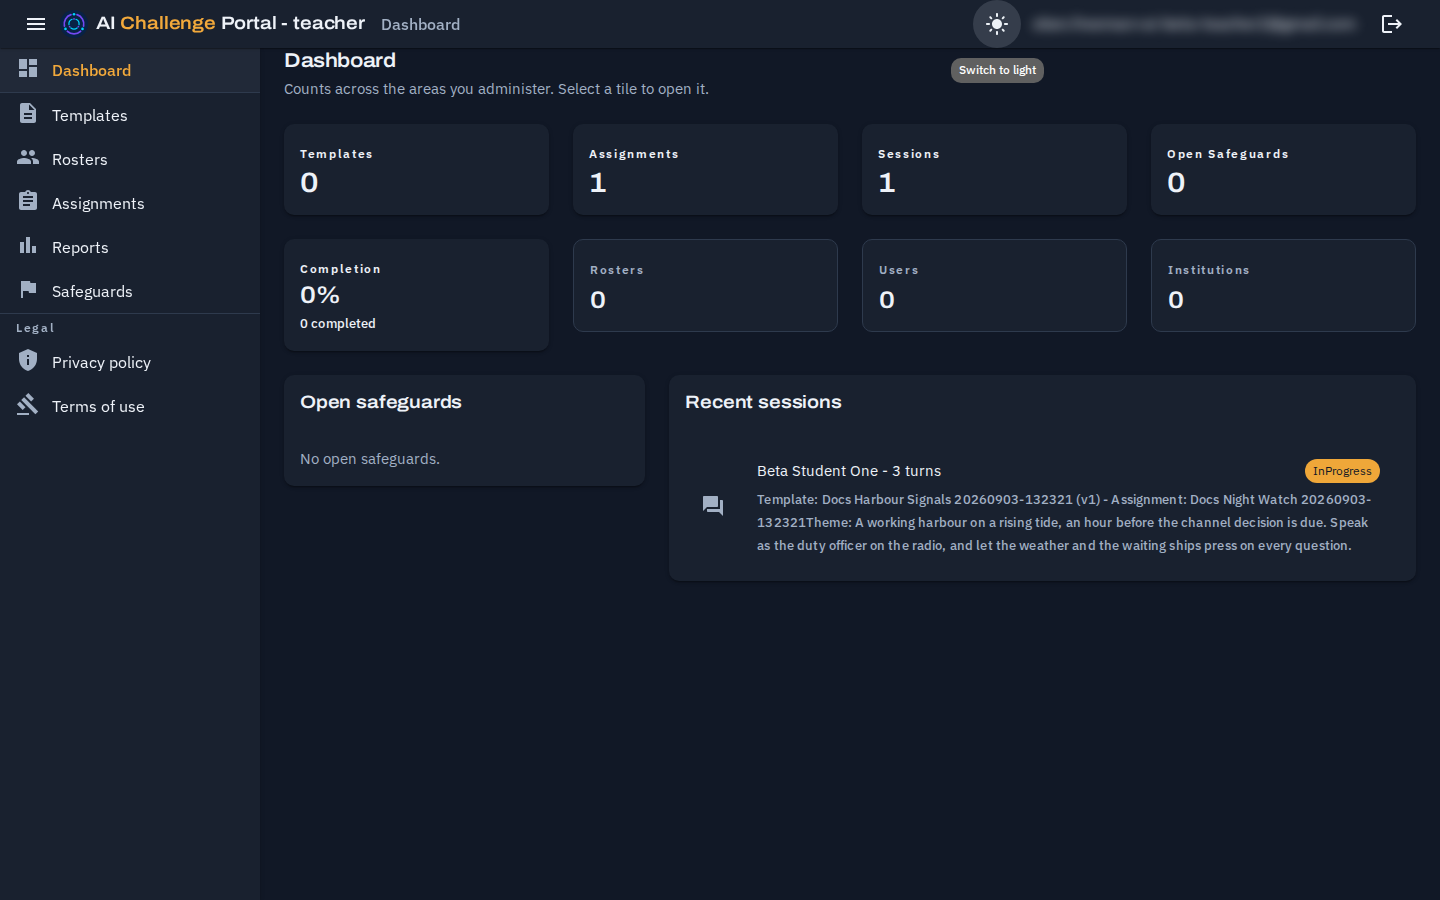
Read the dashboard tiles
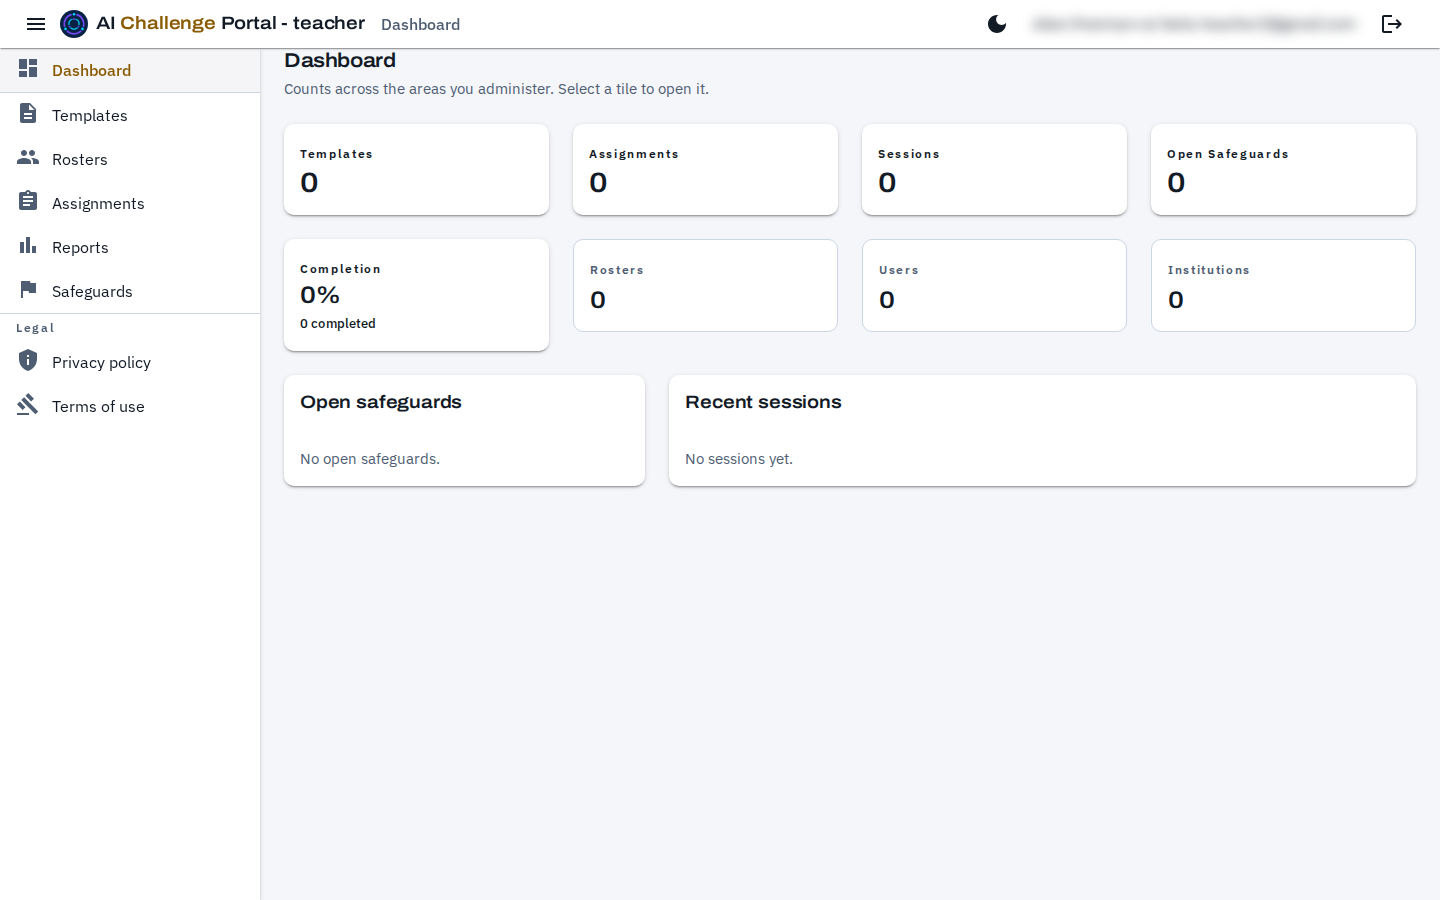
The dashboard counts what you administer and nothing else: your templates, your assignments, the sessions those assignments have produced, any safeguard flags still open, your rosters, and the share of sessions that finished. Templates, Assignments, Sessions and Open Safeguards are links into the list behind them, so the dashboard doubles as a way in. Users and Institutions are on the same grid but belong to your institution's administrator; for a teacher they read zero. The counts follow the lists: work you have archived is left out of both, so a tile and the list it opens agree. Underneath, two panels list your open safeguard flags and your most recent sessions.
The dashboard as it appears after signing in. The navigation drawer is docked open on the left and the signed-in address sits at the top right, blurred here.
Use the drawer to move between areas
The drawer is the whole of your navigation: Dashboard, Templates, Rosters, Assignments, Reports and Safeguards, with a Legal group underneath linking to the privacy policy and the terms of use. What is not in your drawer is not yours to reach: user accounts and institution settings belong to your institution's administrator, not to you.
Expect the same shape on every screen
Every area works the same way. A list page carries a search box, a New button, and one row per record with its actions on the right. Opening a record from that list opens a full page rather than a dialog, so its address can be shared or bookmarked, and the list remembers your search and page when you come back to it. Dialogs are kept for confirmations alone - archiving, cancelling, and removing.
Workflow 3
Defining a challenge: the template
Know what a template is
A template is the challenge. It is the unit everything in the portal is built from: the reusable definition of one reasoning exercise, which you assign to as many students and classes as you like, as often as you like. A template has two layers. The fields on the template itself - Title, Type, Visibility, Locale and Description - say what kind of challenge it is, who may use it and how it is filed. The challenge text - the scenario, the constraints, the goal and the evaluation criteria - lives in a published version, covered in the next workflow, so it can be frozen and revised without the record of past sessions ever changing underneath them.
Open Templates
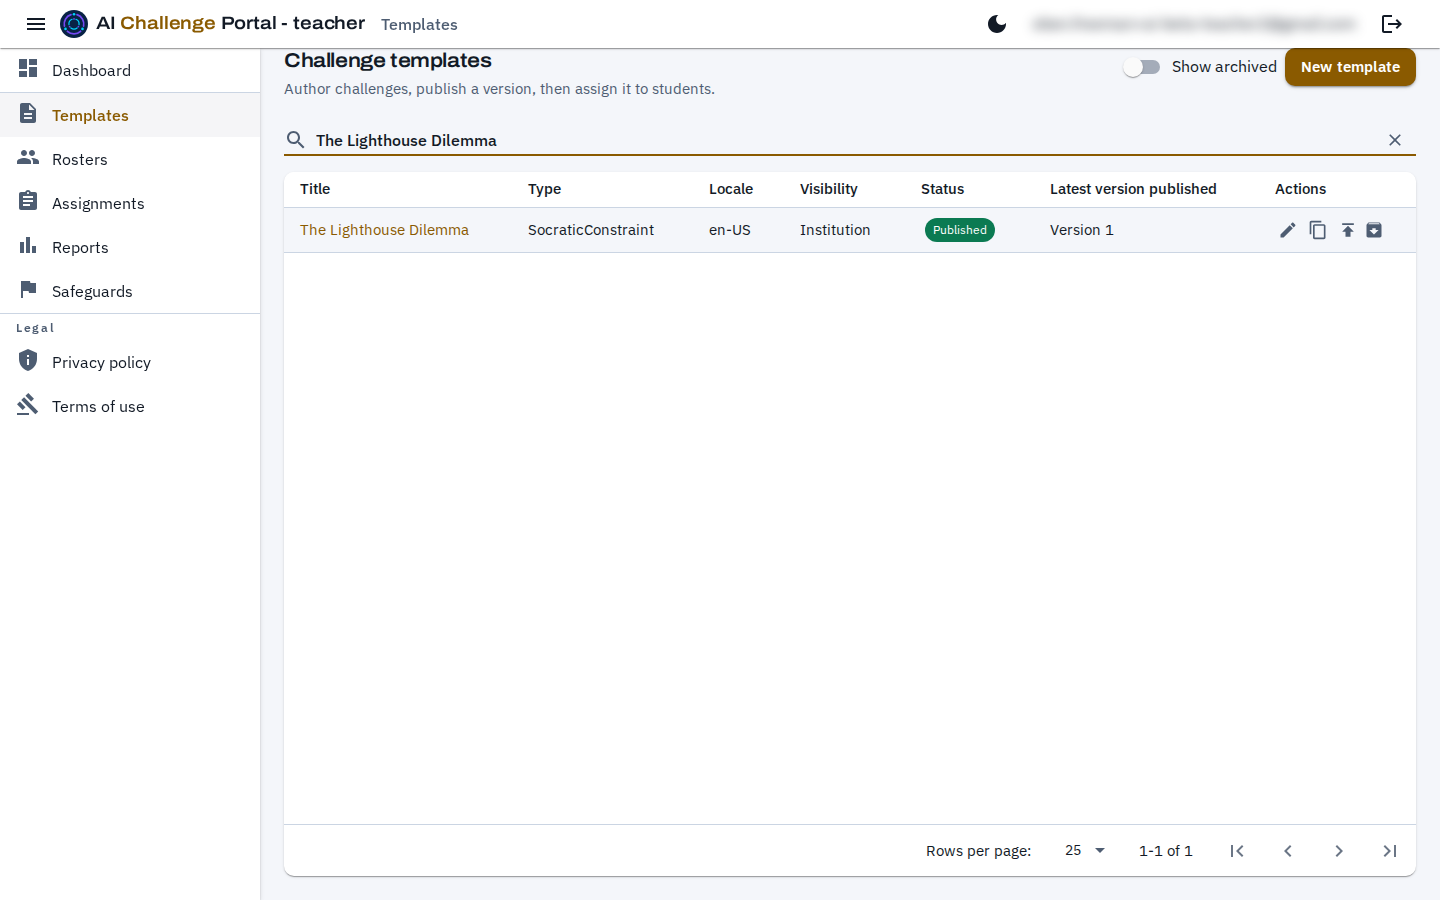
The list holds the templates you wrote and the ones shared inside your institution. The search box narrows it as you type and matches on the title, which matters sooner than you would think: the list pages at twenty-five rows and searching looks across all of them, not just the page you are on. The Show archived switch beside it is for finding work you have retired.
The Templates list, narrowed by the search box. Each row shows its status and its latest published version, with the row actions at the end.
Choose New template and describe the challenge
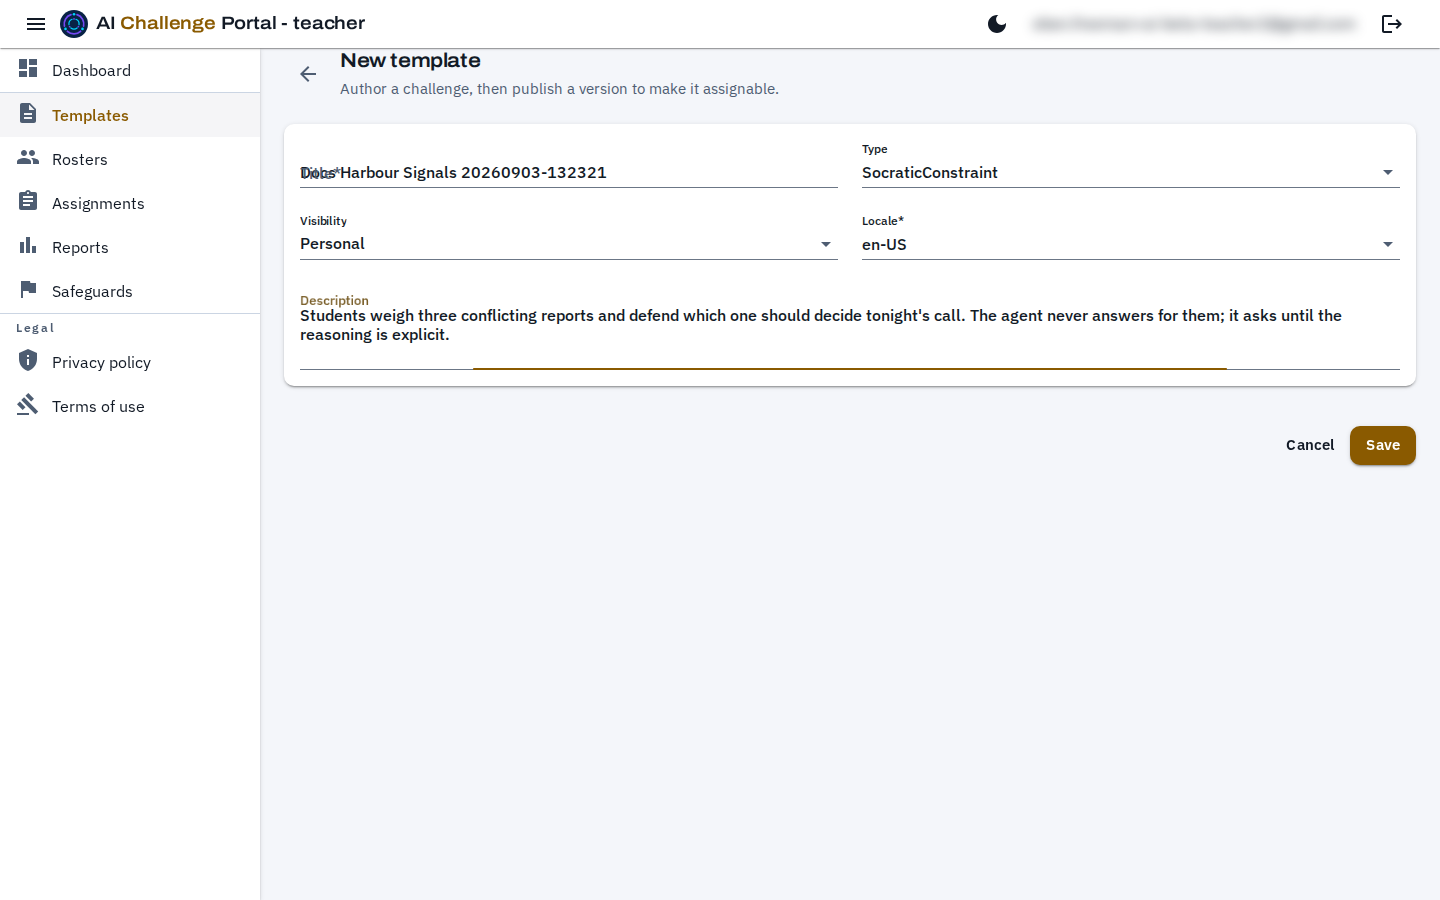
Give it a title a colleague would recognise a term later, and a description written for the student rather than for you: it is the short summary shown in lists and on the student's card, saying what the challenge is about. It is not the narrative the agent speaks in - that is the assignment's Theme, which is set per assignment and covered in workflow 7. Type is the kind of challenge the agent will run, and it fixes the rules of the conversation once the template exists. The beta offers five: Socratic Constraint, where the student works a scenario through questioning and the agent never hands over the answer; The Adversary (Steelman + Rebut), where the agent argues a position and the student must build its strongest form before attacking it; Devil's Advocate Loop, where the student argues, the agent attacks the weakest point each round, and every revision carries a note on what changed and why; Counterfactual Reasoning, where the student traces the consequences of "X did not happen" while the agent tests each causal link; and Analogy Construction and Stress-Test, where the student builds an analogy for a named audience and refines it as the agent finds where it breaks. Socratic Constraint is the default, and the form shows a one-line summary of whichever type you pick. Locale sets the language the agent works in.
Decide who else may use it
Visibility decides that and nothing else. Personal keeps the template to you. Institution shares it with the teachers in your institution, so a department can build one library between them. Neither choice affects students: what a student sees is decided by the assignment, never by the template. Sharing at institution level does not hand the template over: you wrote it, so Edit, Clone and Publish stay yours whichever visibility you pick. The only templates you cannot change are the platform's own system ones, which arrive read-only.
The new template form, filled in and ready to save. Saving returns you to the list with the new template on it, as a draft.
Save it as a draft
Saving creates the template but nothing runnable: a template with no published version cannot be assigned. That is the next step, and it is deliberately separate.
Workflow 4
Publishing a version
Open the template and choose Publish new version
The publish action on the row opens the template with the version form already showing. It is deliberately not open by default: publishing writes a snapshot that can never be edited afterwards, and that is not something to leave sitting open on a page you opened to fix a typo.
Write the challenge
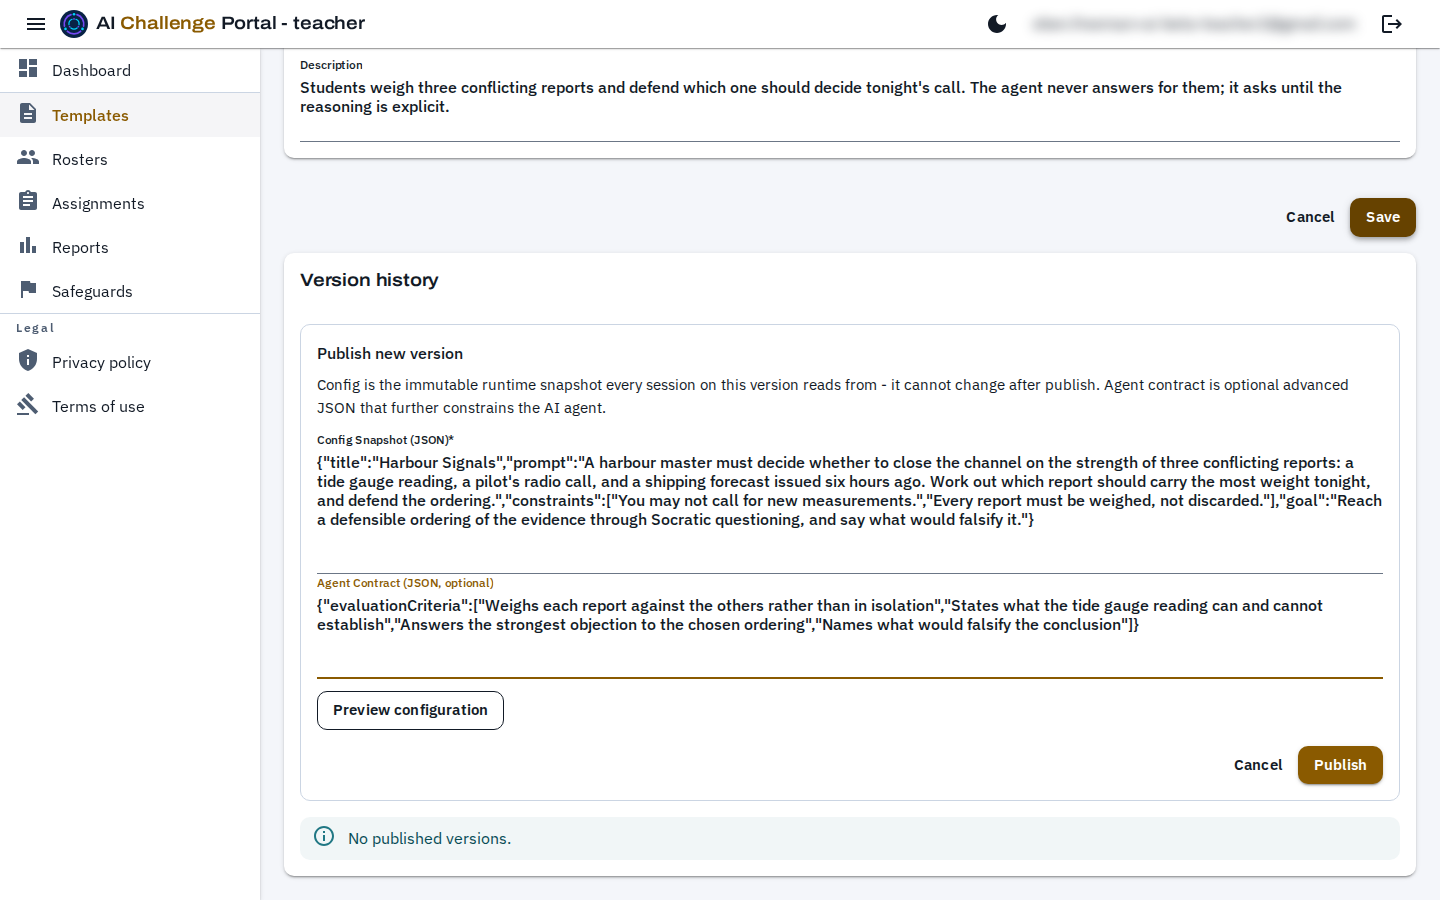
The publish form is the challenge itself, in five plain fields; there is no configuration file or code to write. The Scenario is what the student is given: the situation and the question they have to reason through. Constraints, one per line, are what they may not do or assume. The Goal is what the agent steers the conversation towards, and the Evaluation criteria, again one per line, are what the judge grades the student's reasoning against. The Challenge title is optional and starts as the template's title. The goal and criteria are prefilled with sensible defaults, so the only field you must write is the scenario.
The publish form on a saved template, filled in. These fields are the challenge; everything above them is only how the template is filed.
Publish, and understand what that fixes
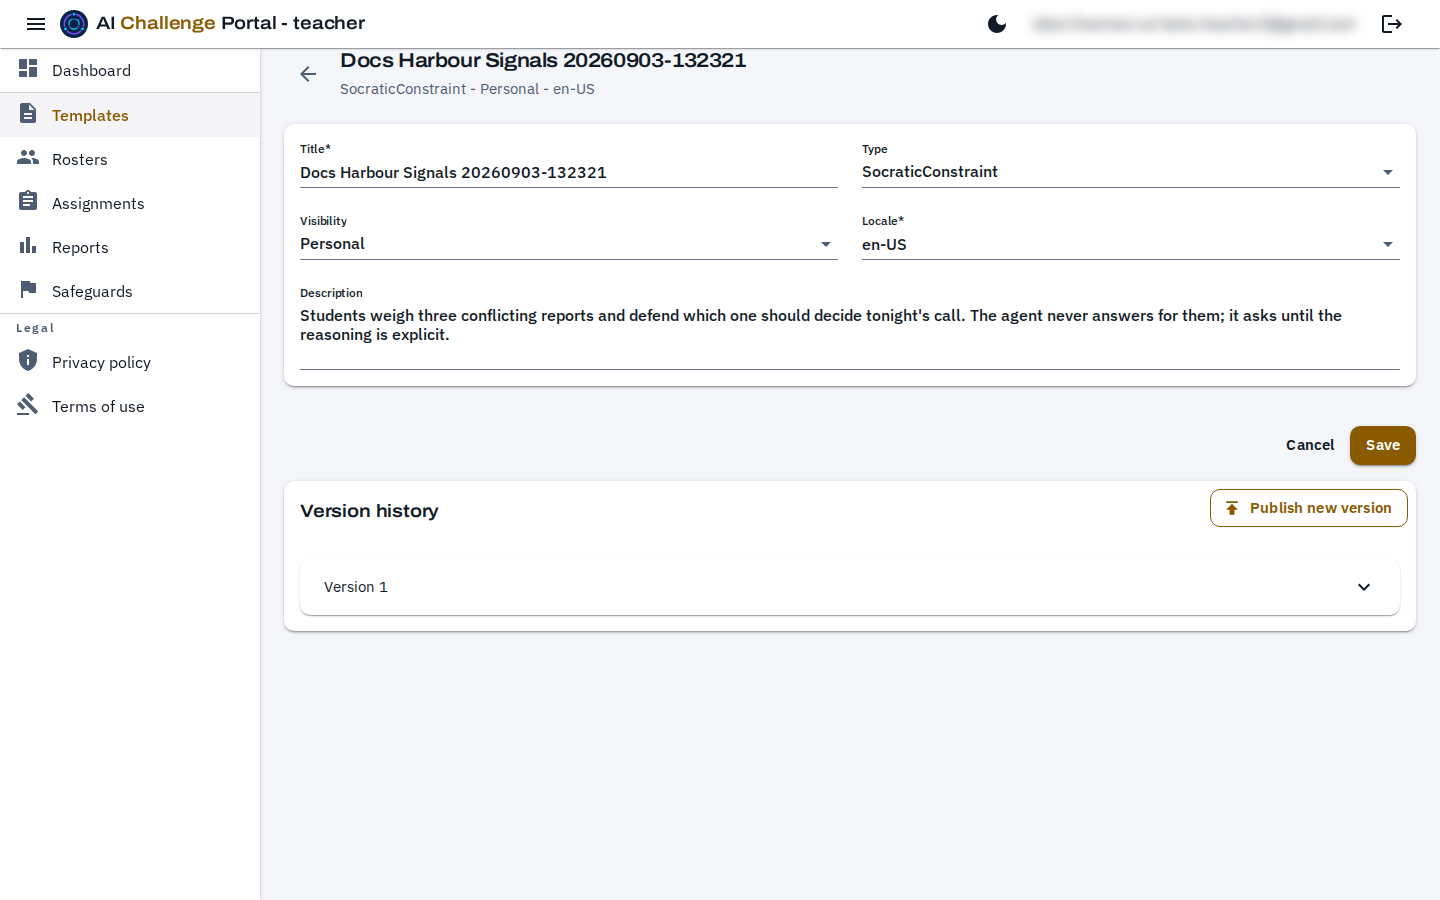
Publishing adds a numbered version to the version history and makes it assignable. The snapshot is immutable from that moment: every session ever run from this version reads the same text, so a report from last term still means what it meant then. Changing the challenge means publishing another version, which leaves the earlier one and its sessions untouched.
After publishing. The version history keeps every version, and each panel opens to show the exact configuration that version froze.
Publish more versions as the challenge develops
Versions accumulate rather than replace. Opening the publish form again starts from the previous version, with every field already filled in, so a revision is an edit rather than a rewrite. An assignment names the version it uses, so publishing Version 2 changes nothing for students already working through Version 1.
Workflow 5
Cloning a template you already have
Use the clone action on a row
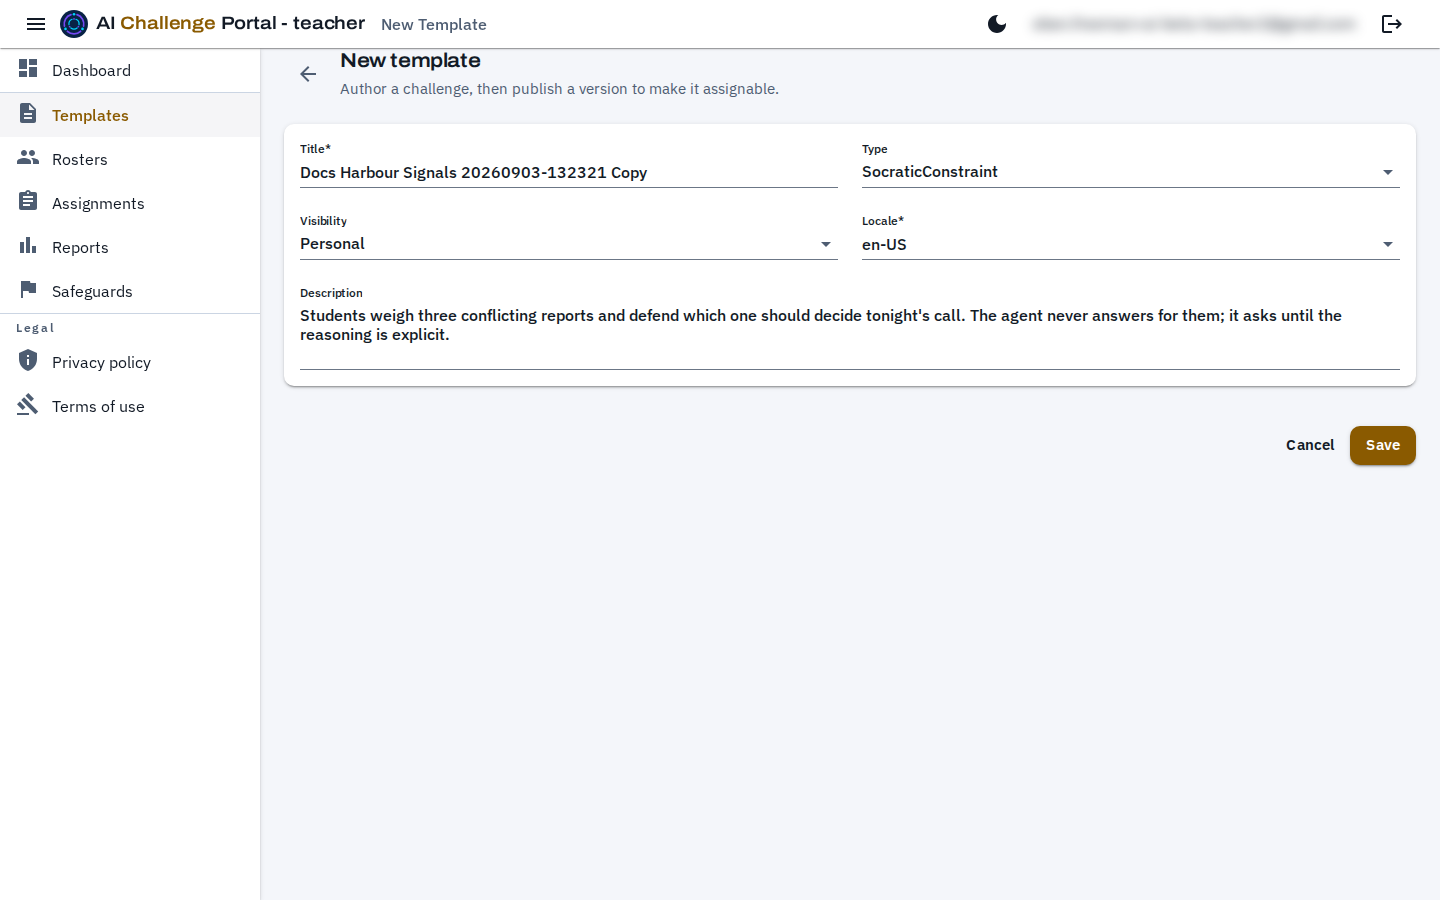
Cloning opens the new-template form with the title, description, type and locale of the source already in it, and " Copy" added to the title so the two are never confused in a list.
A clone before saving. Only the description of the template is carried over; nothing that was published comes with it.
Expect no versions to come with it
A clone always lands as a draft, even when the template it came from is published. That is the point: you clone to write a variation, and the variation needs a configuration of its own before it means anything.
Archive what you have stopped using
Archiving takes a template out of the list without destroying anything. Sessions already run from its versions keep working and their reports keep opening, because an assignment holds the version it was built on rather than a link to a live template.
Workflow 6
Rosters
Decide whether you need one
A roster is a named group of students you assign work to as a group. It is not required: an assignment can target one student directly. Make a roster when the same set of students will receive work more than once.
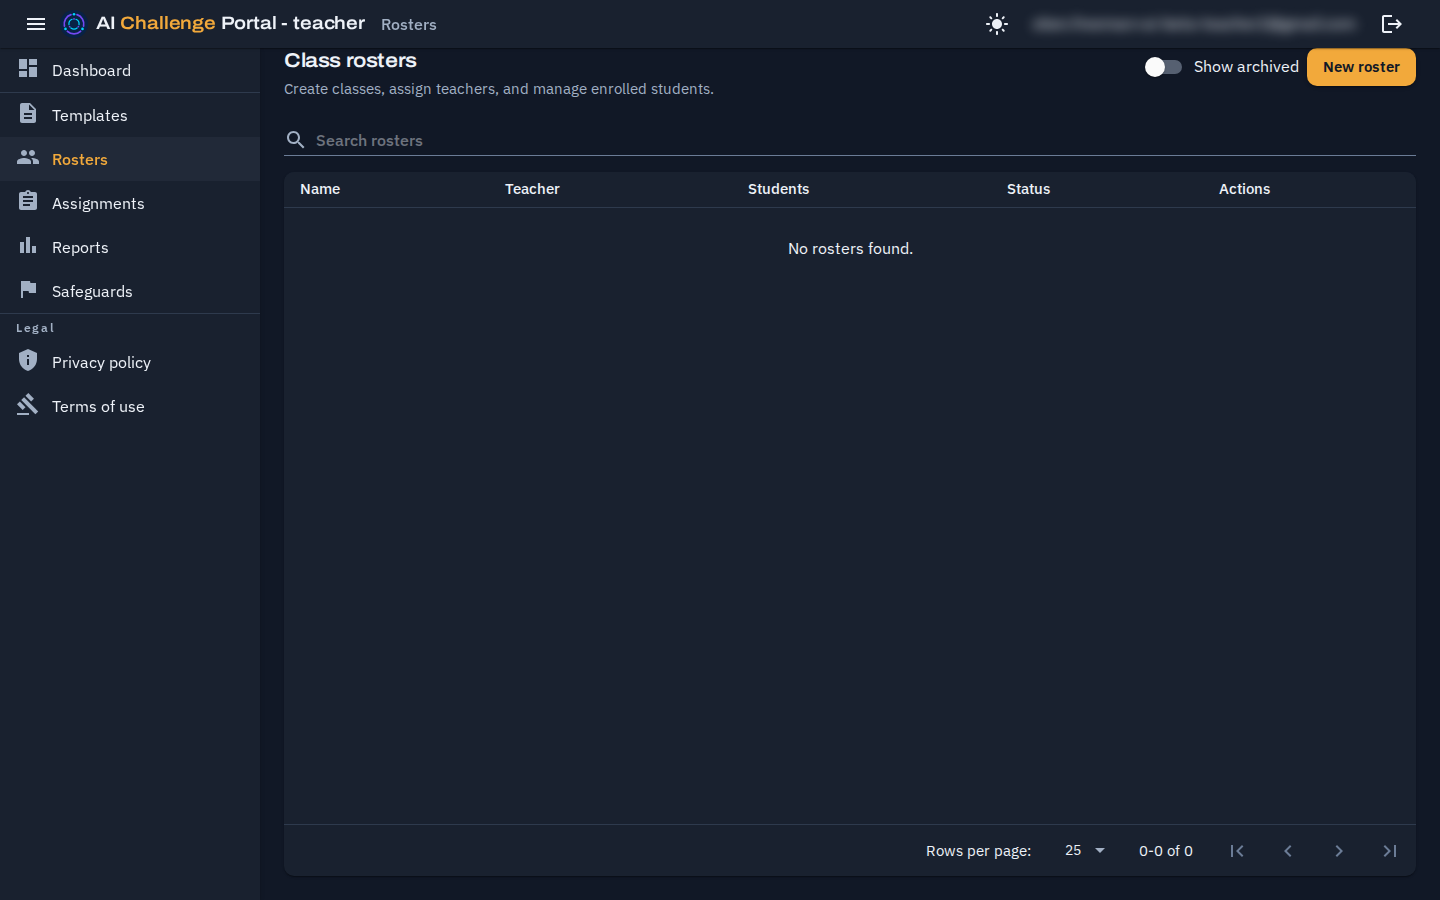
The Rosters list. Only rosters you teach appear here.
Create it, then enroll into it
A new roster asks only for a name and an institution, and the institution is fixed once it is saved - moving a roster between institutions would strand its enrollments and its assignments. Enrollment appears once the roster exists, on the roster's own page.
Add students by name
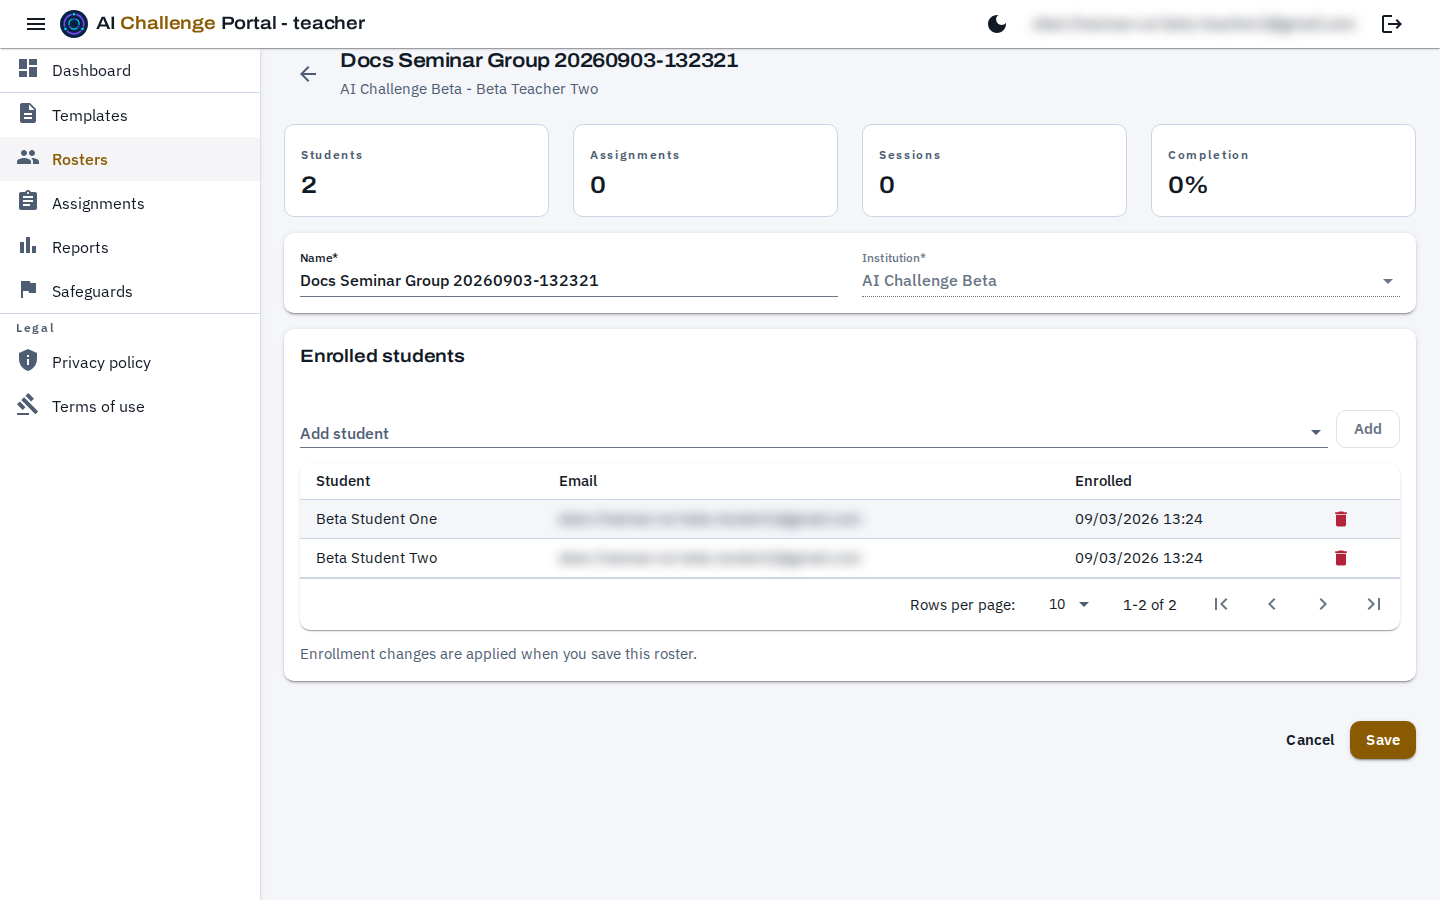
The Add student box searches your institution's students as you type; choose one and select Add. Added students appear in the table below with the address their account uses, which is the quickest way to catch two students with similar names. Removing works the same way, from the row.
A roster with two students enrolled. The addresses are blurred in this picture; on your screen they show normally.
Save before you leave
Enrollment changes are staged on the page and applied when you save the roster, all at once. Leaving without saving discards them, and the page says so beneath the table.
Workflow 7
Assignments
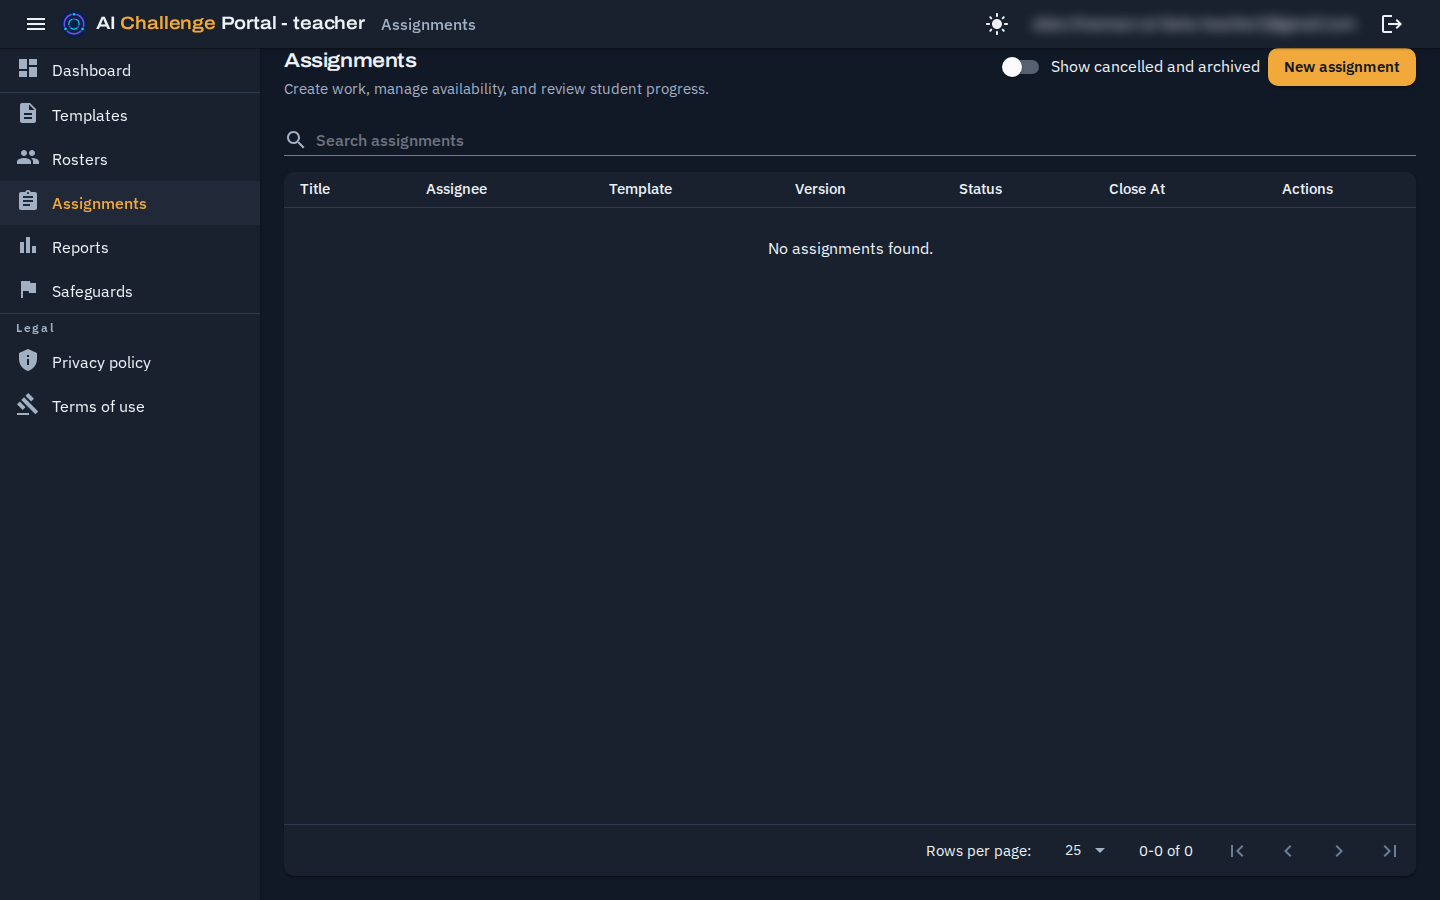
Open Assignments and choose New assignment
An assignment is what a student actually receives. It is the link between the people doing the work - one student, or a roster - and the reusable challenge they will do, which is one or more published template versions, plus when the work is open. The template says what the challenge is; the assignment says who does it, in what order, under what narrative and by when. The same template can sit behind any number of assignments, and each one keeps its own sessions and reports.
The Assignments list. The switch beside the search box brings back assignments you have cancelled or archived.
Choose who it is for
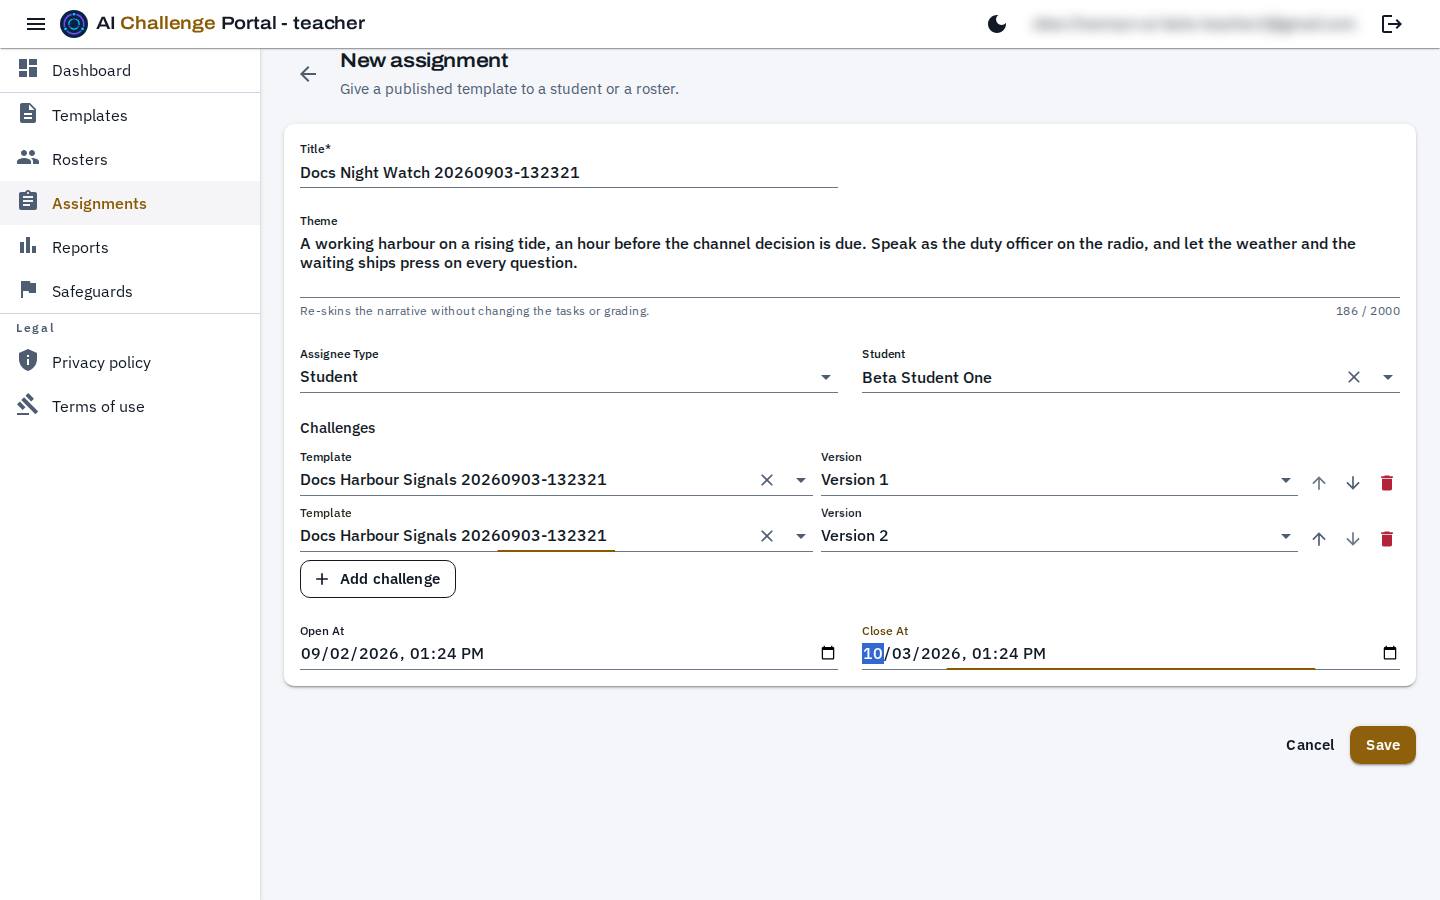
Assignee Type switches between a single student and a roster, and the box beneath it searches for whichever you chose. Type a few letters of the name rather than opening the list and reading it: the search runs on the server and returns the closest ten matches, so a name further down the alphabet is found by typing, not by scrolling.
Build the challenge chain in order
Each row of the chain is one template plus one of its published versions, and the rows run in the order they are listed. Selecting a template pre-selects its highest published version; a version already used by an earlier row is excluded from the later ones, so a chain cannot accidentally set the same work twice. Use the arrows to reorder, Add challenge to extend, and the bin to drop a row.
Set a theme, if the class needs one
Theme re-skins the narrative the agent speaks in without changing the tasks or the grading. The same reasoning challenge can be set in a harbour for one class and a hospital for another, and the reports stay comparable because only the surface changed. This is the difference between the two pieces of prose you write: the template's description says what the challenge is, and is the same wherever the template is used; the theme belongs to this one assignment, colours the conversation the agent holds, and is never seen by the judge, so grading is theme-blind.
Set the dates
Open At and Close At bound when the work can be done, and both are optional; leave both blank for immediate, open-ended access. They are enforced. Before Open At the student's card reads "Opens" with the date and offers no button; after Close At it reads "Closed" and the button is gone again; in between it reads "Due" with the closing date. The server refuses a start and every further turn outside the window, so a student part-way through when the assignment closes cannot send another response, though a finished run stays reviewable. Close At must be after Open At, and the form says so if it is not. Both dates stay editable on the assignment's page after it is saved.
A new assignment with a two-challenge chain and its availability window set, ready to save. The student works through the rows in this order, and each row's Version reads "Version 1", "Version 2" and so on.
Watch it from the assignment's own page
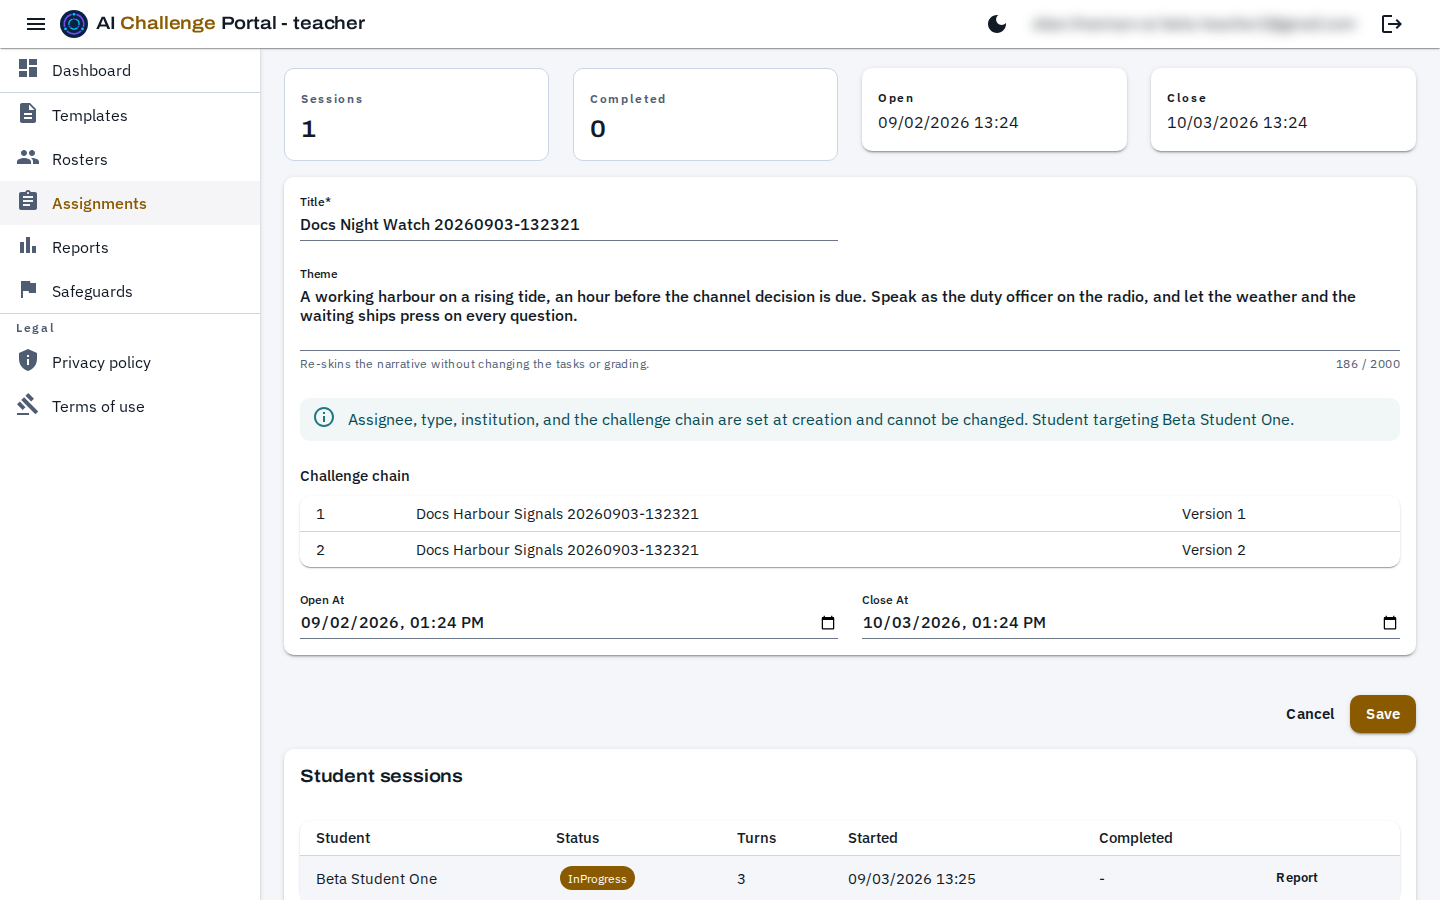
Once saved, the assignment's page carries a table of every session your students have started against it: who, what state it is in, how many turns they have taken, when they started and finished, and a link straight to the report. The assignee and the chain are fixed after creation - changing them would re-point work already done - so the page shows them read-only and says so. The title, the theme and both dates stay editable.
A saved assignment after a student has begun. The Open and Close tiles and the two date fields read back what was set. The chain is read-only, and each session row links to its own report. Cancel assignment sits above the form.
Cancel an assignment that should stop
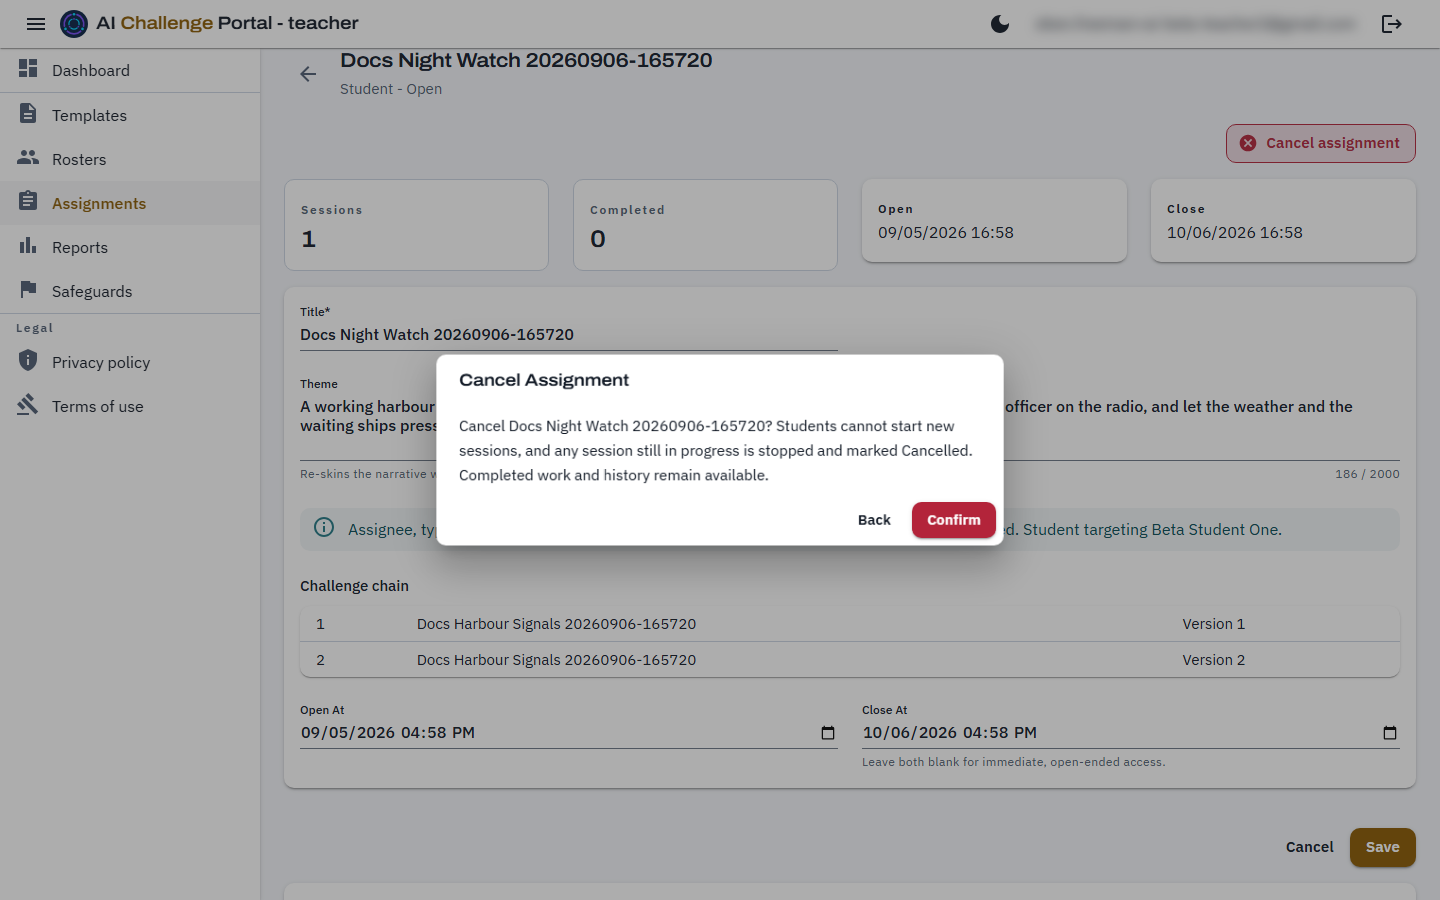
Cancel assignment, at the top of the assignment's page, is for work that must end now: set to the wrong class, superseded by a corrected version, or withdrawn. It asks you to confirm and tells you what it will do. Cancelling is immediate. Students can no longer start it, every session still open - not started, in progress or paused - is stopped and marked Cancelled, and a student who returns to one sees "Cancelled by your teacher". Completed sessions keep their record and their report. The assignment becomes read-only and leaves the list until you turn on Show cancelled and archived. There is no undo; if the work should go ahead after all, create a new assignment.
The cancel confirmation. Back leaves the assignment as it is; Confirm stops it at once.
Workflow 8
Reading a session report
Find the session
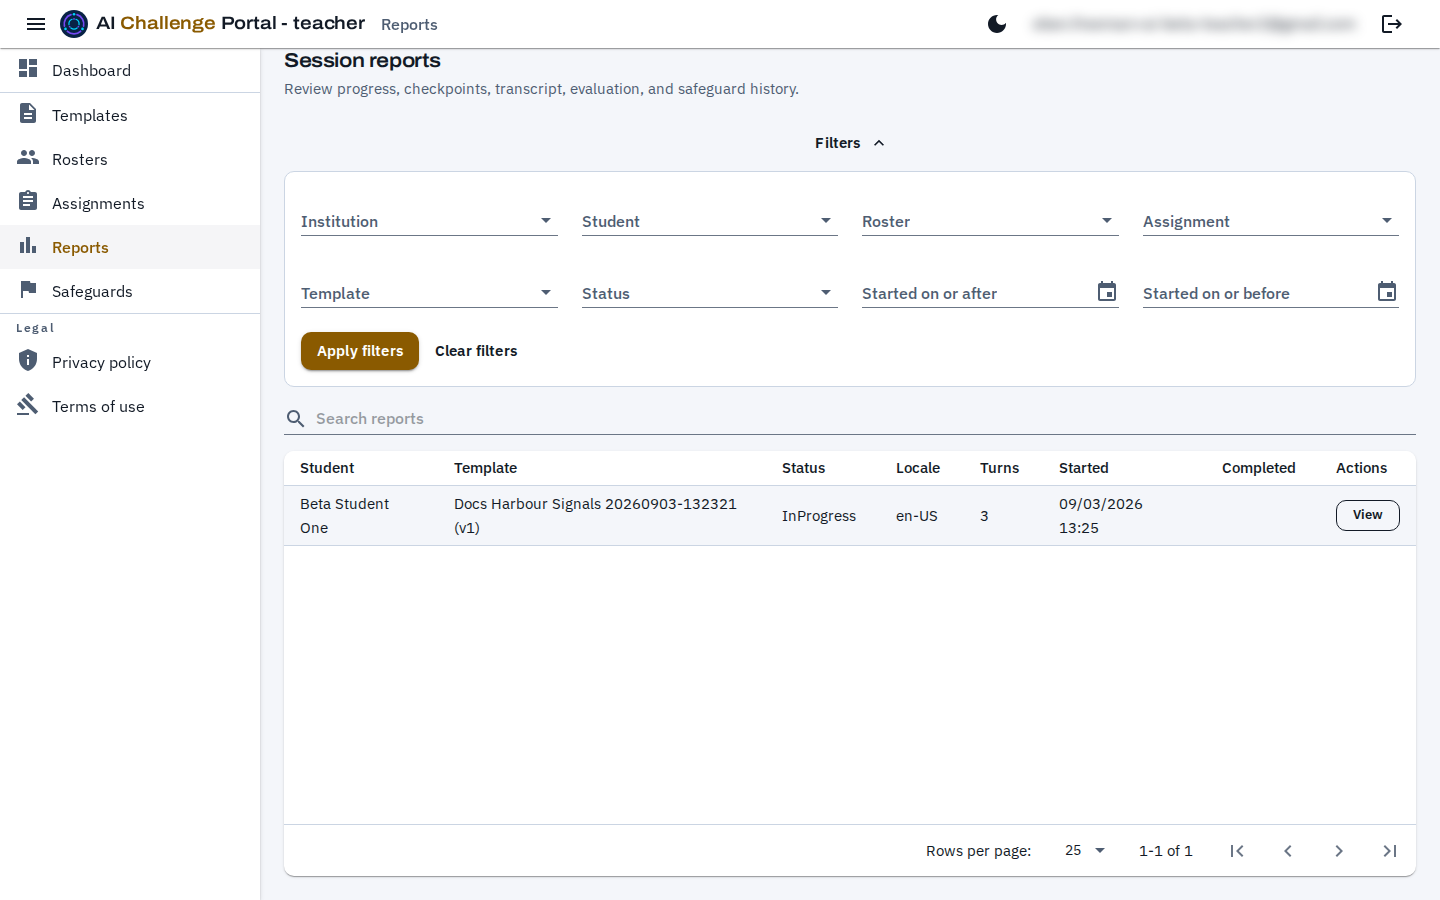
Reports lists every session run against work you set. The filter panel narrows it by institution, student, roster, assignment, template, status and start date, and a separate search box below it matches text; Apply filters runs them and Clear filters puts the list back. That is how you turn "all of this term" into "this class, this challenge". Choose View on a row to open it.
The Reports list with its filter panel open. Only sessions on work you set appear here.
Start with who and what
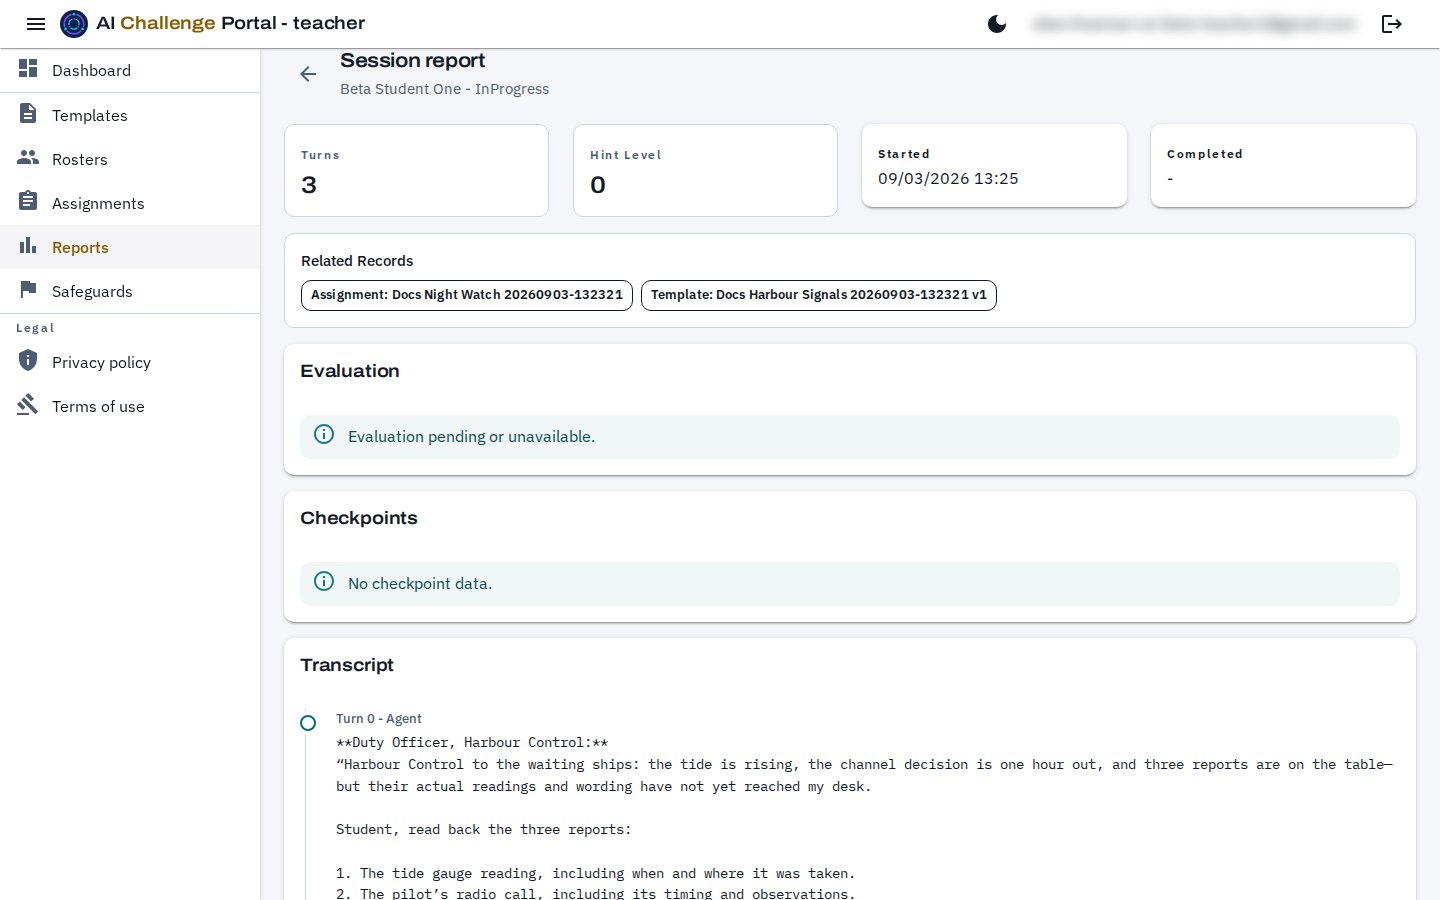
The heading names the student and the state of the session, and the tiles beneath it count the turns taken and the hints reached, with the start and finish times. The Related Records row links back to the assignment and to the exact template version the session ran, with the roster as well when the assignment was set to one, so a report is never an orphan.
Expect the evaluation to fill in at the end
A session still running reads "Evaluation pending or unavailable", and its checkpoints read "No checkpoint data". Neither is a fault: both are written when the session reaches its conclusion. A finished session carries an overall score, a written summary, and a score per reasoning dimension with the rationale for each. Read the rationale rather than the number: the number is a summary of the rationale, and it is the rationale a student can act on.
Use the checkpoints to see where the thinking turned
Checkpoints are the specific things the challenge wanted the student to do. Each says whether it was required, whether it was met, and the turn it was met or missed at, which points you at the moment in the conversation worth reading first.
Read the transcript last
The transcript is the conversation as the student saw it, turn by turn with the speaker on each. Internal agent instructions and grading rules are not in it and are not shown to you here either - what you read is what they read, which is what makes it usable as evidence in a conversation with them.
A report on a session that is still running. Identity and counts at the top, then the evaluation and checkpoints waiting on the session to finish, then the student-visible transcript.
Workflow 9
Safeguard flags
Check the list, not your inbox
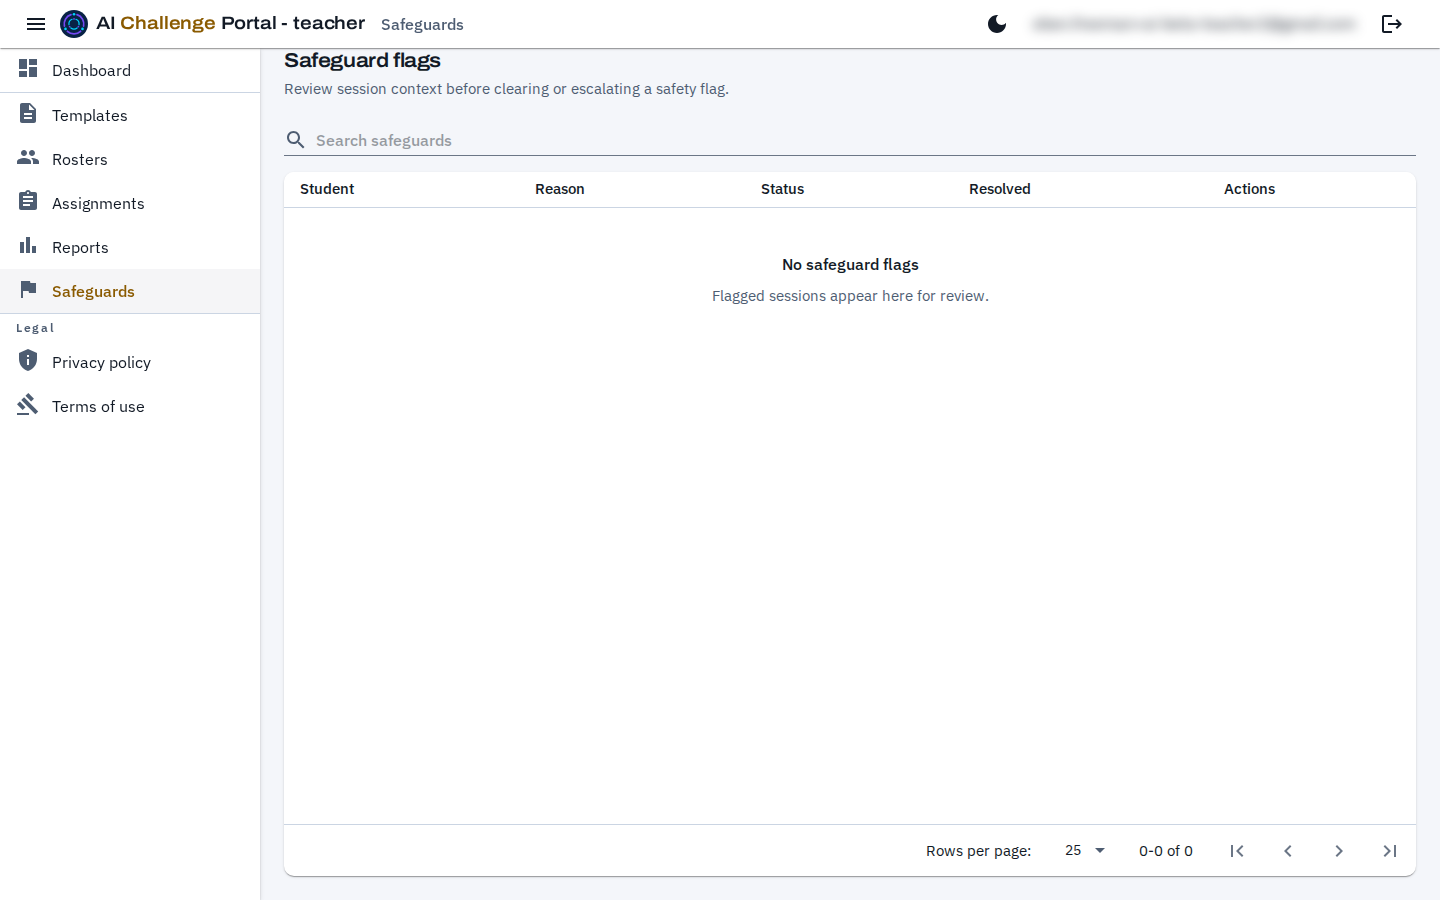
When a session raises a safeguard concern it is flagged and paused, and the flag appears here with the student, the reason and its state. There is no notification in the beta: the dashboard's open-flag count and this list are how you find out, so it is worth a look on the same rhythm as marking.
The Safeguard flags list. An empty list is the state you want; flagged sessions appear here for review.
Review the session before deciding
Opening a flag shows the session's context and the student-visible transcript. Read it before you decide anything; the flag tells you a concern was raised, not what happened.
Record why, then clear or escalate
Both actions require your reviewer notes and a rationale for the disposition. That is not paperwork for its own sake: the flag keeps what you wrote, so a resolved flag can be read back later by whoever needs to know how the decision was reached. A student cannot resume until the flag is cleared.
Workflow 10
Theme, small screens and signing out
Switch the theme
The icon at the top right switches between the light and the dark theme, and the whole portal follows immediately. It is a display choice and nothing else; it changes nothing about what you or your students can see.
The dashboard in the dark theme, from the toggle in the app bar.
Work on a narrower window
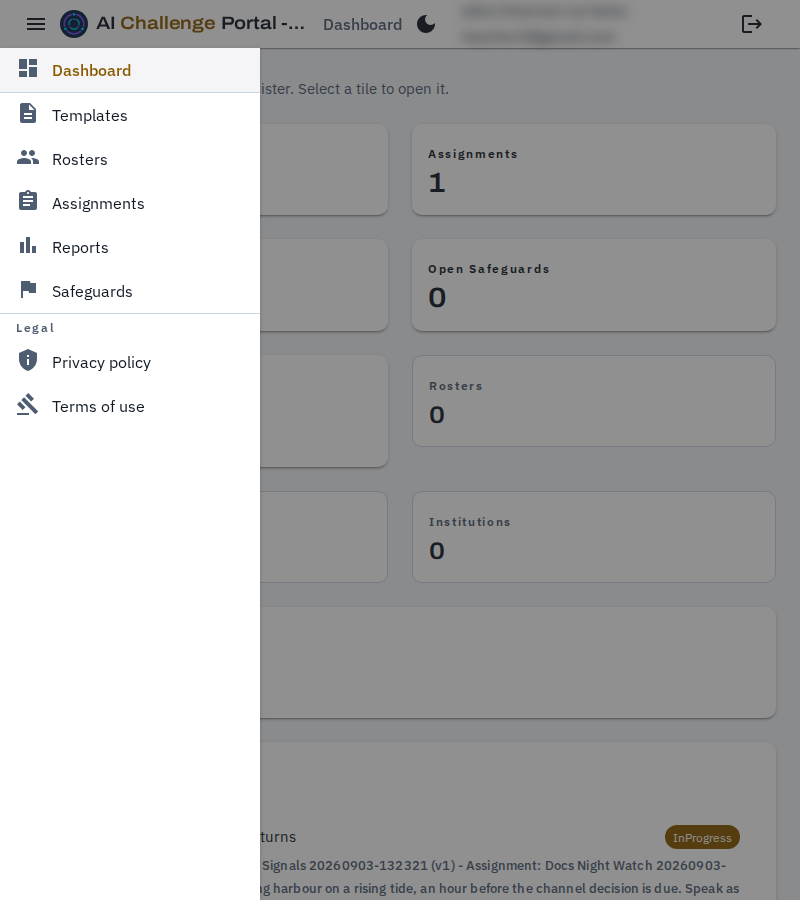
Below roughly a laptop's width the drawer stops being docked and hides itself, and the menu button at the top left slides it back over the page. Choosing anything in it closes it again, so the reading area is never permanently narrowed.
The drawer on a narrow window, opened from the menu button. The same items, over the page instead of beside it.
Sign out when you are finished
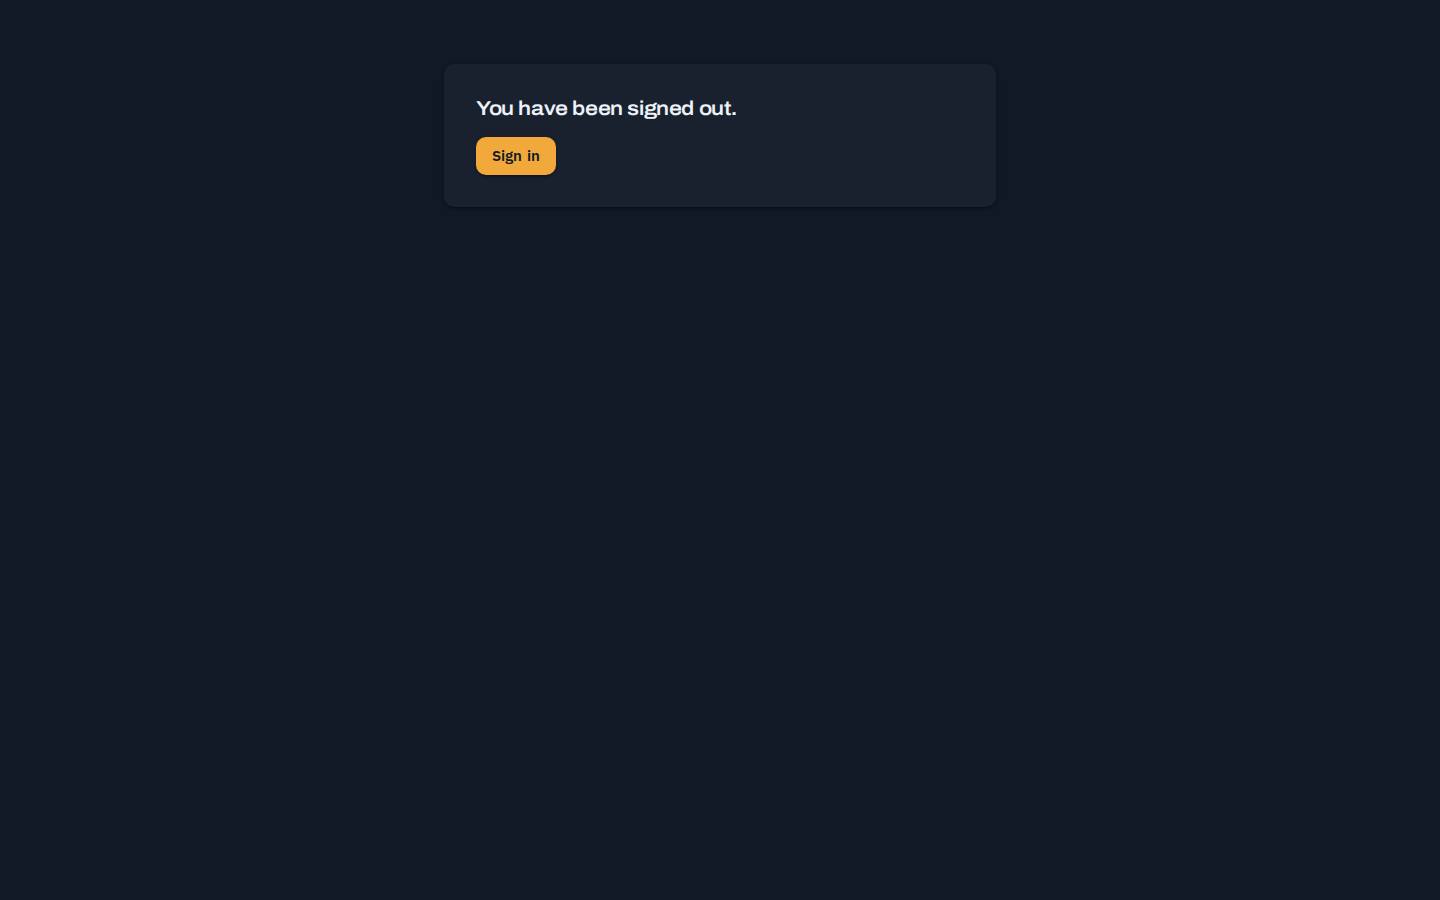
The sign-out icon sits beside the theme toggle. It ends the Microsoft session as well as the portal one and leaves you on a confirmation page with a way back in. Sign out on a shared or classroom machine; closing the tab alone does not end the session.
After signing out. Nothing of your session is left in the browser.
Available in beta
What you can do now
Define challenges as templates, clone them, publish immutable versions, build rosters and enroll students, assign an ordered chain of challenges to a student or a roster with a narrative theme and an enforced availability window, cancel an assignment that should stop, read session reports with their checkpoints and transcripts, and clear or escalate safeguard flags.
Planned next
What is not yet a beta workflow
Programs, join codes, bulk classroom operations, exports, LMS integration, and the remaining challenge types from the design catalogue remain planned. User accounts and institution settings are your institution administrator's, not yours.
Safeguards need a human process
If a session is paused for a safeguard flag, review its visible transcript and clear or escalate it using your institution's process. A student cannot resume until the session is cleared.