Practice reasoning when there is no class around it.
An independent learner uses the student portal without a teacher, roster, or institution. Choose challenges from the library, run them, and review your results.
How to use this guide
Follow the workflows in order
This guide is divided into numbered workflows. Each workflow is a task made of numbered steps, and workflows appear in the order you first need them.
What is available today
Accounts are created for you; the library is ready to use.
A platform administrator creates your account and sends a temporary password. The beta supports sign-in, the library, self-run sessions, and result review. Writing your own challenges is not available yet. Self-registration, subscriptions, and billing are not built yet.
Workflow 1
Getting an account
Ask a platform administrator to create the account
Self-service sign-up is not available in the beta. A platform administrator creates your independent learner account and makes the library visible.
Use the temporary password, then set a new one
Sign in with the temporary password from your administrator. The sign in form asks you to set a new password, and the temporary password then stops working. If you did not receive one, select Forgot password? and use the emailed one-time code.
Accept the privacy policy and terms of use
Read the privacy policy and terms of use, tick both boxes, and choose Agree. You are asked again when either document changes.
Workflow 2
Signing in
Open the portal and choose Sign in
Choose Sign in on the portal card to continue to the sign-in form in this tab.
Enter your email address, then your password
Enter both in the sign in form. The portal never sees or stores your password.
Wait for the portal to load your dashboard
This tab returns to the portal when sign-in finishes and loads your dashboard. Once the header appears, a spinner beside AI Challenge and the environment badge indicates activity while API calls, page loading, navigation, and other async actions finish. The dashboard reserves space beside its cards for the scrollbar.
The sign-in screens are identical for assigned students, so the student guide's sign-in walkthrough shows exactly what you will see. If another tab in the same browser signs in or starts a course session, your open portal tab reloads and switches to the newer sign-in.
Workflow 3
Finding a challenge in the library
Read the library section on your dashboard
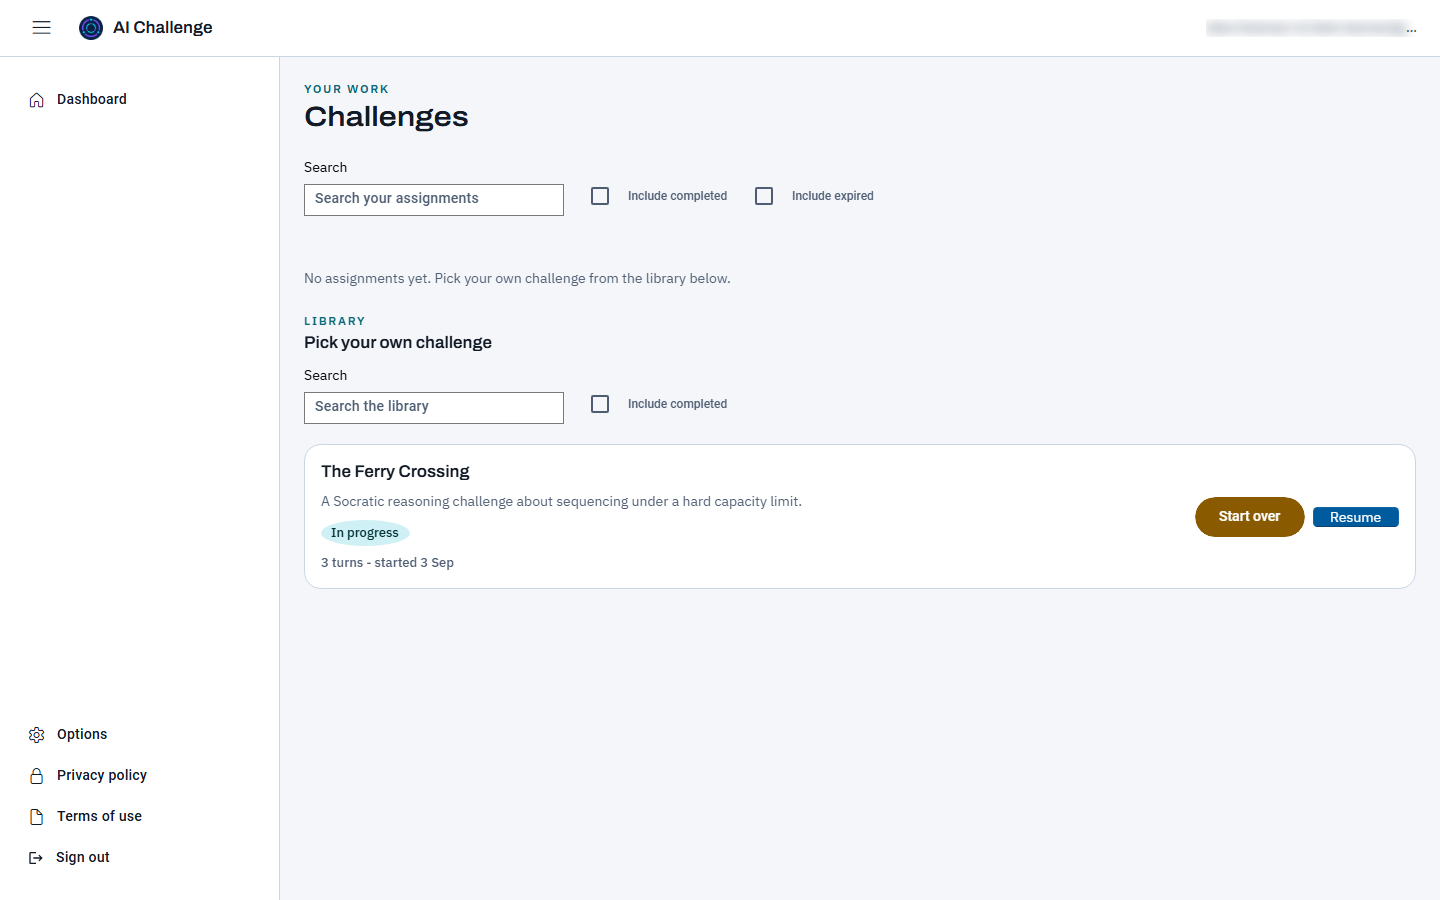
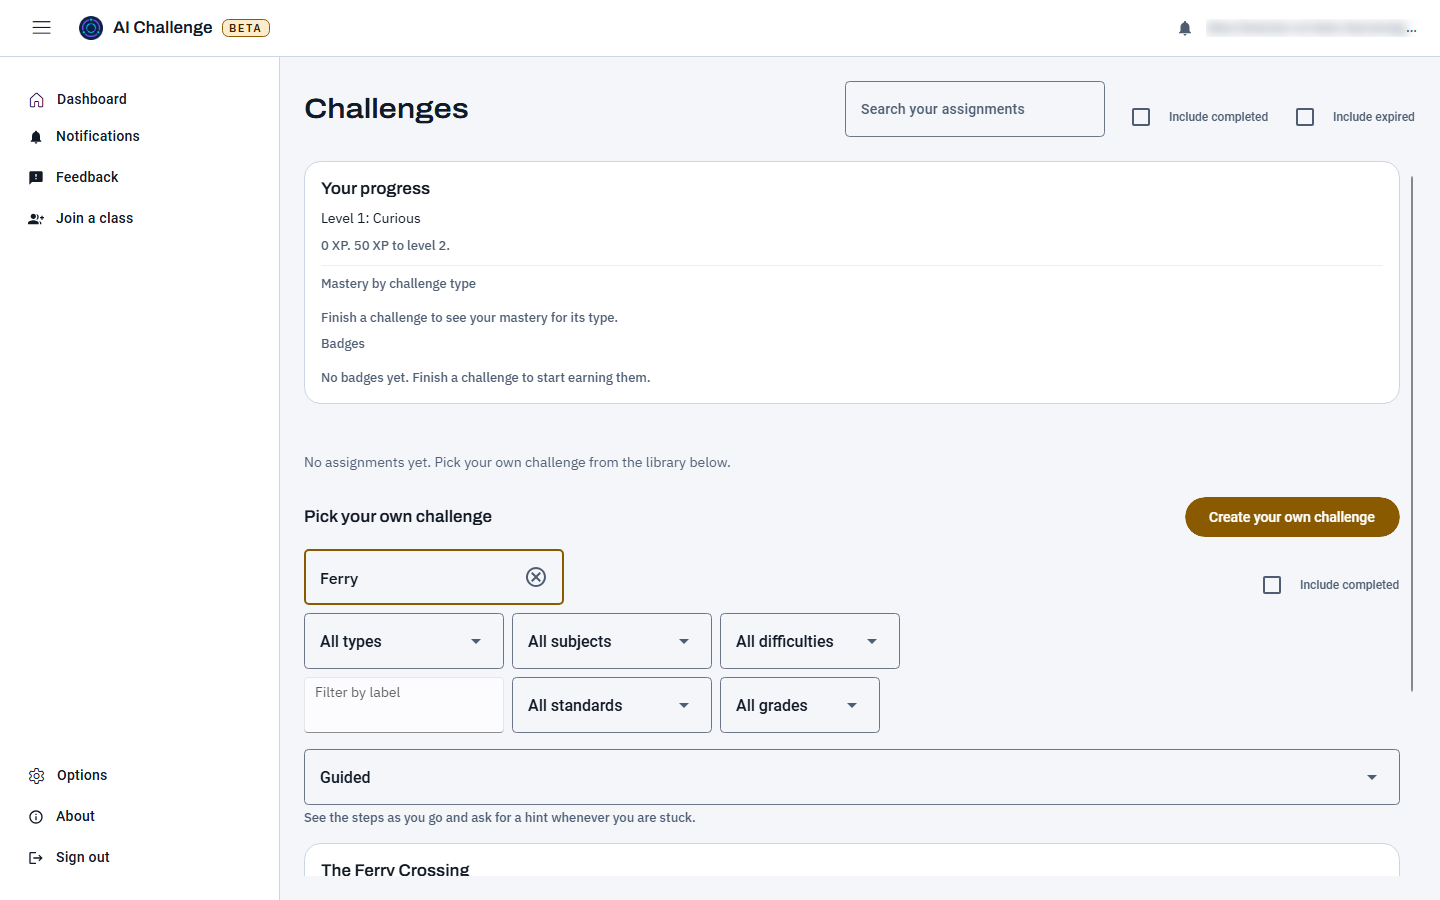
The section is headed "Pick your own challenge". Each card shows its title, description, type, status, and buttons; a subject pill and, on a challenge with an age rating, an "Age N+" pill sit beneath them, with a difficulty pill ("Difficulty: Introductory", "Intermediate" or "Advanced") on a rated challenge, followed by a "Labels:" line when it has labels. Note that the assignment list is empty for independent learners. If you do not see the library, your account is not set up as an independent learner. Contact your administrator.
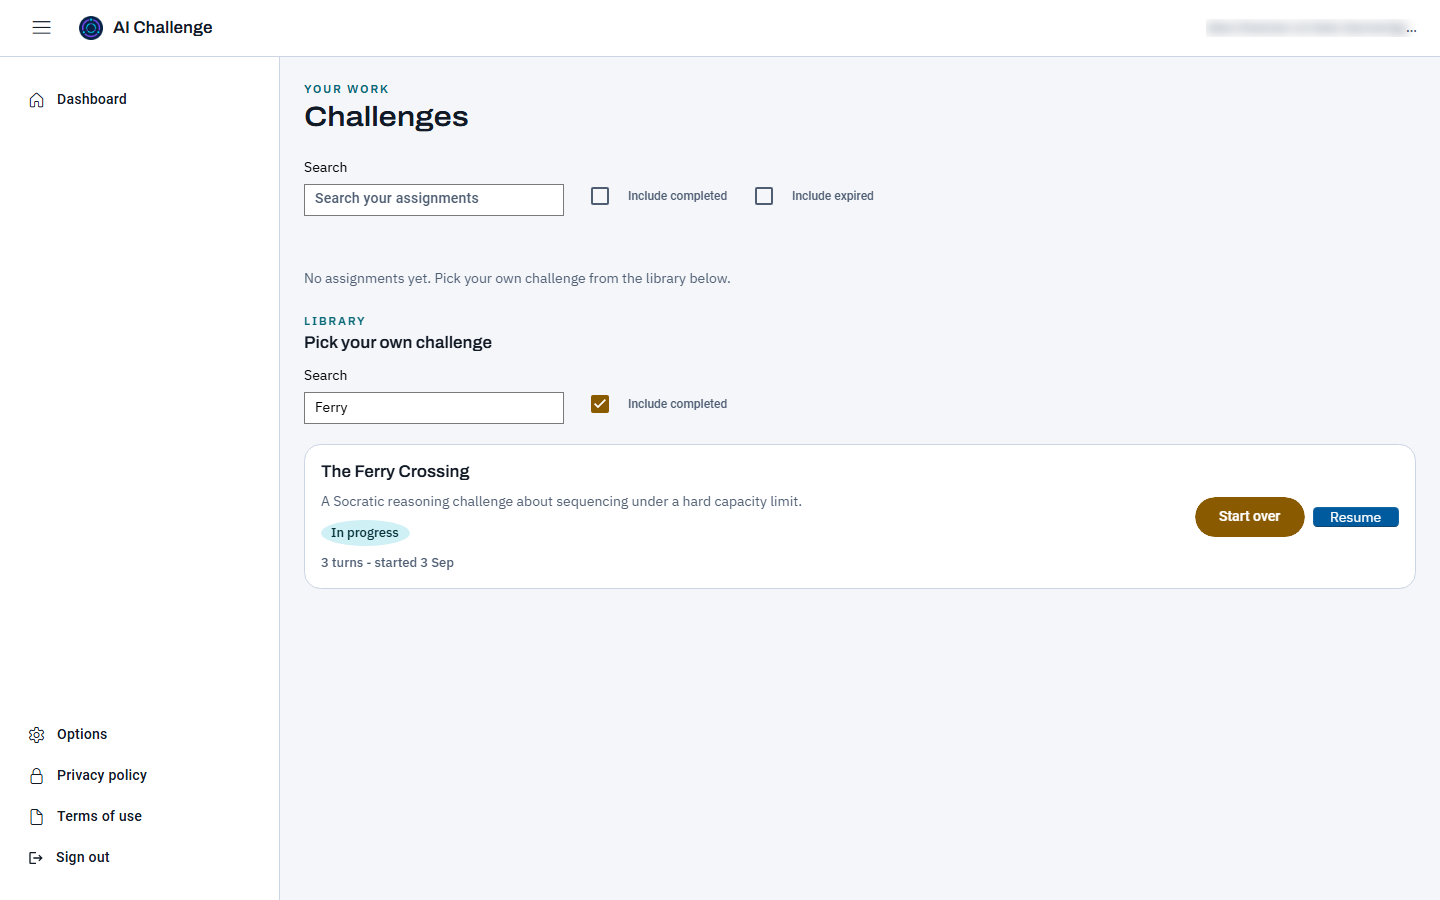
The library section of the independent learner dashboard, narrowed here to one challenge by the search box. The assignment list is empty; without a search the library lists the platform's challenges in title order, ten to a page.
Narrow the list with the search box, or filter by type, subject, difficulty or label
Type part of a title into the library search box, or pick a challenge type, a subject or a difficulty from the dropdowns beside it, to narrow a long list; a difficulty filter leaves out unrated challenges. A second row filters by label. For a label, type part of it into the Filter by label box and pick it from the suggestions, which hold only labels some challenge in your library carries. Every built-in challenge has a subject, such as Science, History or Philosophy and ethics, shown as a pill on its card. Clear the search box and the label box, and set the dropdowns back to All types, All subjects, and All difficulties, to restore the full list.
Search, Include completed, the type, subject and difficulty dropdowns and the label box filter the library. The subject pill on each card is what the subject dropdown matches.
Tick "Include completed" to see finished challenges
Completed challenges are hidden by default. Tick Include completed to show them with Review and Run again.
Use Prev and Next when the list has more than one page
The library shows ten challenges per page and adds Prev, Next, and a page indicator when needed.
Age ratings
Some built-in challenges deal with mature topics and carry an age rating, shown as a pill such as Age 16+ on the card. A rated challenge appears in your library only when the date of birth on your account shows you are old enough. If no date of birth is recorded for you, rated challenges stay hidden until an administrator records one - the portal cannot check your age without it. Nothing on the page says a challenge is hidden, so if you expected to see one, ask your administrator to check your date of birth.
Workflow 4
Running a challenge
Replies from the AI can take up to two minutes during beta. After about 20 seconds the page adds the text "The AI is still thinking. Replies can take up to two minutes during beta." under the response box; your message is kept if a reply times out. If the AI service's content filter blocks a message, the run pauses and the message is passed to a person to review; the page reads "Your last message was blocked by the AI service's content filter and has been passed to a person to review. Choose Resume to continue. If something is worrying you, talk to someone you trust." Your message comes back in the box, and you can choose Resume and carry on. If the filter blocks a challenge's opening, the challenge does not start and the dashboard says so: try another challenge.
Choose the button on the row you want
Choose Start challenge, Resume, or Run again based on the row status. Library runs have no assignment or due date. If the AI facilitator is busy or still preparing your challenge, the dashboard shows "Your challenge is being prepared - trying again in N s..." and tries again by itself; your run is kept and no attempt is used. If the AI is still busy after three tries, the dashboard reads "The AI is busy right now. Please try again in a moment."; choose it again shortly. If it is still being prepared after about 2 minutes, the dashboard reads "Your challenge is still being prepared. Open it again in a moment." and stops trying; it does not open the challenge by itself, so choose it again shortly.
Pick a support mode before you start
Above the library list, Support mode for your next run sets how much help a new run gives; it starts on Guided, and the line under it explains the mode you pick. Guided shows the steps as you go and lets you ask for a hint whenever you are stuck. Standard keeps the steps hidden until your report, and you can still ask for hints. Challenge shows no steps and gives no hints. The mode applies to every Start challenge, Run again and Start over; Resume carries on in the mode the run already has.
Read the scenario and the agent's opening message
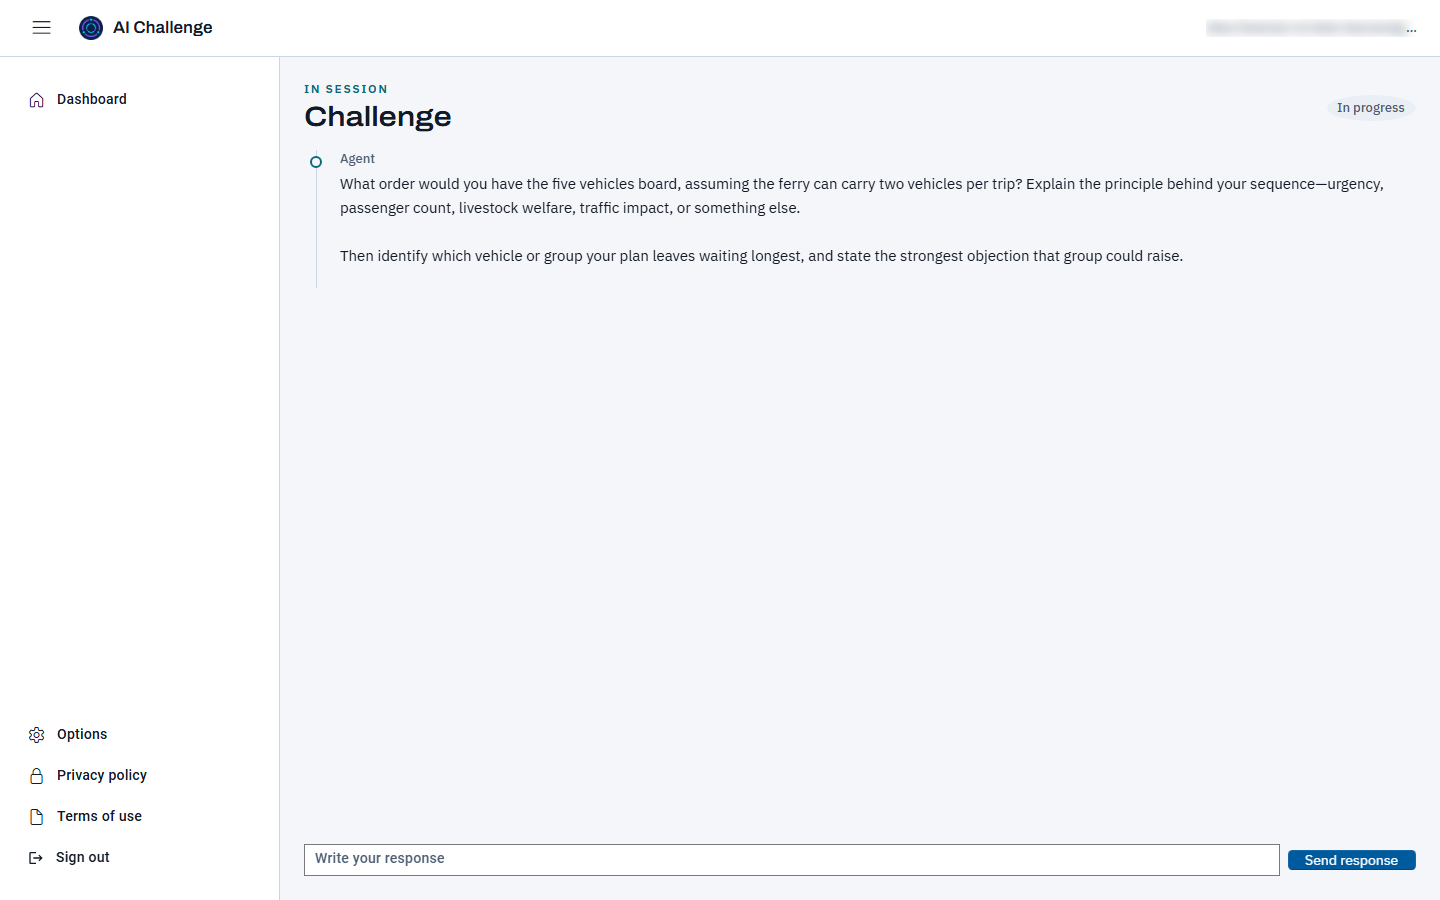
The panel at the top of the conversation explains the challenge type and, under it, The scenario the challenge is about (Hide collapses it); the agent opens by stating the scenario, your goal and the rules of the challenge type in plain words, then asks its first question. Each turn names its speaker. The How this challenge works panel names the type and links to its full requirements and scoring reference.
A fresh run of the library challenge. The agent's opening message sets the scene and asks for a proposed crossing order; the response box waits underneath.
Write your response and send it
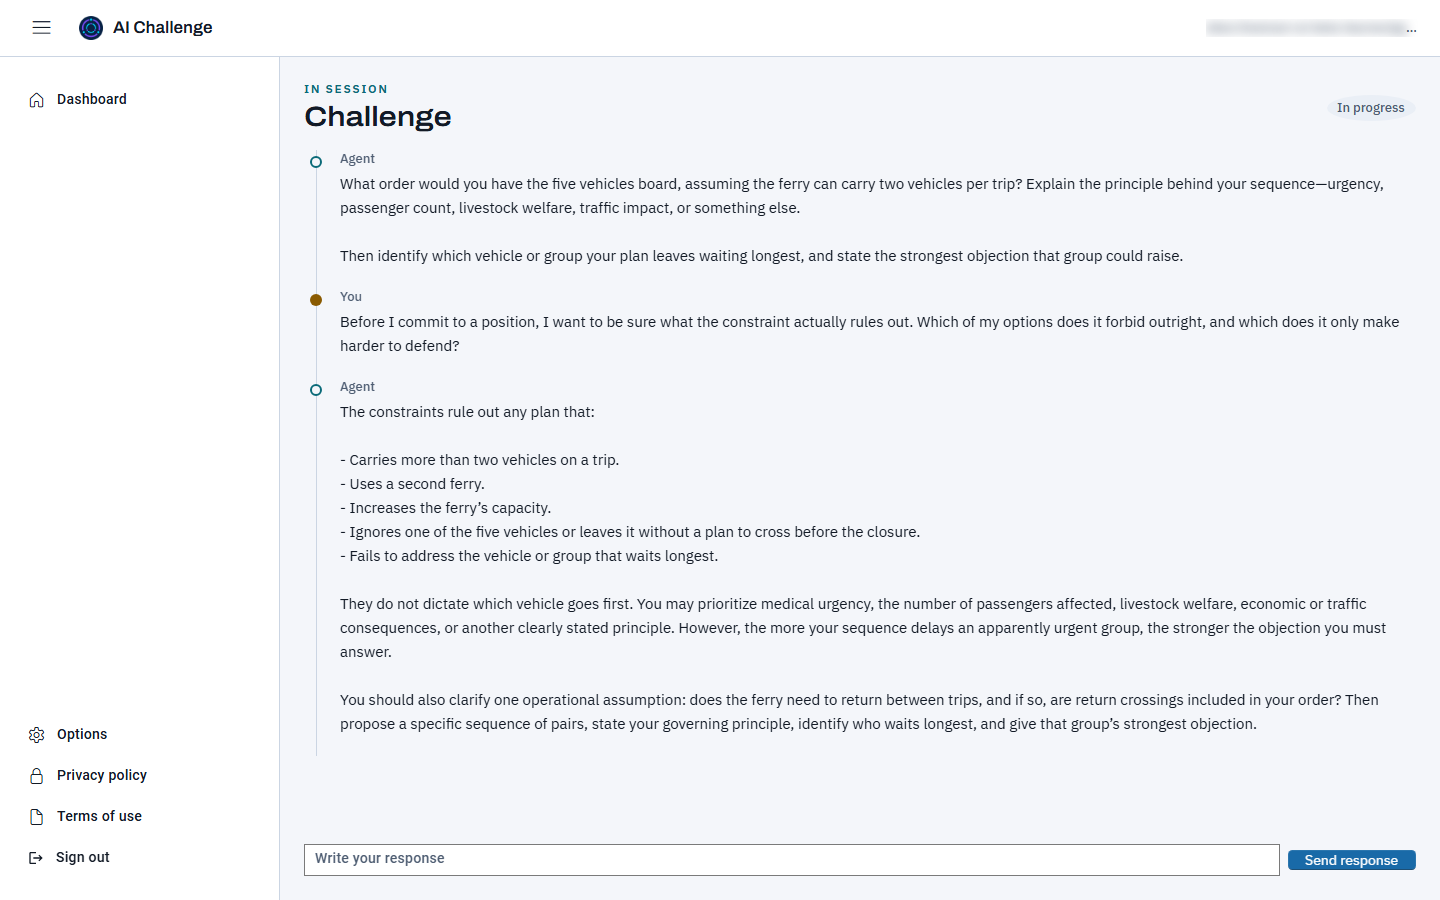
Enter your response and choose Send response. Your turn appears immediately as Sending..., the conversation keeps its newest turn in view, and the box stays locked until the agent reply arrives. If the platform is busy, a note under the conversation reads "Busy right now - sending again in N s..." and your message is sent again by itself. If it is still busy after three tries, the note reads "The AI is busy right now. Please try again in a moment." and your message goes back in the box unanswered; send it again shortly. If an administrator has paused AI sessions during a provider outage, that is a different message: it says so, nothing is sent or tried again, and your message goes back in the response box; try again in a couple of minutes. AI work can also pause for the rest of the day when the platform reaches its daily AI spend limit; the message then says so, and it clears at midnight UTC. Nothing you wrote is lost. Starting a challenge shows the same message. If a reply is slow, the page reloads your session; your message is not sent twice. If the reloaded session already has your message, it stays; if not, it goes back in the box. "Still answering your last message..." means an earlier send is still being answered. To send a message that went back in the box, send it unchanged: the platform recognises it and never answers it twice, while an edited message counts as a new one. If the agent cannot reply at all, the run pauses with "This session is paused after a problem on our side"; your message is kept, and after Resume you send a new message to carry on.
One turn exchanged. Your message is labelled You, the reply Agent, and the conversation grows upward from the box.
Keep going, or leave and come back
Your session saves as you work. Choose Pause beside Send response, or simply close the tab, and choose Resume on the card later; a paused run reads Paused. Choose Start over to abandon a run and begin again. While AI sessions are paused, Start over shows the pause message and keeps the run you have open. A run also finishes when you reach the platform's turn limit: the agent gives a closing reply and the run is scored on the work so far. The run screen does not count your turns down, and a challenge with a time limit shows the minutes allowed and used under its title. You get two attempts at each challenge and can start up to five new challenges a day (the day resets at midnight UTC); the card shows the attempts you have left. Start over is not offered when a new run would be refused, and the card says why, so you never lose the run you have open.
Ask for a hint when you are stuck
Choose I'm stuck beside Pause. A note says the hint is on its way, and the agent's next reply carries it; each hint counts toward the run's hint total. The button refuses with a message when no more hints are available, when a hint is already waiting for your next message, or when a timed challenge is nearly over. In Challenge mode the button is not shown.
Use the steps panel, or switch to Guided
The run shows its mode under the title. A Guided run lists the steps in a Your steps panel above the conversation, each marked Done or Not yet. If a Standard or Challenge run gets too hard, choose Switch to Guided beside the mode and confirm with Yes, switch to Guided; the steps panel and the hint button appear. You cannot switch back to a harder mode for that run.
Play by the type's rules
Types appear on library cards, assignment cards, in the run screen header, and in the How this challenge works panel at the top of every session. Each type runs the conversation by its own rules and is graded differently; see the challenge types reference for what each one asks of you.
Make your reasoning visible
Explain why evidence matters, name uncertainty, and revise your view when the conversation gives you a reason.
Your report appears a few seconds after the session ends. Until then the result panel reads "Your report is being prepared..."; if it takes longer than about 2 minutes, the panel says so and the report appears in your library list when it is ready. You can leave the page. A full report opened before the score is ready says the same and fills in by itself once it is. In the rare case that the report cannot be prepared, the panel says so; your conversation is still saved.
Find the finished run in the library list
There is no separate history page. Completed runs are hidden until you choose Include completed; runs that read Abandoned or Timed out remain listed.
Choose Review to reopen the report
Review opens the full report: score, summary, dimension scores with a rationale for each, what to practice next when named, and the transcript. Above them it shows your mastery band, for example "Developing - you completed 3 of 6 steps; 2 with a hint.", and lists each step as Completed, Completed with hint level N, Started or Not yet: every step earns credit on its own, full without a hint, a little less for each hint level, and some for a real start. The bands run Beginning, Developing, Proficient, Mastered. An abandoned run in which you sent at least one response still gets a report, graded on the work done before it ended, and so does a timed-out run. A run left before you answered at all has no report.
Choose Run again to have another go
Run again starts a fresh conversation in the support mode picked above the library. The row shows only your latest run. The report shows the mode the run ended in, and after a Mastered result it suggests trying the next mode up next time: Standard after Guided, Challenge after Standard.
Read the summary as a next step
Use the score, summary, and transcript to decide what to practice next.
Track your progress
The Your progress card on the dashboard shows only your own progress, never a ranking: your level with its skill name (from Level 1: Curious to Level 8: Sage; levels never go down), your XP and how much more the next level needs, mastery per challenge type, your badges, and a suggested next challenge type and difficulty. With a selected framework, suggestions first look for a template directly aligned to one of its five weakest observed items. Without an eligible direct template, a suggestion can use a demanded measured skill below the Proficient level defined by that skill framework's catalog levels. Every graded solo run that finishes counts, library runs included; an abandoned run does not. XP comes from the credit on each required step, by default 10 XP for a full-credit step, multiplied for a harder challenge and a harder support mode. Mastery for a type is your average step credit over your latest runs of it (the last 5 by default). Under Evidence by skill and standard the card lists, under each framework's name and followed by its copyright or licence notice when it has one, each thinking skill your graded runs measured and each standard your challenges are aligned to, for example "questioning: 72%, Proficient (3 observations). Asking questions that clarify terms, probe assumptions...": the skill or standard's code, your average over your latest observations of it (the last 5 by default), its level when the framework has levels (never on an assessment framework, where it would read as a predicted result), how many observations there are, and the start of its description. A skill is scored from the evaluation dimensions that measure it; a standard from your step credit on a challenge aligned to it. It is evidence toward the skill or standard from your own work, not a test result. The report of a counted run says how much XP it earned and lists any new badge; until the XP is added it says the XP is still being added and keeps checking for about 10 minutes, then reads "Your XP for this run will be added shortly.". A run that does not count (an abandoned run, or one that could not be evaluated) shows no XP line. The student guide lists the default multipliers and the four badges.
The Your progress card. Level, XP, mastery and badges fill in as graded runs finish.
Workflow 6
Settings and signing out
Open the navigation panel
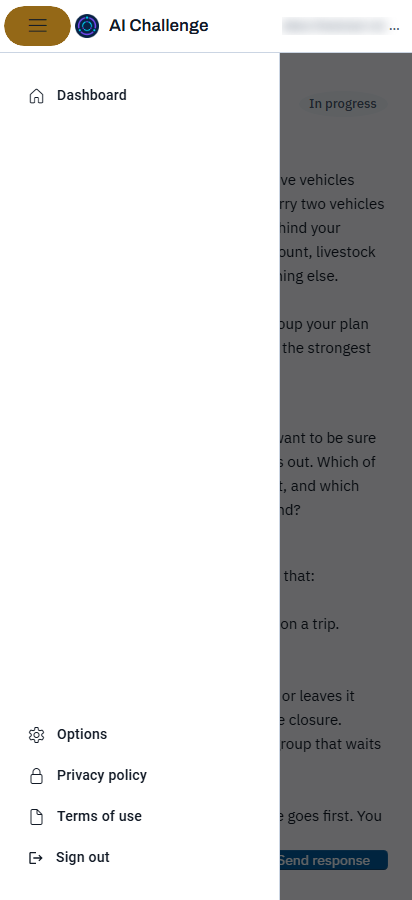
On a wide screen the panel stays open on the left; on a narrow screen choose the menu button. The panel contains Dashboard, Notifications, Feedback, Join a class, Options, About, and Sign out. The bell in the header also opens Notifications and shows how many are unread.
The navigation panel opened on a narrow screen.
Set the theme and Enter key in Options
Choose light, dark, or system theme, and choose whether Enter sends or starts a new line. Both settings are remembered.
Join a class only if a teacher invites you
Join a class takes the class code a teacher gives you. Joining turns your account into a student account in that class's school: the class's assignments appear on your dashboard, and the library section, which is for independent learners, is no longer shown. Only join when you mean to study with that class.
Delete your account
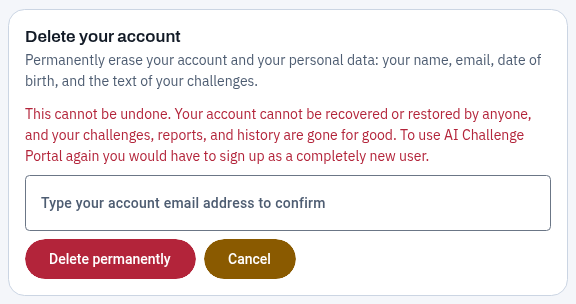
To erase your account and personal data, open Options and choose Delete my account in the Delete your account card. Read the warning, type your account email address exactly, and choose Delete permanently. Your sign-in is deleted; your name, email, date of birth, and the text of your challenges are erased; and you return to the sign-in page. This cannot be undone: nobody can restore the account, and using the portal again means signing up as a new user. The Privacy Policy lists what is erased and what remains in anonymous form.
The confirmation step. Nothing is erased until the email matches and you choose Delete permanently; Cancel closes it.
Sign out when you are finished
Choose Sign out once. This tab returns to the sign-in card with "You're signed out." The portal also signs you out after a period of inactivity (60 minutes by default, set by the platform or your institution). A warning appears two minutes beforehand with a countdown and Stay signed in. Typing counts as activity, and activity is shared across tabs. Opening another tab keeps the existing inactivity deadline. Signing out of the student portal signs out its other tabs. A new sign-in ends the previous student sign-in session. If the inactivity setting cannot be loaded, you can stay signed in for up to 12 hours until the next successful refresh. Unsent responses are lost on sign-out and are never saved in browser storage.
Product direction
What is not built yet
Planned
Signing yourself up
Self-registration is switched off in the beta. An administrator creates the account.
Planned
Subscriptions and billing
Plans, billing, and usage limits are not implemented.
Planned
Writing your own challenges
Writing, copying and editing your own challenges is not available yet, and neither is sharing them. Both are planned.
Planned
Support when a session is paused
Independent-learner support guidance for safeguard cases is not built.
Announcements banner
Scheduled announcements appear above the portal header, with Info, Warning or Critical severity and Critical announcements first. Platform administrators can reach everyone or selected roles, institutions and rosters. Institution administrators can reach only their own institutions and narrow by role; teachers can reach only students in rosters they own. You see only announcements whose audience you match, including every selected target kind. Independent learners cannot create banners.
The author schedules start and stop dates in their browser's local time. Banners refresh when you sign in or load the app and every five minutes while it is open. Close a banner to dismiss it while this app remains loaded; a fresh page load can show it again if its schedule is still active.
Loaded announcements appear and disappear at their scheduled times even when a refresh fails. When several announcements are visible, scroll within the banner area to read them; the header remains below the bounded area.
Notification updates
The bell checks for unread notifications about once a minute. Each browser starts at a random moment and varies the interval by up to 20%, so a whole class does not check at once; the unread count can therefore take up to a minute to appear after the portal loads. It does not check while the tab is hidden, and checks again when you return to the tab if a check is due. Brief connection failures keep the last known count, and while checks fail the portal waits longer between them (up to 10 minutes) and respects a wait the platform asks for. After three checks fail to reach the platform without a successful check between them, one message says notifications are temporarily unavailable; the portal keeps trying automatically. Opening the Notifications page marks everything it shows as read in a single request. By default, a notification is removed 90 days after you read it, or 180 days after it was sent if you never read it.
Request limits
Request allowances apply across the whole service. If you reach a limit, wait for the time shown before trying again. If AI requests are temporarily unavailable, wait and try again when the service recovers.
Cognificance thinking skills
The Cognificance layer and Profile are included with AI Challenge. Teachers and staff see annotated thinking demand (1-4) and demanded skills in the template editor and Gap view. Explore the domain and strand structure, grade-band progressions and observable indicators in the reference. The Profile is formative only, not a certified or predicted score. AI-literacy skills, persistence and evidence evaluation are defined for mapping but are not separately scored by current dimensions.