Set a thinking task, then read how it was thought through.
Use the management portal to define a challenge, publish it, assign it, and read each session. This guide covers those screens in the order you use them.
Opening from your LMS
When your institution has LTI launch enabled and its LMS registration permits instructor access, open the course activity to reach the launch-mode teacher page. It can offer a link to the assignment or roster in the admin portal when that destination is configured; the admin portal uses its own sign-in. The course must already be linked to a roster by an institution administrator. Learners open the activity in a new window by default and work without a separate portal sign-in. Overall or dimension grades return after evaluation; completion credit applies to fully or partially finished activities. See integrations for availability.
Course content through your LMS
When enabled on the platform and the institution's LMS is registered, with LTI launch and deep linking enabled, teachers can select their own published templates or course assignments from the LMS content picker. If account access cannot be resolved or the teacher lacks membership in the course institution, the picker asks the institution administrator to check the account. Publishing a template requires a course roster reachable by the linked teacher account, just as in the assignment editor. An institution administrator must first link the LMS account to the teacher's existing account through the admin API. If the picker has no content, ask your administrator to check that link.
Choose an overall score, a dimension from the selected challenge type, or completion credit. Unknown dimension names show the available names. Completion credit applies only to finished or partially finished activities, not timed-out runs. When the picker opens a new window, submit the selection there and return to your course within eight minutes; the original course frame has one extra minute to retry brief connection failures and complete the placement.
How to use this guide
Follow the workflows in order
This guide is divided into numbered workflows. Each workflow is a task made of numbered steps, and workflows appear in the order you first need them.
Workflow 1
Signing in
Open the management portal, not the student portal
Open the management address from your institution. It sends you directly to the sign in form.
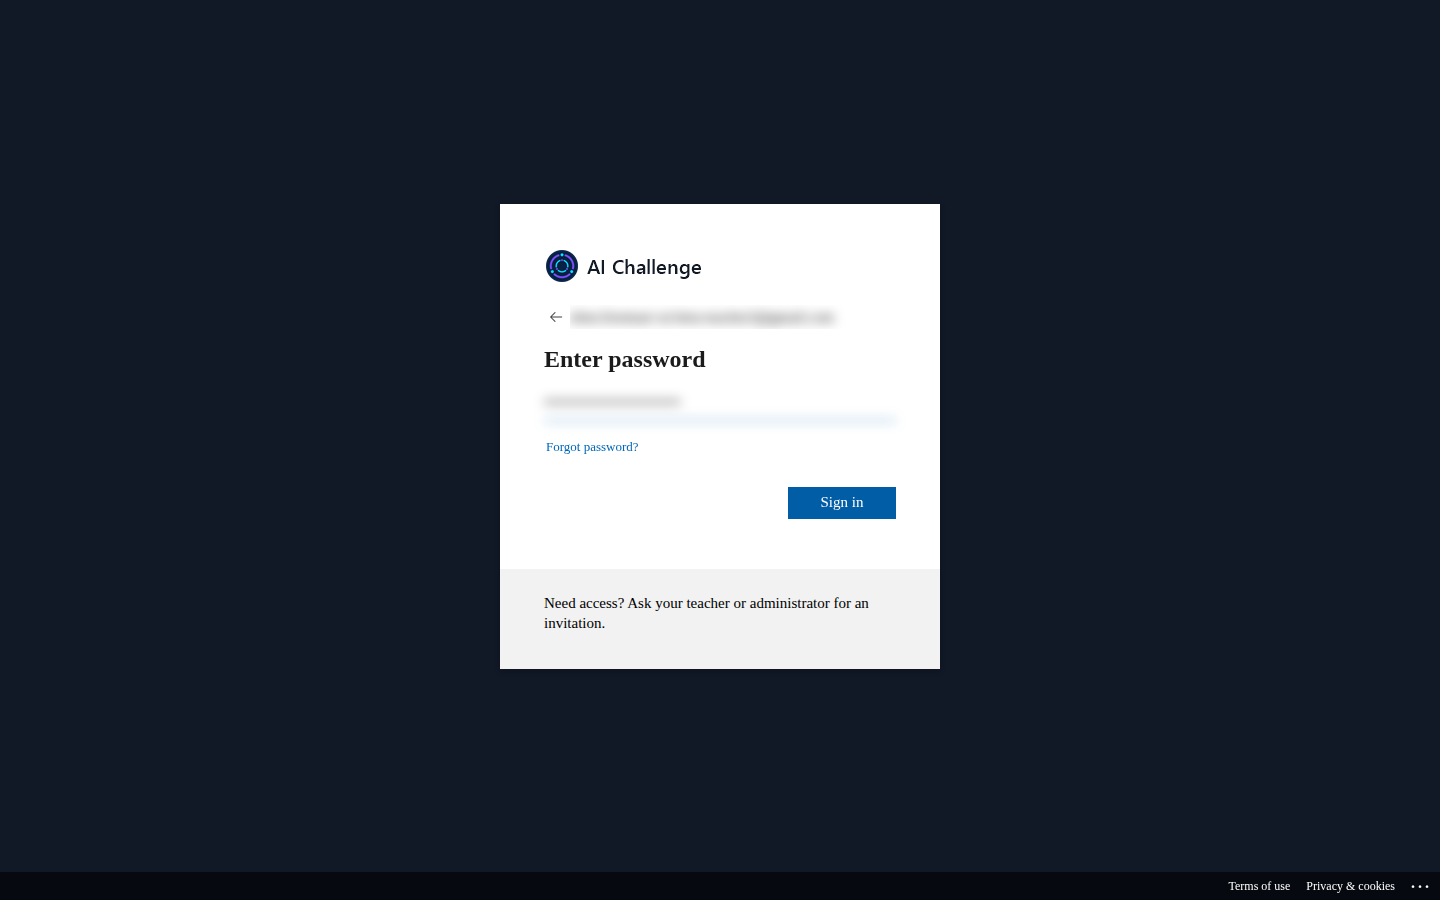
Enter your work email address and password
Enter both in the sign in form. The portal never sees or resets your password.
The password screen. The email address and the password box are deliberately blurred in this picture; on your screen they show normally.
Wait for the portal to come back
The tab returns to the portal by itself and lands on the dashboard. Nothing needs to be clicked in between.
The first time only: the privacy policy and terms
Read the privacy policy and terms of use, tick both boxes, and choose Agree. You are asked again when either document changes.
Workflow 2
Finding your way around
Read the dashboard tiles
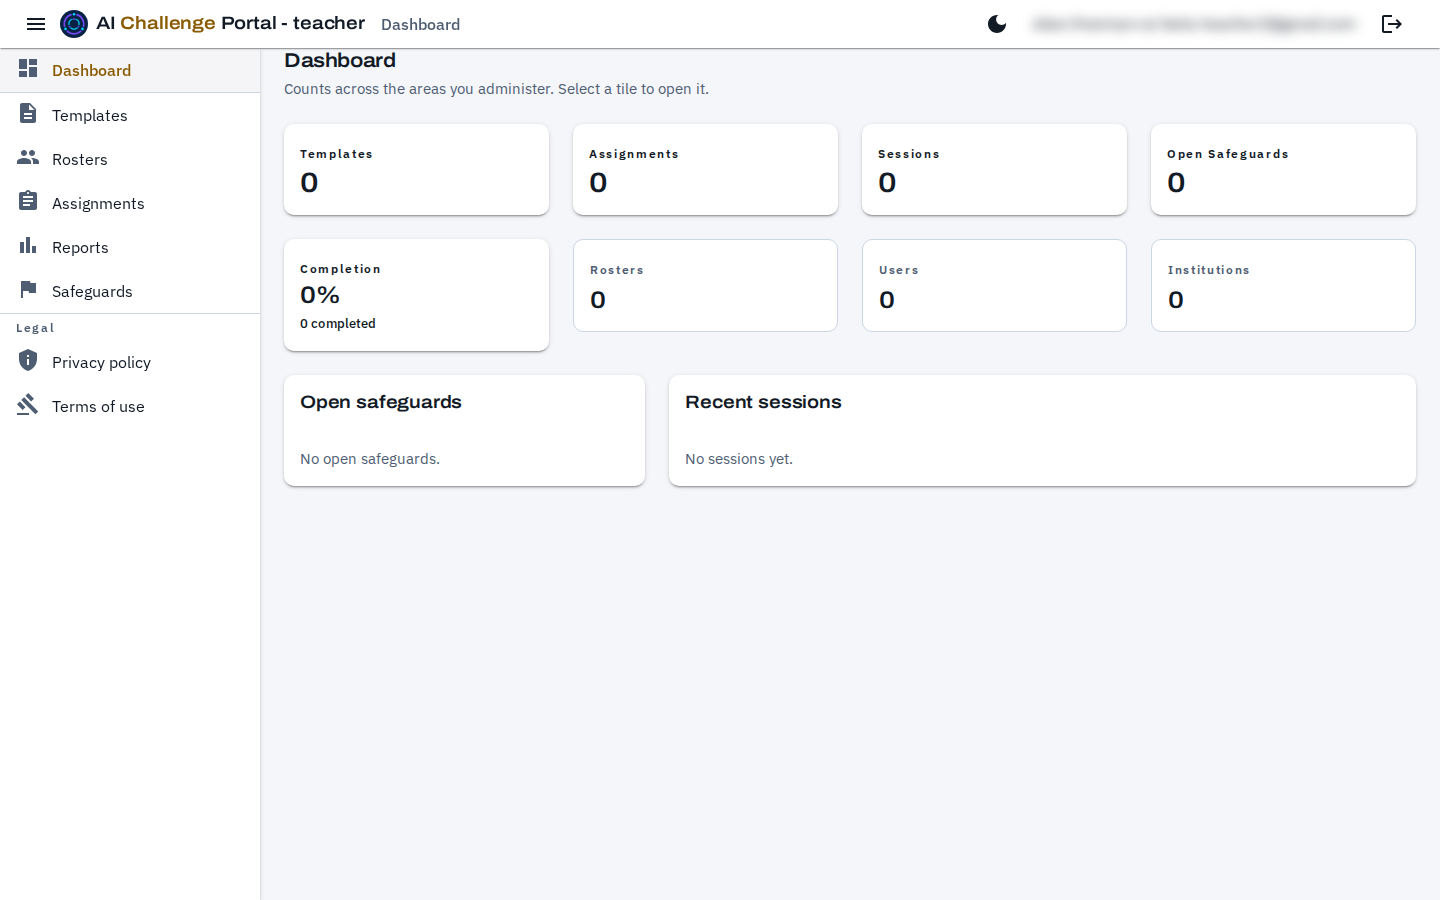
A teacher sees Templates, Assignments, Sessions, Open Safeguards, Completion, and Rosters. Users and Institutions appear only for institution and platform administrators. The linked tiles open their lists, and the panels below show open safeguards and recent sessions.
The dashboard as it appears after signing in. The navigation drawer is docked open on the left and the signed-in address sits at the top right, blurred here.
Use the drawer to move between areas
The drawer links to Dashboard, Templates, Rosters, Assignments, Reports, Safeguards, and About. About links to the privacy policy, terms of use, and third-party notices. User accounts and institution settings belong to institution administrators.
Expect the same shape on every screen
Lists provide search, a New button, and row actions. Search matches part of a title or name without regard to capitalization: carbon finds A Carbon Budget for the School Trip. Templates and assignments match titles; rosters match names. Reports match student names, assignment titles, and template titles; safeguards match student names and reasons. Other filters still apply. Select a record to open it; dialogs confirm actions such as archiving or removing.
Workflow 3
Defining a challenge: the template
Know what a template is
A template is a reusable reasoning exercise, and it has two layers. The fields on the template itself, Title, Type, Visibility, Locale, Subject, Age rating, Difficulty, Description, Labels, and Alignments, say what kind of challenge it is, who may use it, and how it is filed; none of them reach the agent. The challenge itself, the scenario, constraints, goal, and evaluation criteria, lives in a published version, covered in the next workflow, so it can be frozen and revised without the record of past sessions changing underneath it.
Open Templates
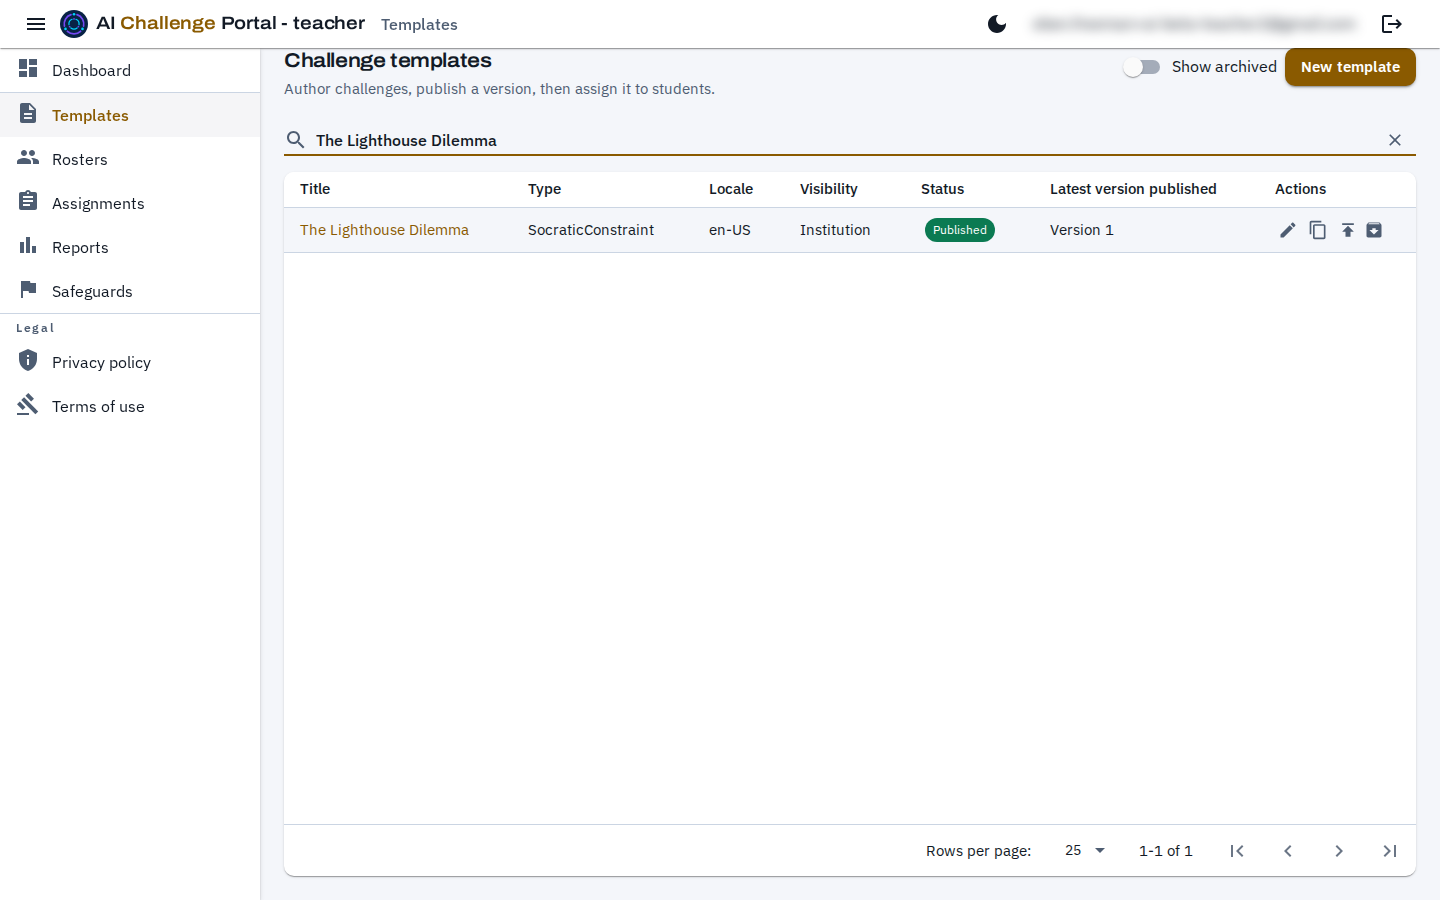
Search templates by title, and narrow the list with Show, Type, Subject, Label, Framework, Item code, and Grade above it. The Grade picker notes that its grades come from the items' grade bands. Grade lists the grades the available items cover, starting at grade 7 (learners are 13 or older), narrowed to the selected framework when one is chosen; it is hidden when the available items (or the selected framework) cover no grade from 7 up. A template matches a grade only through an item whose grade band includes it, so an item with no grade band (a thinking skill, for example) matches no grade. Standards are school-curriculum aligned, so templates for older or college learners usually carry no grade and appear when Grade is left empty. Show starts at My templates: yours, plus any your institution shares with its teachers. Platform library switches to the ready-made library covered in workflow 6, and All templates lists both. Use Show archived to find retired work.
The Templates list, narrowed by the search box. Each row shows its status and its latest published version, with the row actions at the end.
Choose New template and describe the challenge
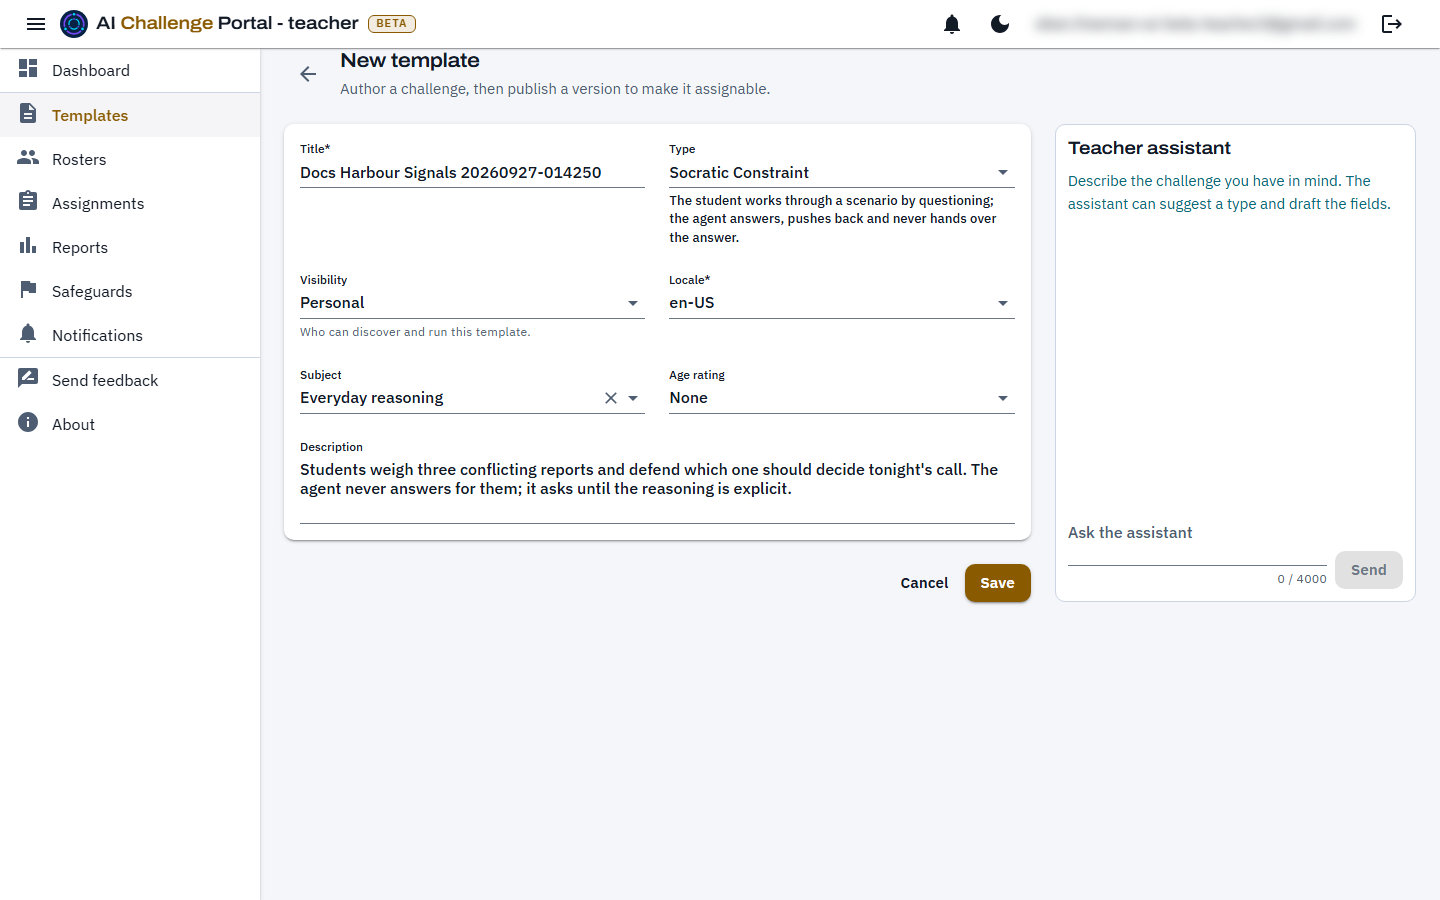
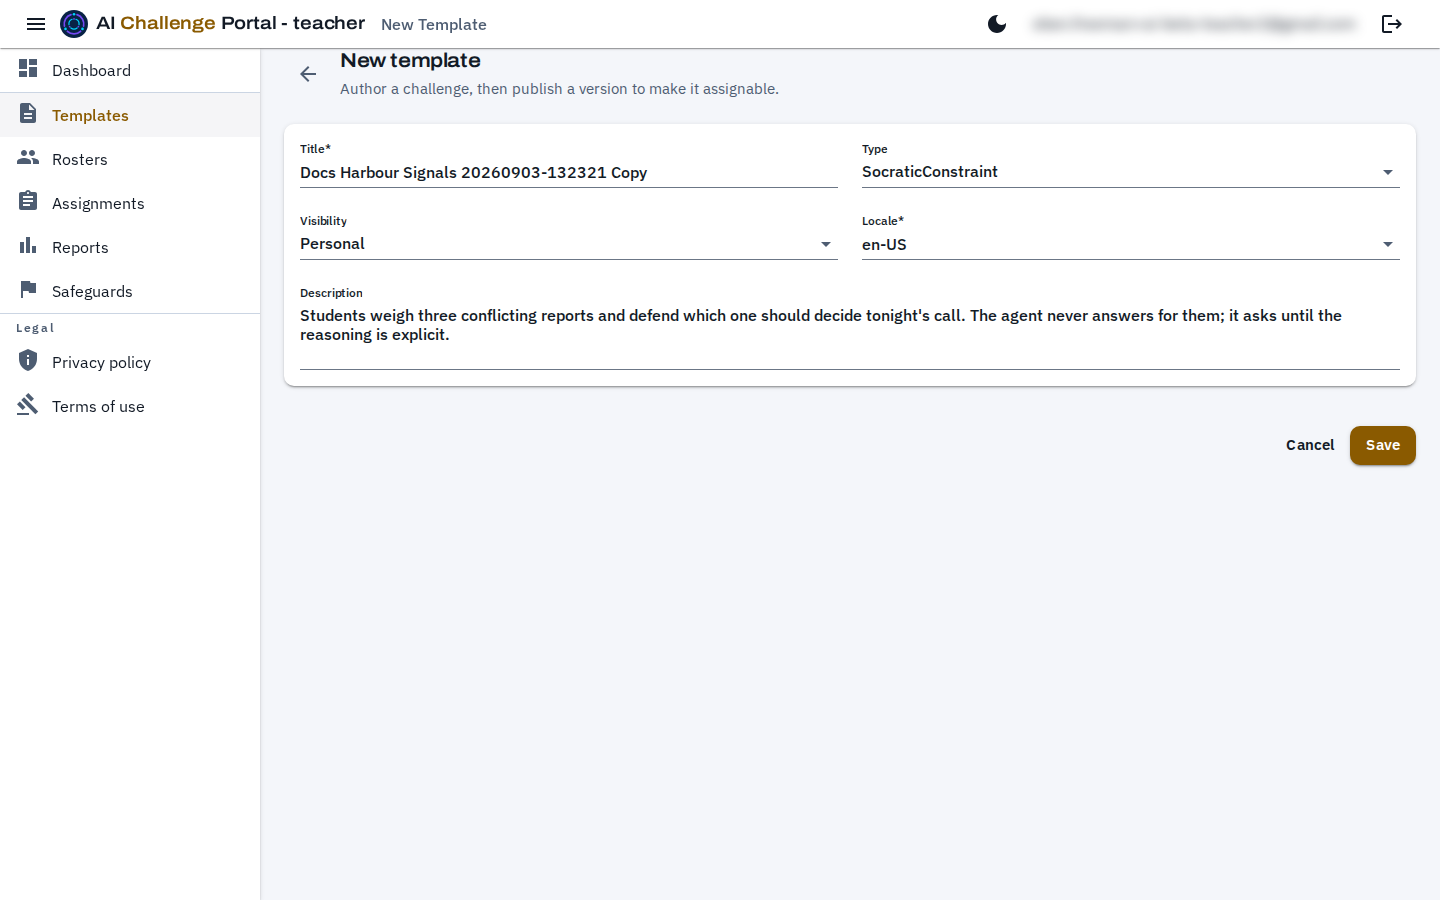
Enter a title, and a Description written for the student rather than for you: it is the short summary shown in lists and on the student's card, saying what the challenge is about. It is not read by the agent, and it is not the narrative the agent speaks in, that is the assignment's Theme, set per assignment and covered in workflow 8. Type sets the rules the agent runs the conversation by; see the challenge types reference for what each of the five does and how it is graded. Socratic Constraint is the default. Locale records the language the challenge is written in.
Know who else can see it
Visibility is filled in as Personal, and a template you create is saved as Personal: only you see it, assign it, and change it. Templates your institution administrator shares at Institution visibility appear to every teacher in that institution, who can assign and clone them but not edit them. Platform library templates (Visibility System) are read-only, but every teacher can browse them, assign them directly, or clone one into a template of their own.
File it by subject and age
Subject files the template under a topic (Everyday reasoning, Philosophy and ethics, AI and technology, Science, and so on) for the Subject filter on the Templates list. Both fields are optional. Age rating (13+, 16+ or 18+) marks content that is not for every age: a rated template blocks a student under that age, or one with no recorded date of birth, from starting it. Leave it empty for a challenge any student may start. Difficulty is also optional: Unrated, or 1 Introductory, 2 Intermediate or 3 Advanced. Students see it as a pill on library cards and can filter the library by it; it does not change how the challenge runs or is graded.
The new template form, filled in and ready to save. The Teacher assistant panel beside it is covered in workflow 5. Saving returns you to the list with the new template on it, as a draft.
Add labels
Labels are your own words for finding a template again, such as "climate" or "persuasion". Type one under Add a label and choose Add, or pick a suggestion as you type: the list offers labels already in use on templates you can see, so you can reuse a spelling instead of inventing a second one. A template holds up to 10 labels, each up to 40 characters, and a label that differs only in capitals is the same label. Remove one with the close mark on its chip. Labels are shared across the whole platform and are visible to anyone who can see the template, so keep them to the topic; a platform administrator can rename, merge or delete a label that does not belong.
Pick the standards and skills it supports
Alignments tie the template to items from a fixed catalog: learning standards such as NGSS, Common Core, C3, the Australian Curriculum, Texas TEKS or Florida B.E.S.T., and the Cognificance thinking skills the challenge types measure. Choose a Kind or a Framework, type part of a code or of the item's wording in Find an item by code or text, or pick a Grade. Kind offers only the kinds an available framework has (Standards and Competency today), and choosing one narrows Framework to frameworks of that kind. Grade lists the grades the available items cover, starting at grade 7 (learners are 13 or older), narrowed to the selected framework when one is chosen; it is hidden when the available items (or the selected framework) cover no grade from 7 up. Then choose Search and Add on the row you want. Only items in the catalog can be added, and the catalog's descriptions are short summaries in our own words; under the alignments, each code links to its official source page. A template holds up to 10 alignments. An item fits when the challenge really exercises that thinking, not merely when it shares a topic; a few well-chosen items are better than ten loose ones.
Read the framework notices
Some frameworks require a copyright, trademark or attribution line wherever their standards appear. The editor shows each notice under the standards it applies to, and the same notices are listed on the third-party notices page. ISTE Standards and the CASEL framework are not available yet, pending permission from their publishers, so they do not appear in the picker.
Save it as a draft
Save creates the template, with its labels and alignments. It cannot be assigned until it has a published version. Labels and alignments belong to the template, not to a version: changing them later takes effect at once and does not create a new version.
Workflow 4
Publishing a version
Select Publish on the template row
The version form opens. Publishing creates a version that cannot be edited later, so the form opens only from this action.
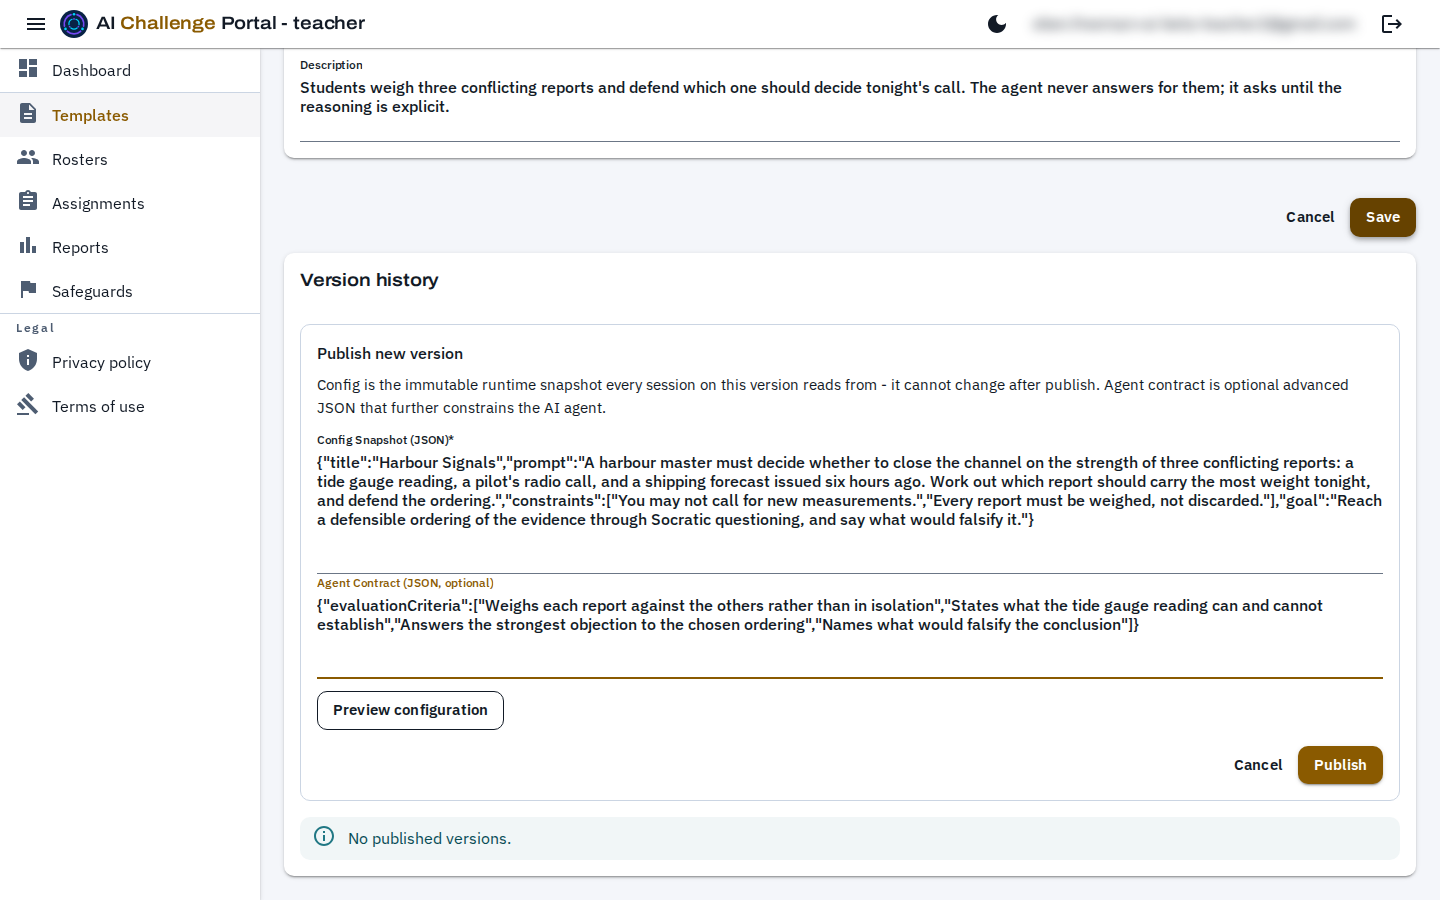
Write the challenge
These fields are what the agent and the judge actually read. The Scenario is what the student is given, and what the agent works from turn by turn. Constraints, one per line, are rules the agent holds the student to, and the judge reads them too. The Goal is where the agent steers the conversation, and the judge reads it as well. The Evaluation criteria, one per line, are what the judge grades the student's messages against. Time limit (minutes) is optional: leave it blank and the session runs untimed, or set 1 to 240 minutes and the session closes at the limit and is graded on the work done, showing as Timed out. Only time between turns counts towards it, capped at fifteen minutes per gap. Challenge title defaults to the template title; goal and criteria default to values for the chosen Type, listed in the challenge types reference.
The publish form on a saved template, filled in. These fields are the challenge; everything above them is only how the template is filed.
Break the problem into steps, if it has parts
Steps are optional. Add one with Add step for each part of the problem the student works through, in order: for example name the quantities and their units, write the relationship, compute, check against the limit, and interpret. Move a step with the up and down arrows, remove it with the bin, and clear Required for a step the challenge is complete without. Up to ten steps. Say what the student does, never the result. When a version has steps, the judge tracks and credits each one on its own instead of the type's own milestones, and the report shows which steps the student completed and how much help each took.
Check the readiness line before publishing
Under the fields, the portal checks the content as you type. Ready to publish means nothing is missing. A red chip names something that would stop the publish, such as an empty scenario, and Publish stays disabled until it is fixed. An amber chip flags content that is only thin, such as a very short scenario, no constraints, or no goal (the type's default is then used); it never stops you publishing.
Publish, and understand what that fixes
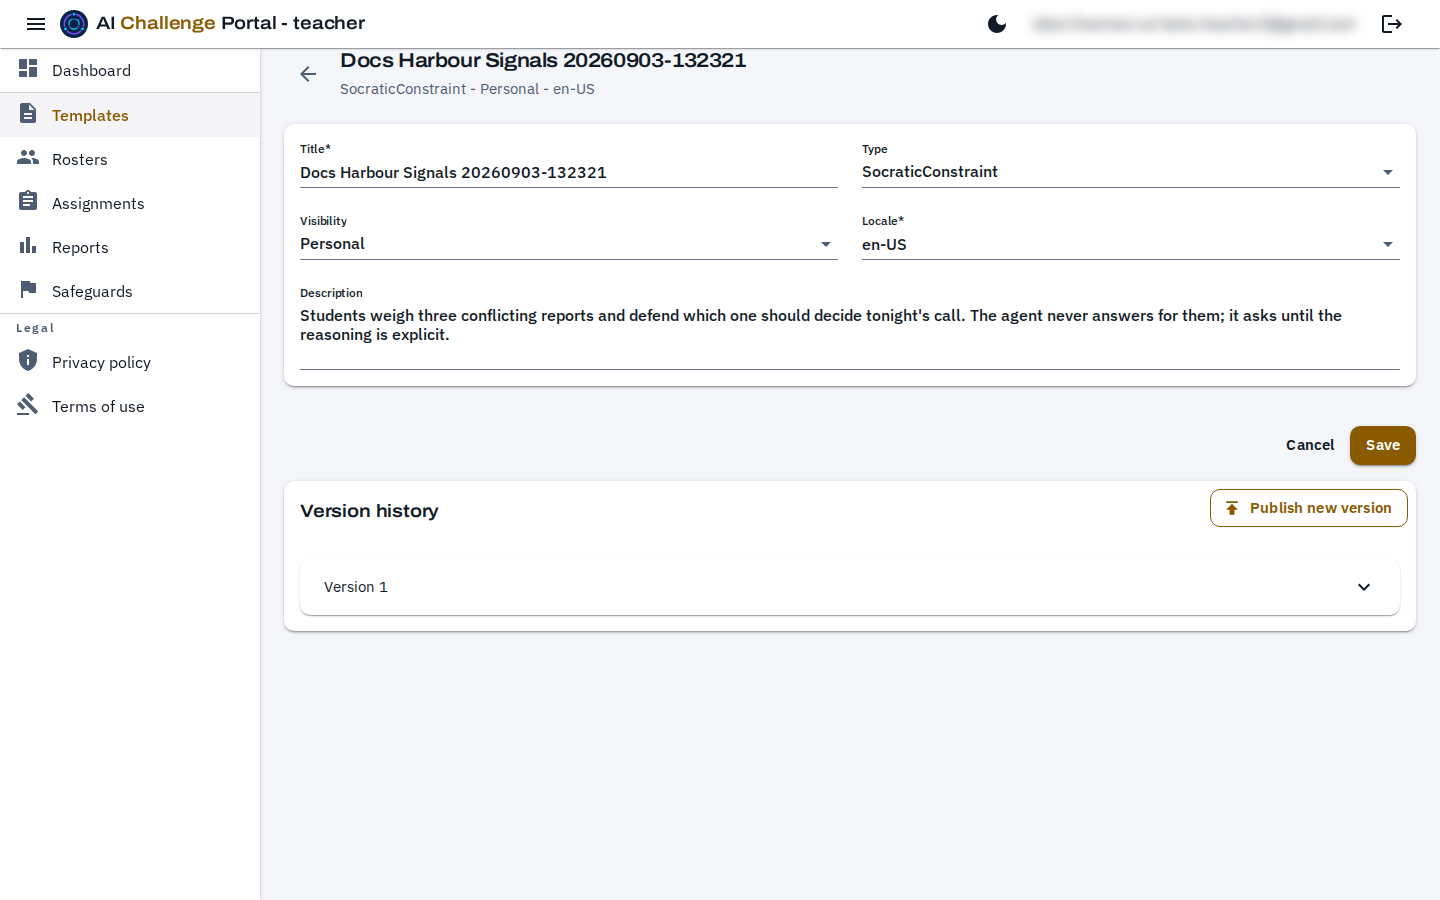
Publishing adds an assignable, immutable version. Later versions leave earlier versions and their sessions unchanged.
After publishing. The version history keeps every version, and each panel opens to show the exact configuration that version froze.
Publish more versions as the challenge develops
Each new version starts from the previous fields. Assignments keep the version they were created with.
Workflow 5
Drafting with the teacher assistant
The assistant can take up to two minutes to reply during beta; a notice beside the message box says so, and your draft is kept if a reply times out. If the AI service's content filter declines a request, the notice asks you to rephrase it, and that request does not use up a message of your daily limit. A reply that fails because the AI service is unavailable or slow, a reply cut off for length, and a review of a saved version that could not complete still count.
Find the assistant beside the form
The Teacher assistant panel sits to the right of the template form, on a new template and on any template you can edit. It does not appear on a template you can only read, such as a platform library template.
Describe the challenge you have in mind
Type the topic, the class, and what students should reason about, then choose Send, or press Enter (Shift+Enter starts a new line). The assistant can suggest a challenge type and say why, compare types, and ask you one question at a time. Ask it to draft the challenge when you are ready. If an administrator has paused AI features during a provider outage, a message says AI sessions are paused for a short while; your message stays in the box, so send it again in a couple of minutes. AI features can also pause for the rest of the day when the platform reaches its daily AI spend limit; the message then says so, and it clears at midnight UTC, or sooner if a platform administrator raises the limit. Nothing you wrote is lost. If the assistant takes too long or cannot answer, a notice above the message box says nothing was changed. If its reply was too long to finish, the notice says so and asks for a shorter or narrower change, because sending the same message again would be cut off the same way. Your message returns to the box so you can send it again.
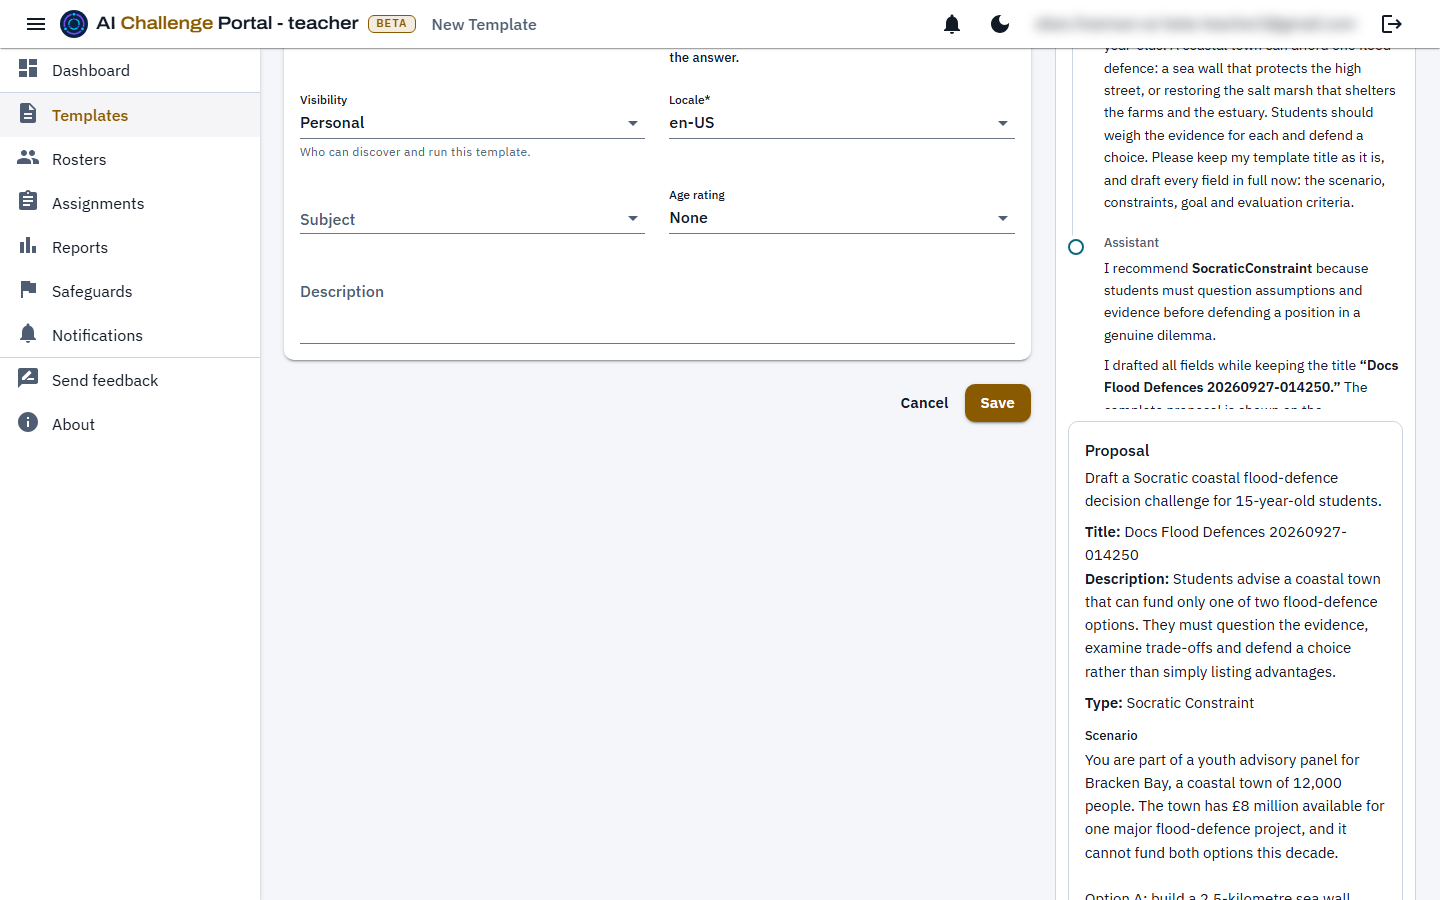
Review the proposal card
A draft arrives as a Proposal card under the conversation: a one-line summary, the title, description, type and difficulty it would set, and the scenario, constraints, goal, time limit, evaluation criteria, and steps of the version it would publish. Ask the assistant to break the problem into steps and it proposes them; a proposal that does not mention steps keeps the ones you have. The same readiness chips as the publish form flag anything that would block publishing or is thin. When you ask, the assistant also looks up standards in the catalog, starting from the thinking skills the challenge type exercises, and proposes Labels and Alignments on the card, each item with its code, short description and framework notice. A line reading "(unchanged)" means the proposal leaves that field alone; "(none: clears the labels)" means confirming would remove them.
A proposal from the assistant, waiting for a decision. Nothing on the card has been saved.
Confirm it, or discard it
Nothing is saved until you choose Confirm and save. On a new template that creates the template and publishes the proposed content as Version 1, the same as Save followed by Publish. On an existing template it updates the title, description, labels and alignments if they changed and publishes the content as a new version. The labels and alignments on the card are the ones saved, whatever the form shows: to change them, ask the assistant for a revised proposal, or discard it and edit them in the form. Discard drops the card and changes nothing. A template's type cannot change once it exists, so for a different type start a new template.
Read the review of what was saved
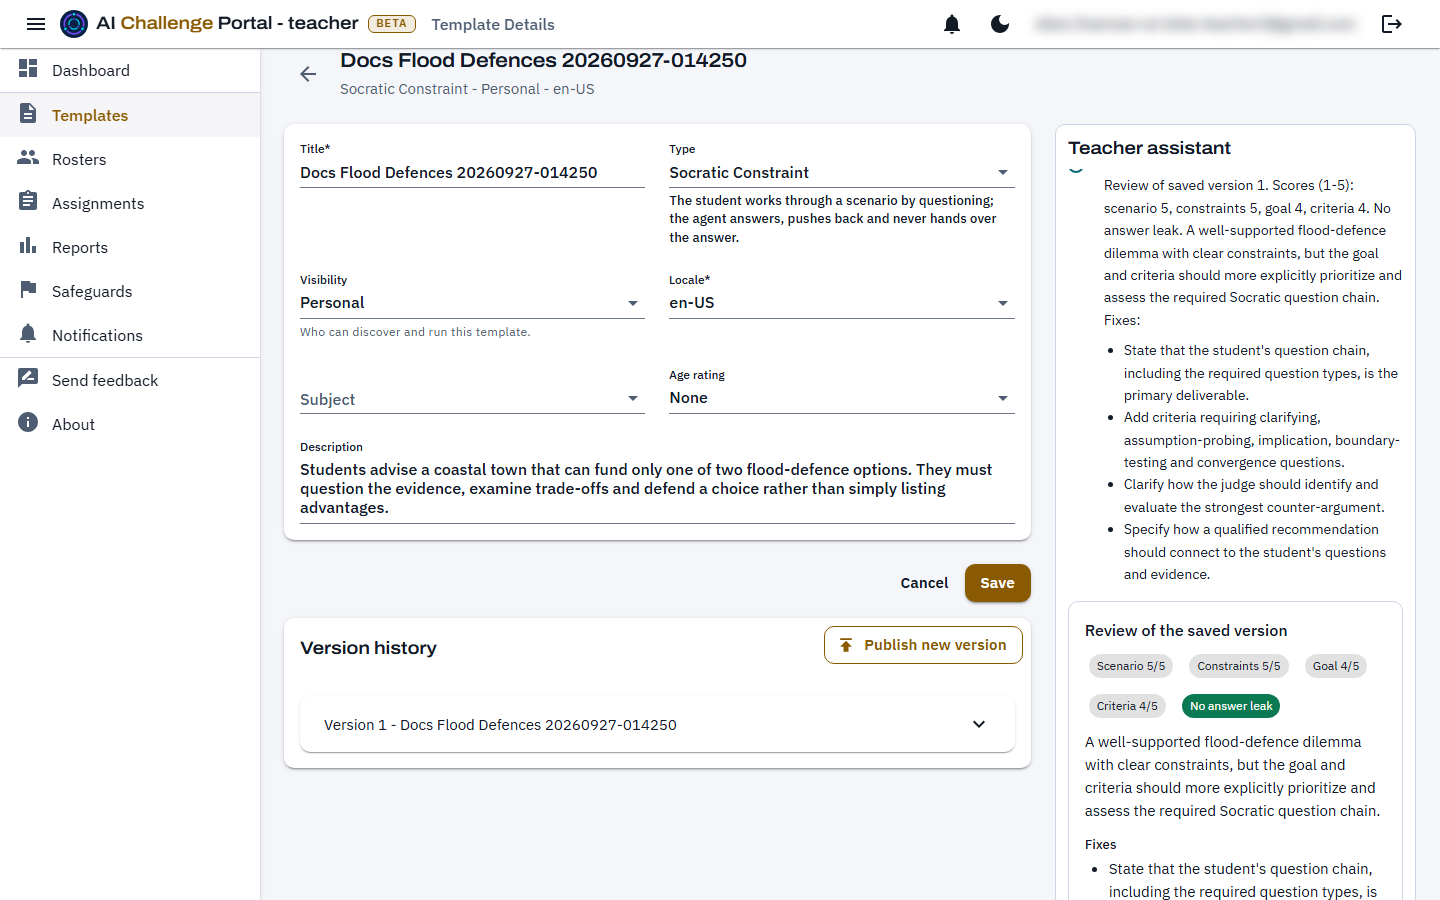
After a confirmed save the assistant reviews the saved version: a score out of five each for the scenario, constraints, goal, and criteria, whether any field gives the answer away, what is missing, and suggested fixes. Act on it by asking for a revised proposal, or by publishing a new version yourself. If the AI review cannot complete, the version is still saved and the automatic checks are shown.
After Confirm and save. The template now exists with Version 1 published, and the assistant has reviewed what was stored.
Know what it will not do
The assistant never saves, publishes, or changes anything by itself, including labels and alignments; only your click on Confirm and save does. It can propose only items that exist in the catalog. It will not write a worked answer, a solution, or the conclusion students should reach into any field: the scenario sets out the situation, and the student does the thinking. It sees only this template and your unsaved form, and the conversation is not kept once you leave the page.
Know its limits
The assistant has a daily limit: by default 100 messages per person per day (the automatic review of a saved version counts as one), counted from midnight UTC. When you reach it, a notice above the message box reads "Daily assistant limit reached. It resets at midnight UTC." and your message is not sent or counted; the count starts again at midnight UTC. A message that was accepted but then failed (for example when the AI provider has a problem) still counts toward the day. Sending many messages within a minute also pauses the assistant briefly: wait a moment and send again.
Workflow 6
The platform library and cloning
Show the platform library
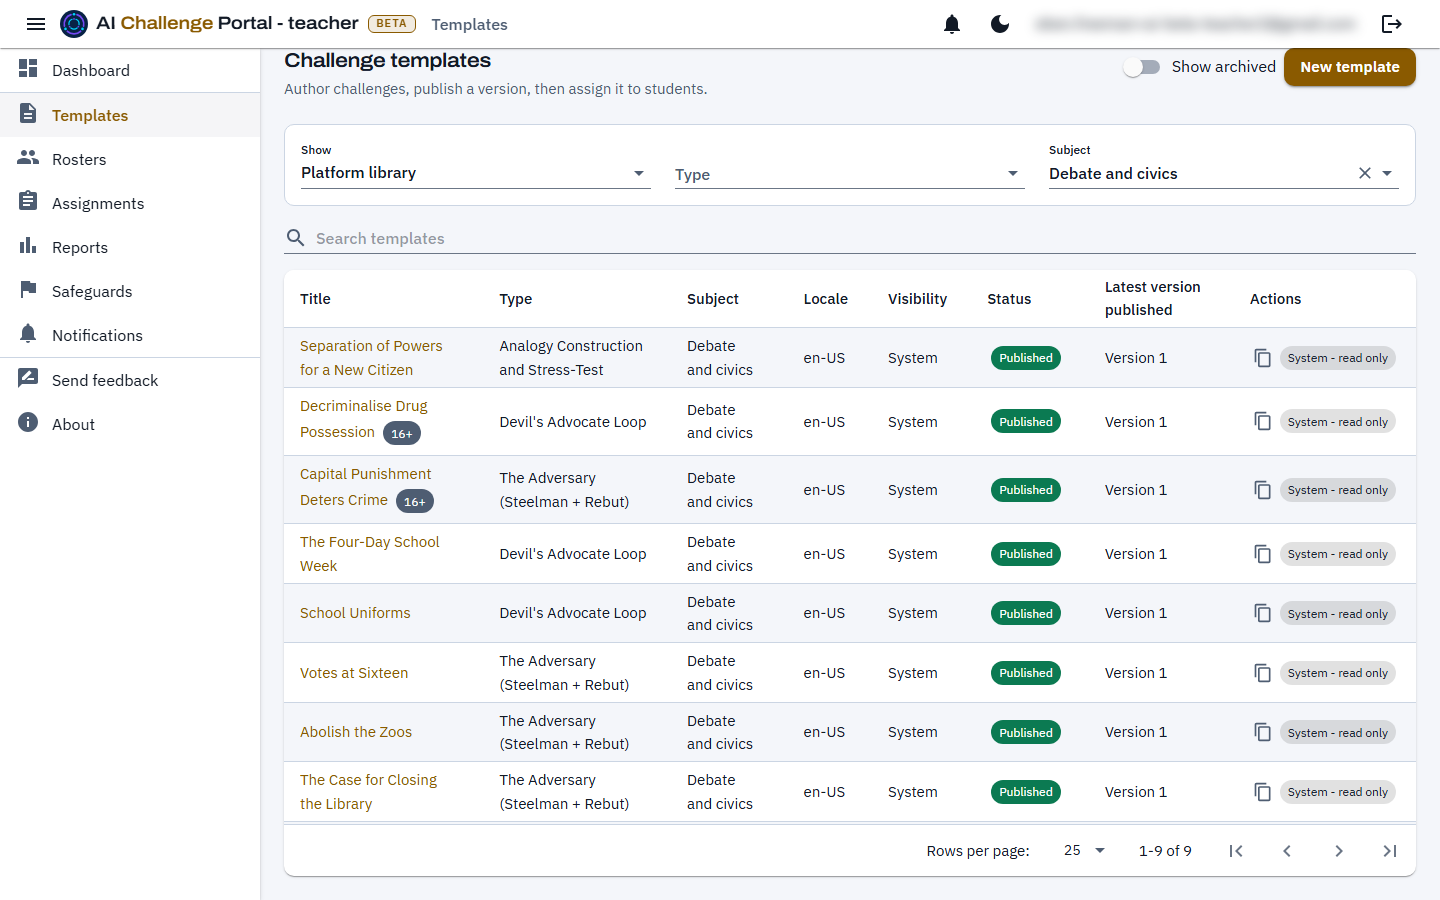
On Templates, set Show to Platform library. The library is a set of ready-made, published challenges, several of each type, maintained by the platform. Each row is marked System - read only.
The platform library, narrowed to one subject. The age chip sits beside the title of every rated template.
Narrow it by type and subject
Type, Subject, Label, Framework, Item code and Grade filter the list, and the search box matches titles. Grade lists the grades the available items cover, starting at grade 7 (learners are 13 or older), narrowed to the selected framework when one is chosen; it is hidden when the available items (or the selected framework) cover no grade from 7 up. The Label filter takes more than one label and shows templates that carry any of them; framework, code and grade narrow to templates with an alignment that matches all you set, and an item with no grade band matches no grade. Each row shows its type, subject, labels, alignments (up to three codes, then a count; hover a code for its framework, label and grades, or open the template to see them all; the frameworks' notices sit above the list), locale, and latest published version.
Check the age rating
A 13+, 16+ or 18+ chip marks a template for older students. A student under that age, or one with no date of birth on record, cannot start it. The assignment form warns you when you add a rated template to a challenge chain, but does not stop you saving, because the age check happens when each student starts.
Open a library template to read it
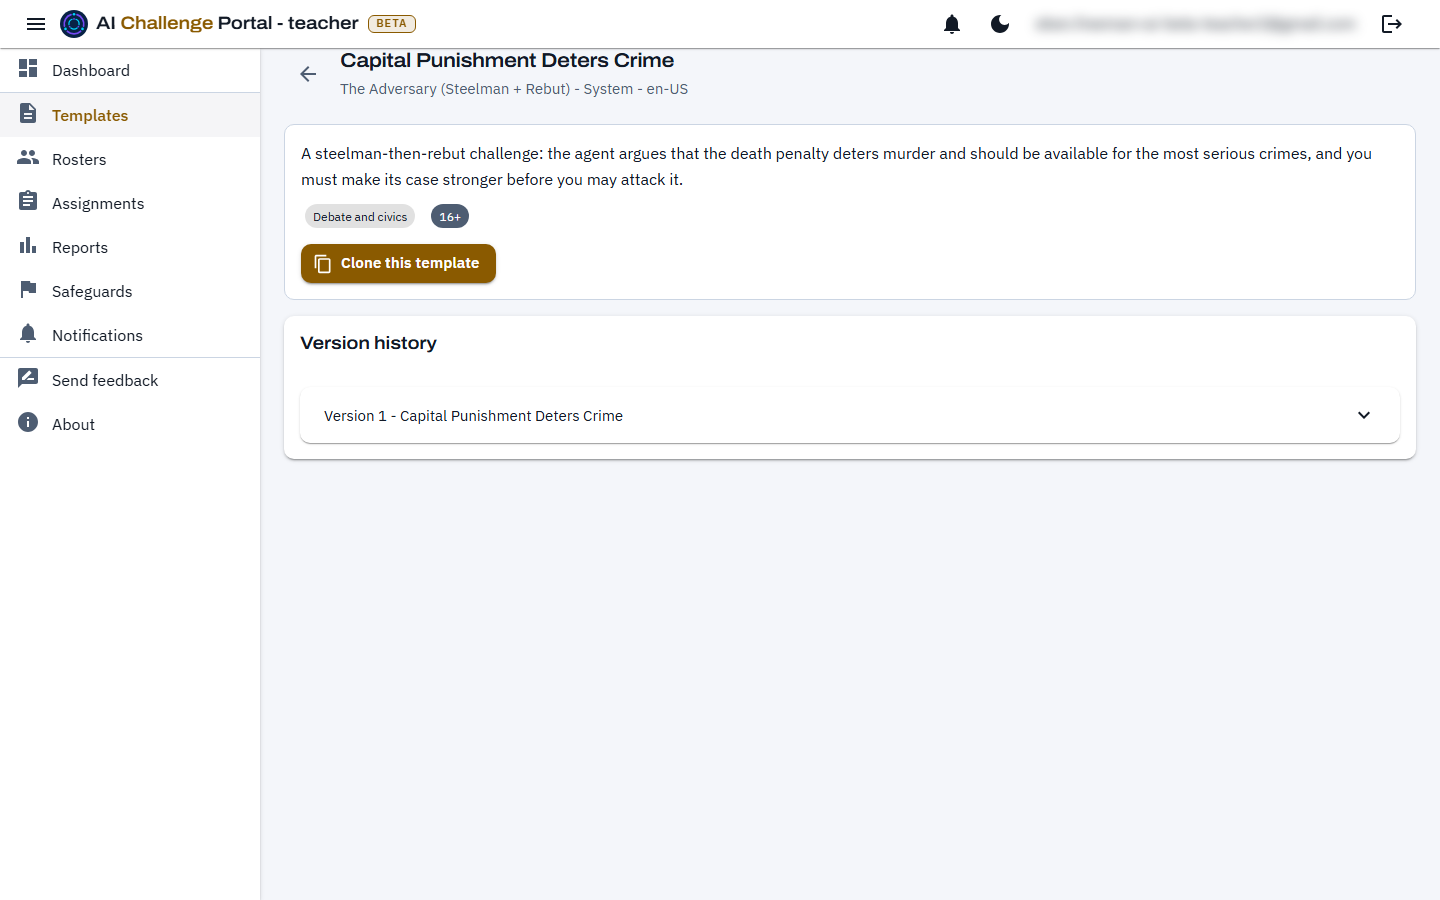
Select its title. A library template opens read-only: its description, its subject, age rating, difficulty, labels and alignments, and its version history with the full scenario, constraints, goal, and criteria. The one action is Clone this template.
A library template, read-only. Clone this template copies it into your own templates.
Assign a library template directly, or clone it first
You do not have to clone a platform library template to use it: it can be assigned as it is. Clone it when you want to edit it into your own version.
Use the clone action
Clone is available on any published, non-archived template you can read: on its row in the list, or with Clone this template on a library template's page. It copies the title (with " (copy)" appended), description, type, locale, subject, age rating, labels, alignments (except any retired since, or of a framework not currently available), and the source's latest published content, and lands you on the new template's own page. The copy is Personal and yours to edit.
A clone right after saving. Its content is already published as Version 1, so it can be assigned at once.
Expect it to land published, not a draft
A clone always publishes Version 1 from the source's latest content, so it is assignable immediately. Editing and publishing again adds Version 2, leaving the clone's own Version 1 unchanged.
Archive what you have stopped using
The archive action on a template's row hides it and stops it being chosen for new assignments. Existing sessions and reports remain available. Turn on Show archived to find it again and restore it. Platform library templates cannot be archived.
Workflow 7
Rosters
Decide whether you need one
A roster is a named group for repeated assignments. Assignments can also target one student directly.
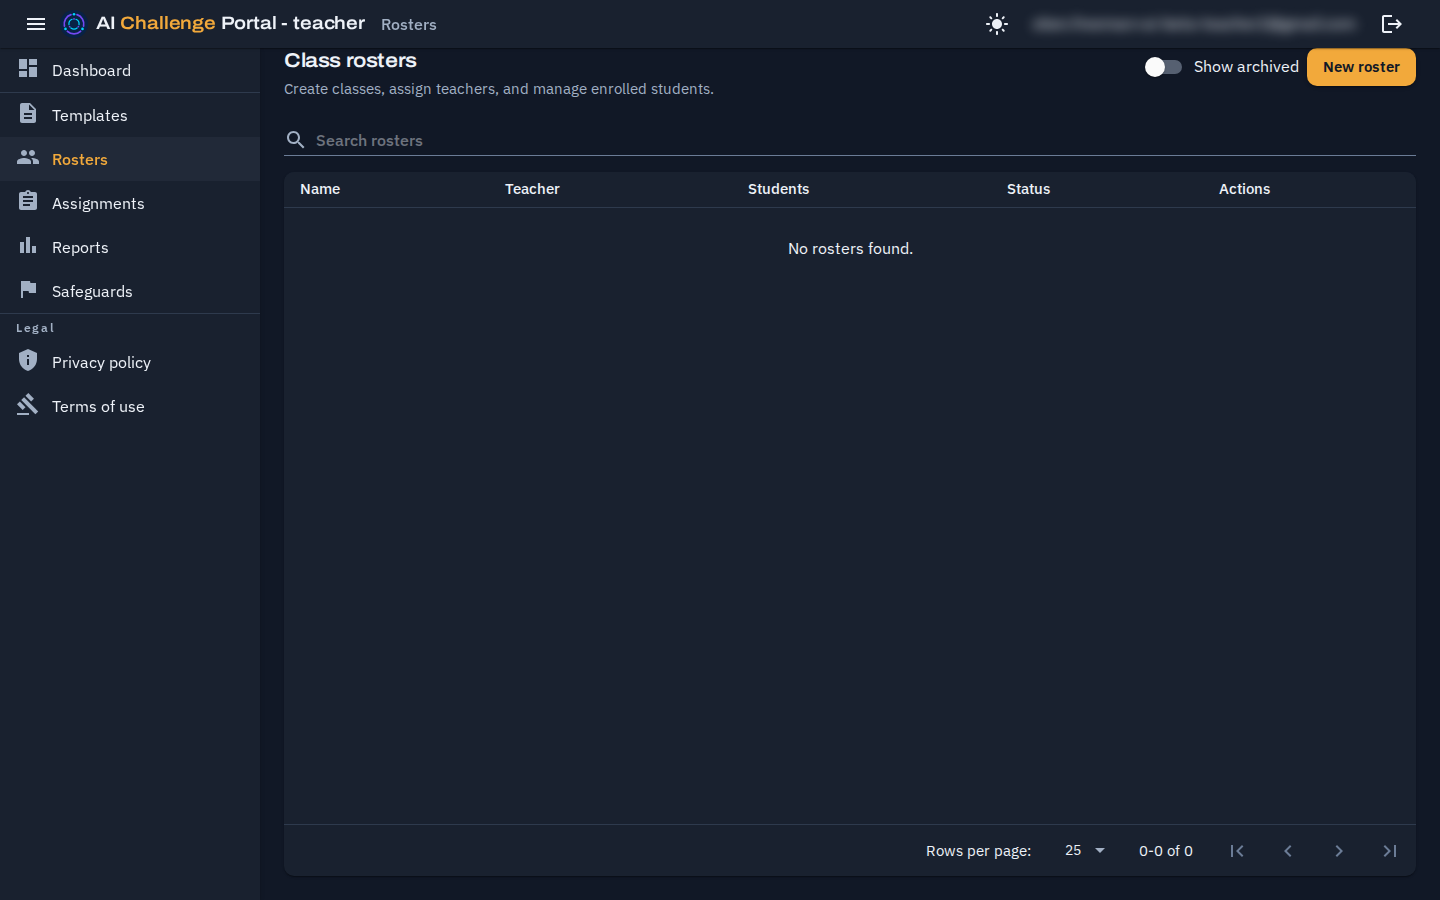
The Rosters list. Only rosters you teach, in institutions you still teach in, appear here.
Create the roster
Enter a roster name and select one of the institutions you teach in. If you teach in one institution, it is already selected. The institution cannot be changed after the roster is saved, because the roster's enrollments and assignments belong to that institution. Add students on the roster's page after saving.
Add students by name
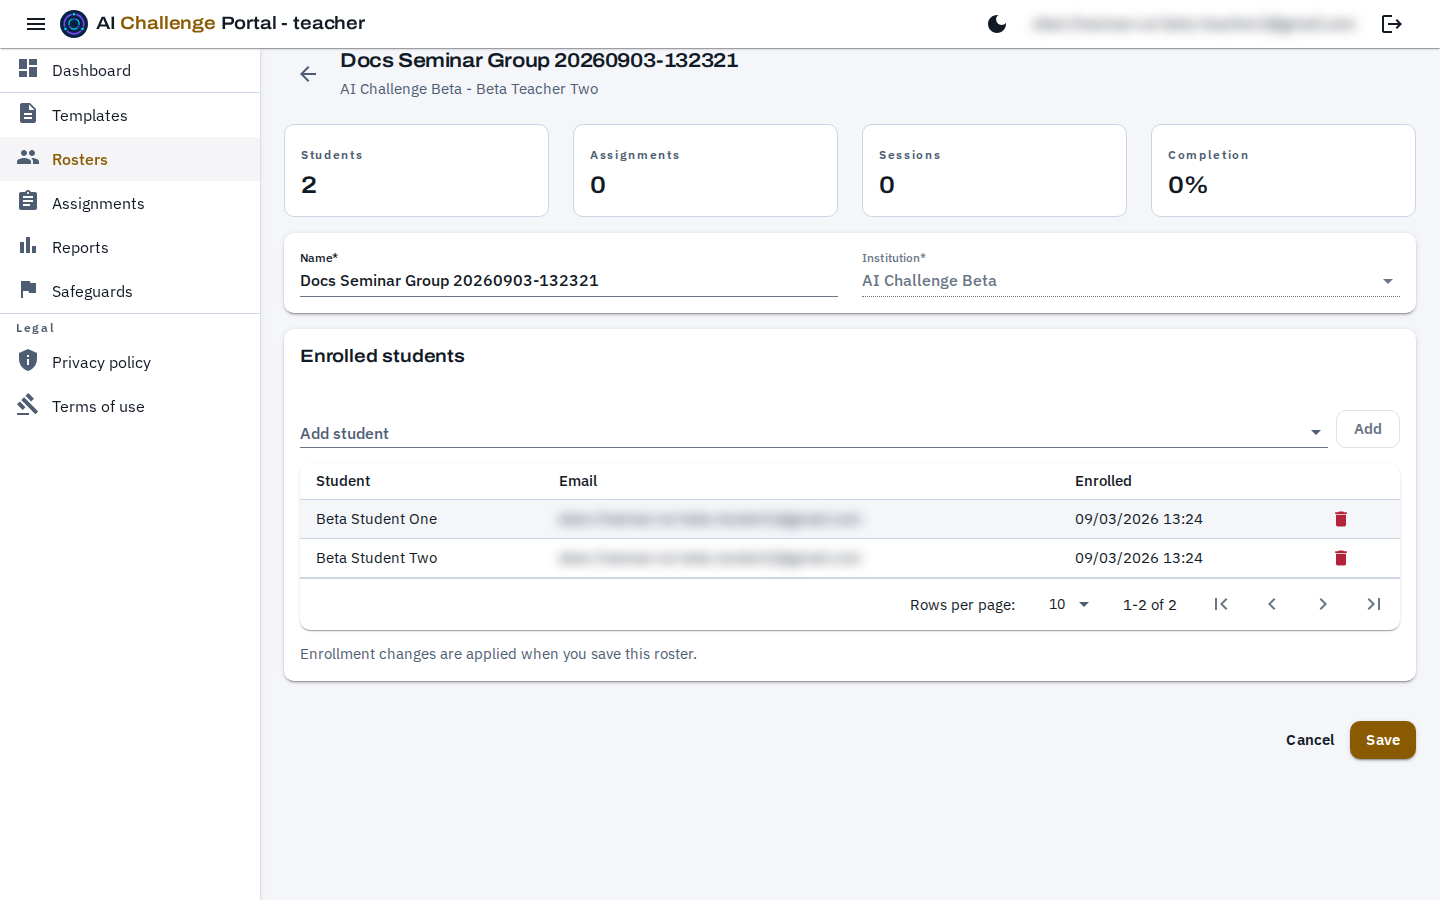
Search with Add student, choose a person, and select Add. Each student must belong to the roster's institution. Remove a person from the table.
A roster with two students enrolled. The addresses are blurred in this picture; on your screen they show normally.
Save before you leave
Save applies enrollment changes. Leaving without saving discards them.
Share a class code instead
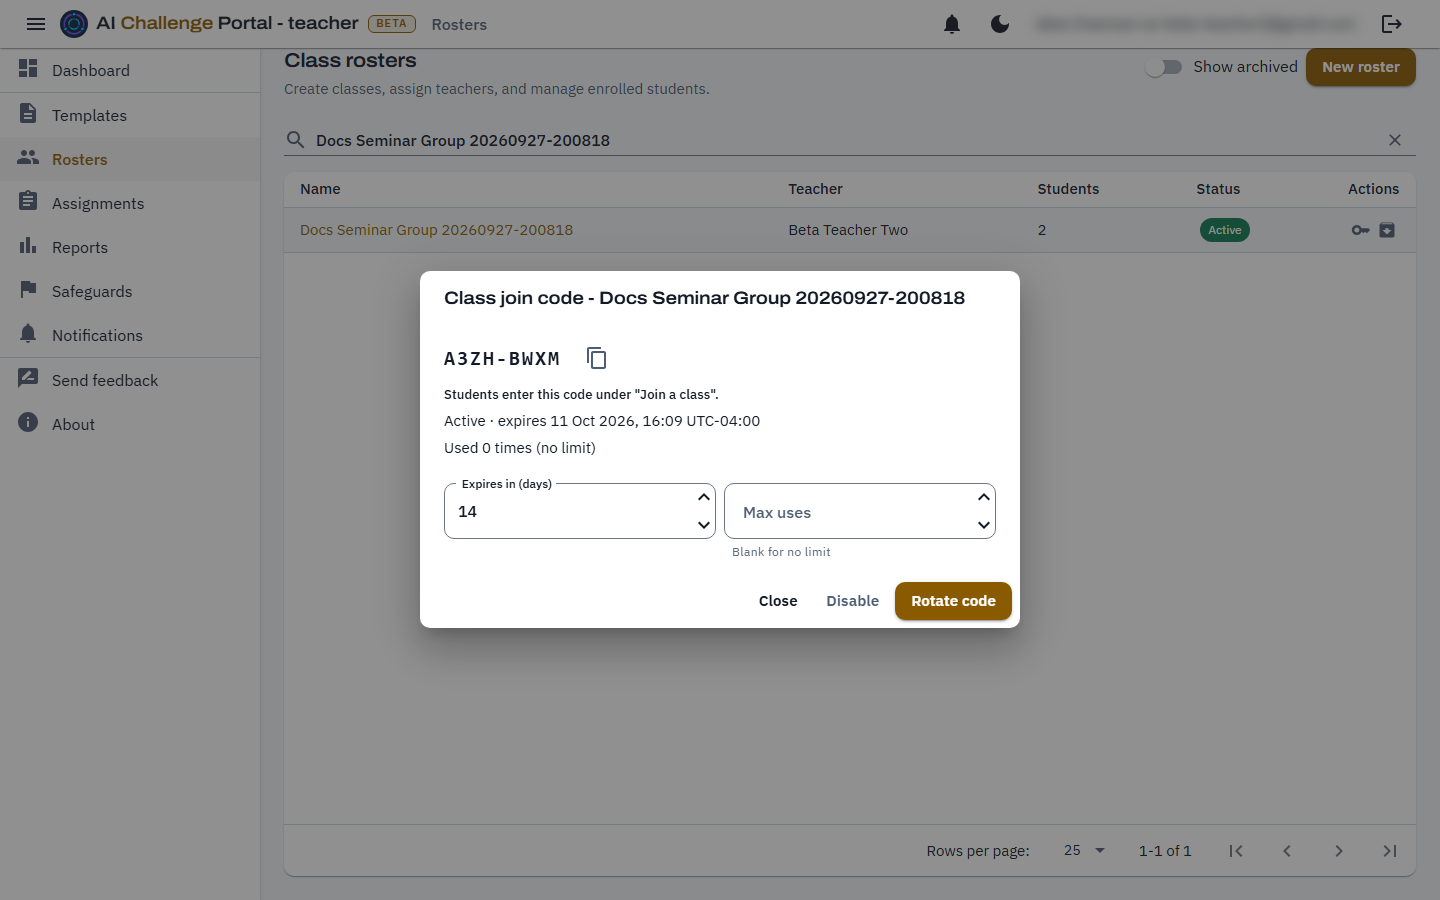
The key icon on a roster's row opens its class join code. Choose Generate code to make one, or Rotate code to replace an existing code with a new one - the old code stops working the moment you rotate. Copy the code or share the join link it fills in for students, and set an optional expiry and a max use count. Disable revokes the code immediately without issuing a new one.
A roster's class join code, just generated.
What a student does with it
A student signs up with the code, or opens your join link, which fills the code in for them; see Signing up and signing in. Either way lands them on your roster as a Student, with no admin involvement. A student who already has an account and opens the join link instead sees a "class code waiting" card on their dashboard and joins from there; see Joining another class.
Workflow 8
Assignments
Open Assignments and choose New assignment
An assignment connects a student or roster to one or more published challenge versions, an optional theme, a limit on student turns, and an availability window.
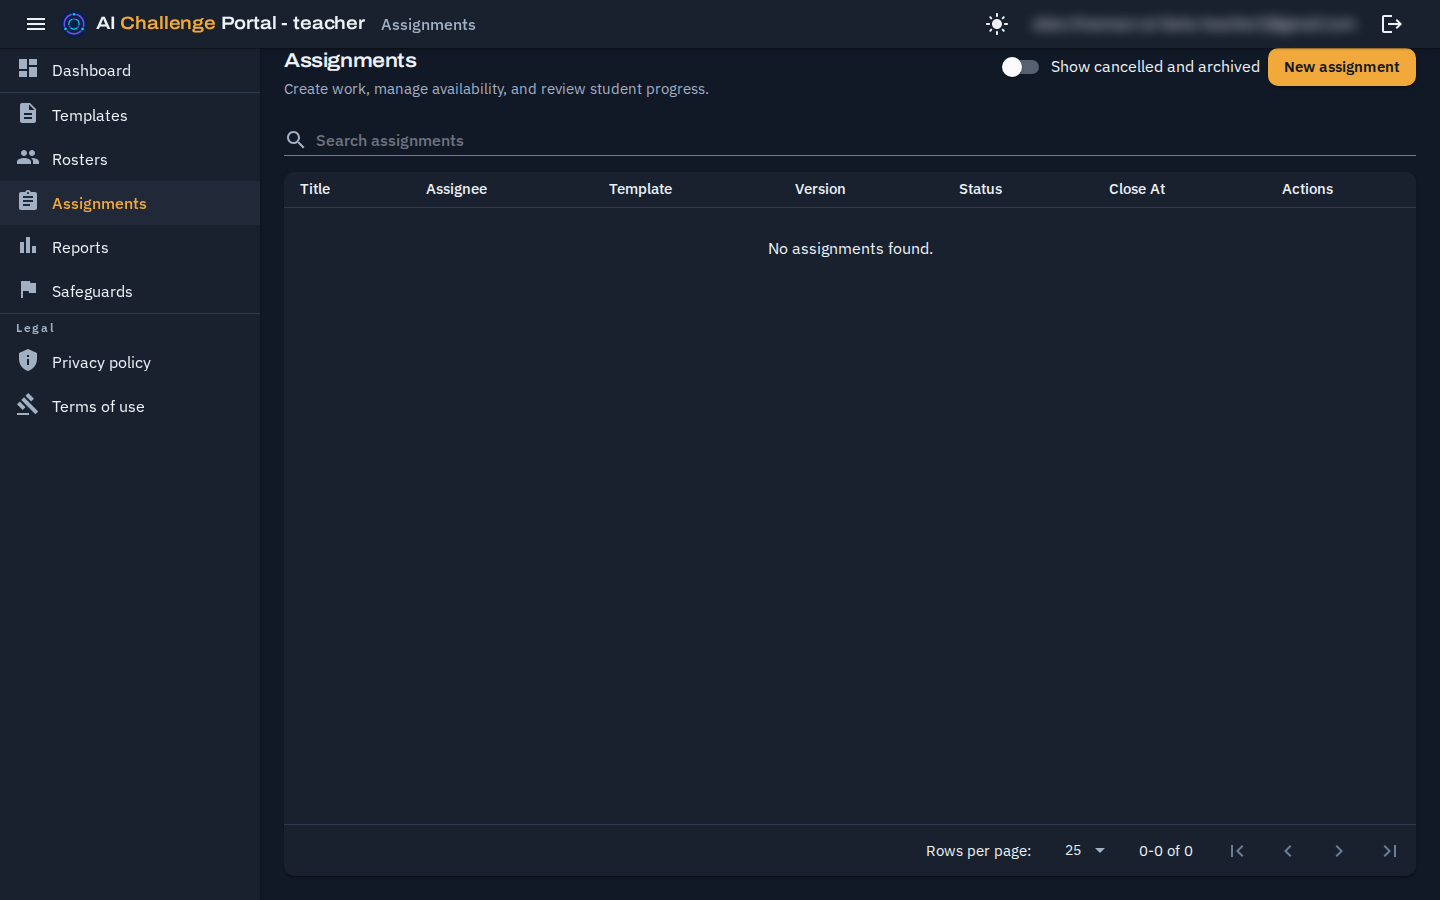
The Assignments list. The switch beside the search box brings back assignments you have canceled or archived.
Choose who it is for
If you teach in more than one institution, choose the Institution first: the student or roster, and every template in the chain, must fit it. If you teach in one, it is already chosen. Then set Assignee Type to Student or Roster, and search for the person or group.
Build the challenge chain in order
Add published template versions in sequence: your own templates, your institution's shared ones, or platform library templates. Use the arrows to reorder, Add challenge to extend, and the bin to remove a row. A row whose template carries an age rating shows the rating and a warning that younger students, or students with no date of birth on record, cannot start it.
Set how many turns a student gets
Max student turns is filled in with the platform's default. A session closes, with its report, after that many student messages if it has not finished sooner. The highest value accepted is the platform's ceiling, or a lower one your institution sets; the field names the limit if you go over it. A change made later applies only to sessions started after saving.
Choose the support mode
Support mode sets how much help students get, and is Guided by default. Guided shows the student the steps as they go, each marked done or not yet, and lets them ask for hints. Standard keeps the steps hidden until the report and still allows hints. Challenge shows no steps and allows no hints, and a step met in Challenge mode always earns full credit. Each row of the challenge chain has its own Support mode select: leave it on Use assignment default, or pick a mode for that challenge alone. Allow students to step down to Guided is on by default: a student in Standard or Challenge mode can then switch the run to Guided, never the other way. Turn it off to keep every run in the mode you set. Changes apply to sessions started after saving.
Set a theme, if the class needs one
Theme re-skins the narrative the agent speaks in, without changing the task or the grading. The same reasoning challenge can be set in a harbour for one class and a hospital for another, and the reports stay comparable because only the surface changed.
Know what the agent actually uses
Description and Theme are both prose you write, and it is easy to mix them up. Description is set on the template, is the same wherever the template is used, is shown to people in lists and cards, and never reaches the agent or the judge. Theme is set per assignment, wraps the narrative the agent speaks in on every turn, never changes the constraints or the goal, and never reaches the judge or scoring, so grades stay comparable across themes. The conversation itself is configured by Type, plus the Scenario, Constraints and Goal on the published version, plus this Theme.
Set the dates
Open At and Close At are optional but enforced. The student sees Opens, Due, or Closed, and cannot start or continue outside the window. Close At must follow Open At.
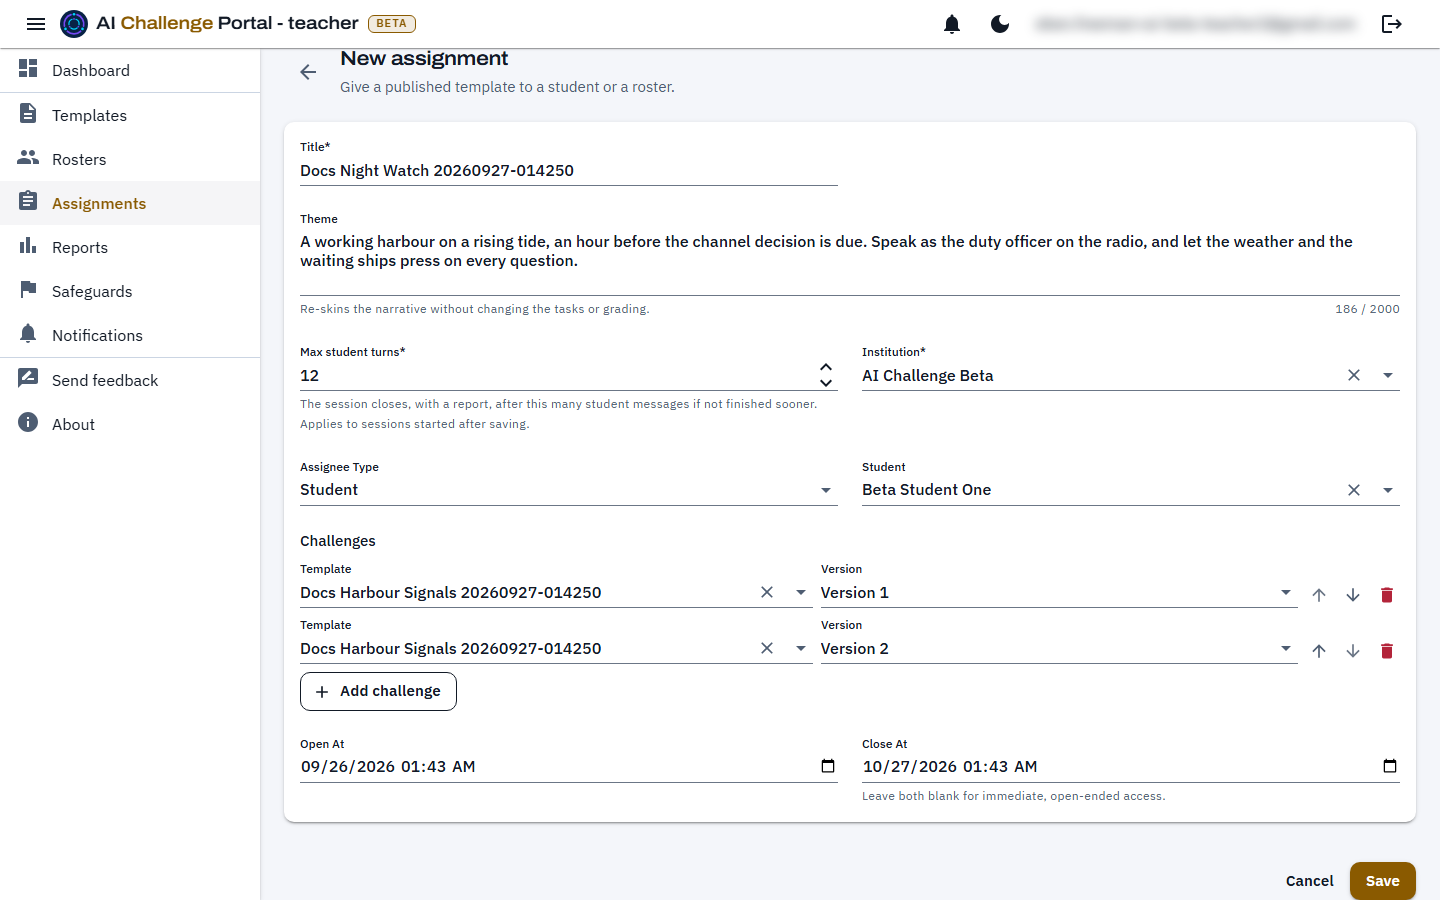
A new assignment with a two-challenge chain and its availability window set, ready to save. The student works through the rows in this order, and each row's Version reads "Version 1", "Version 2" and so on.
Watch it from the assignment's own page
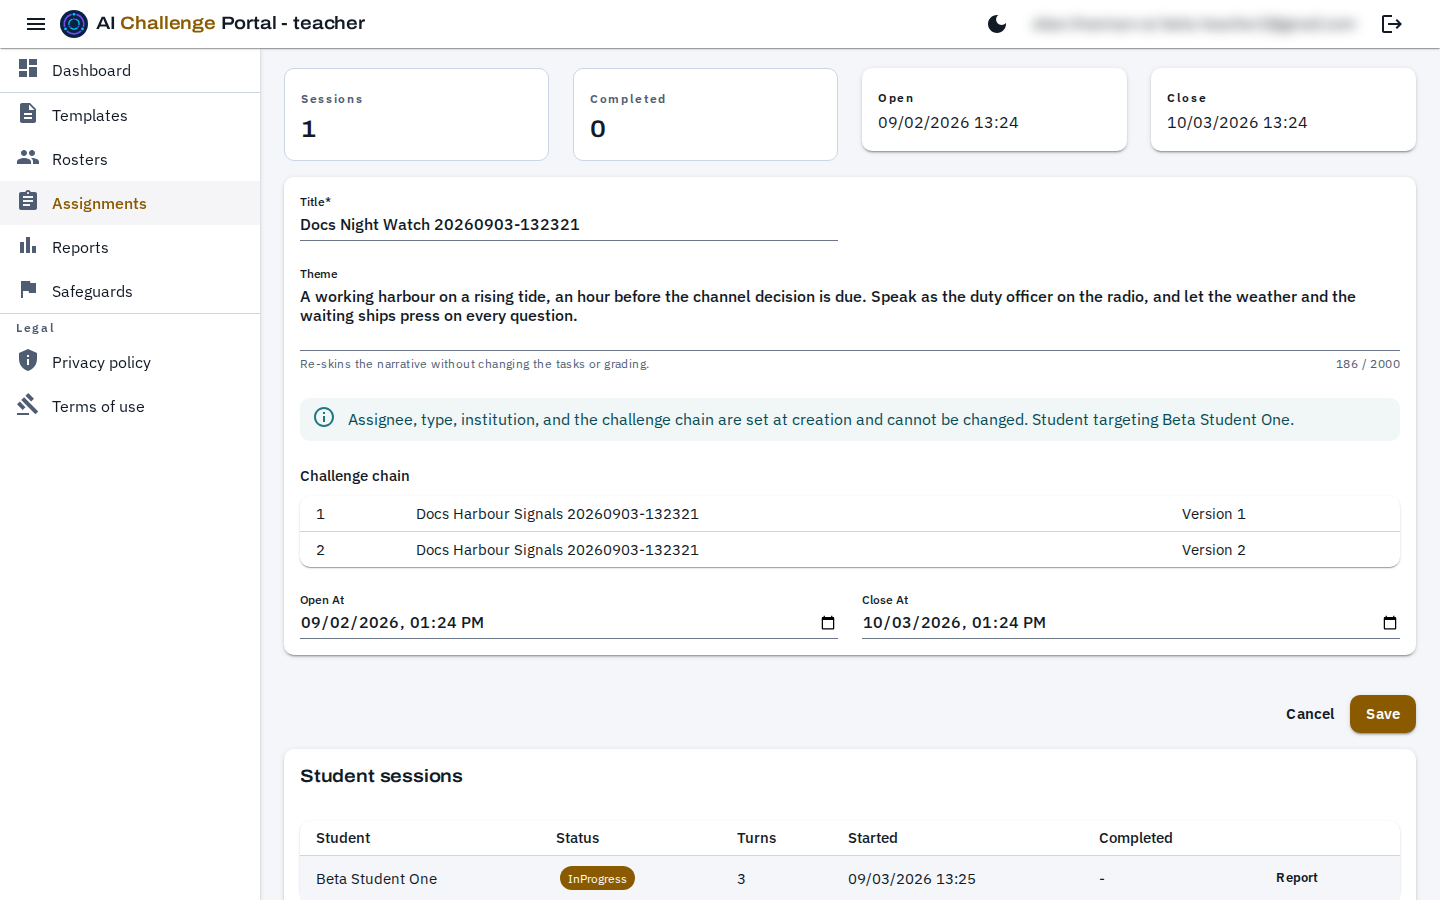
The page lists sessions, turns, dates, and report links. The institution, assignee and chain are read-only; title, theme, turn limit, support mode, the step-down switch, and dates remain editable. The chain lists each challenge's own support mode, or Use assignment default.
A saved assignment after a student has begun. The Open and Close tiles and the two date fields read back what was set. The chain is read-only, and each session row links to its own report. Cancel assignment sits above the form.
Cancel an assignment that should stop
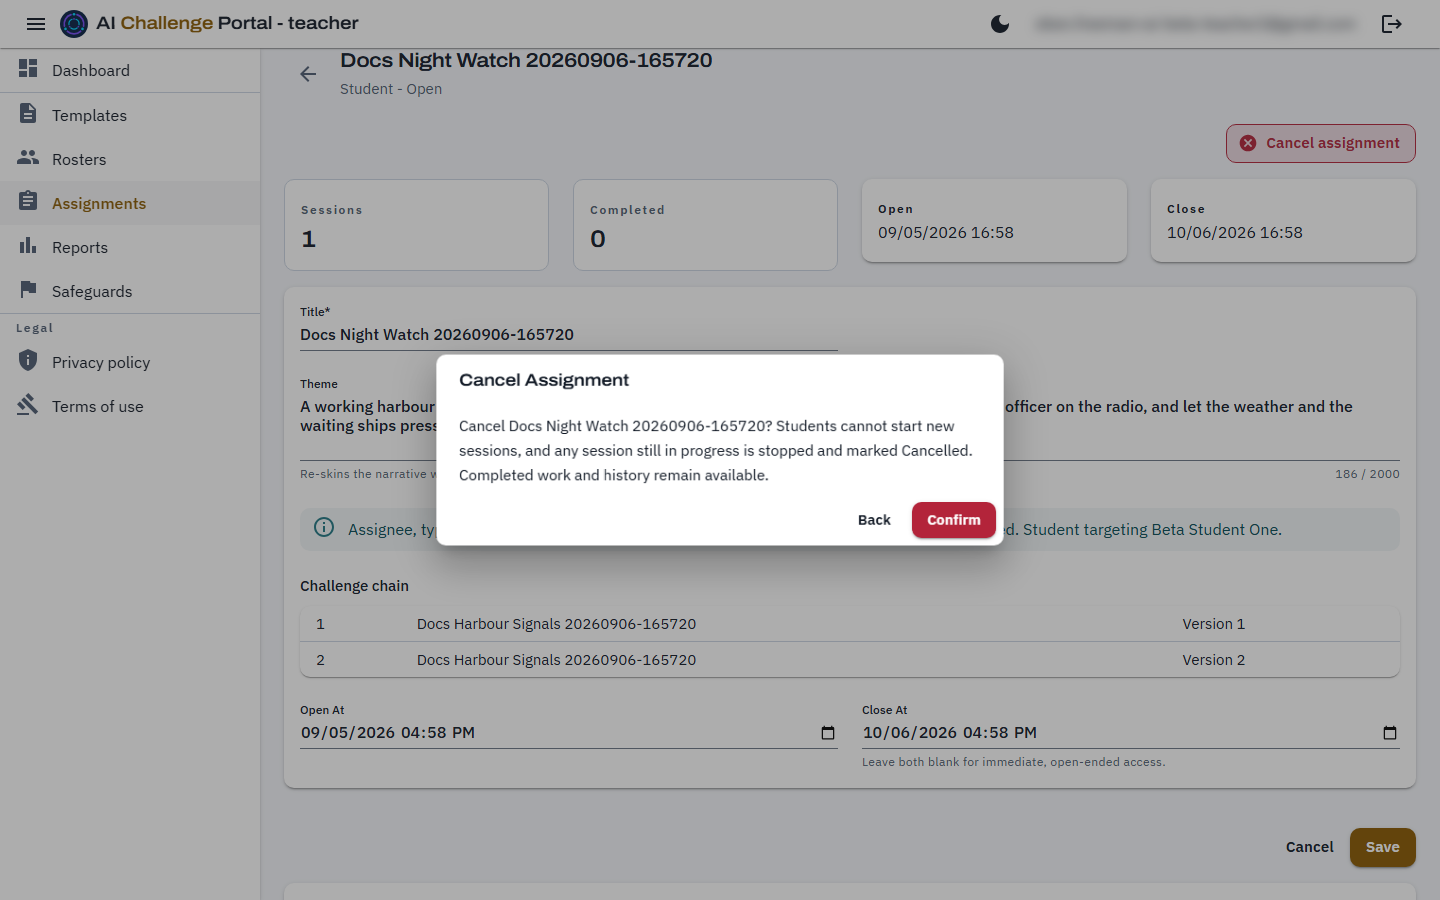
Cancel assignment stops new starts and marks open sessions Cancelled. Completed sessions keep their record and report. The assignment leaves the list until you select Show cancelled and archived; create a new assignment if the work should continue.
The cancel confirmation. Back leaves the assignment as it is; Confirm stops it at once.
Workflow 9
Reading a session report
Find the session
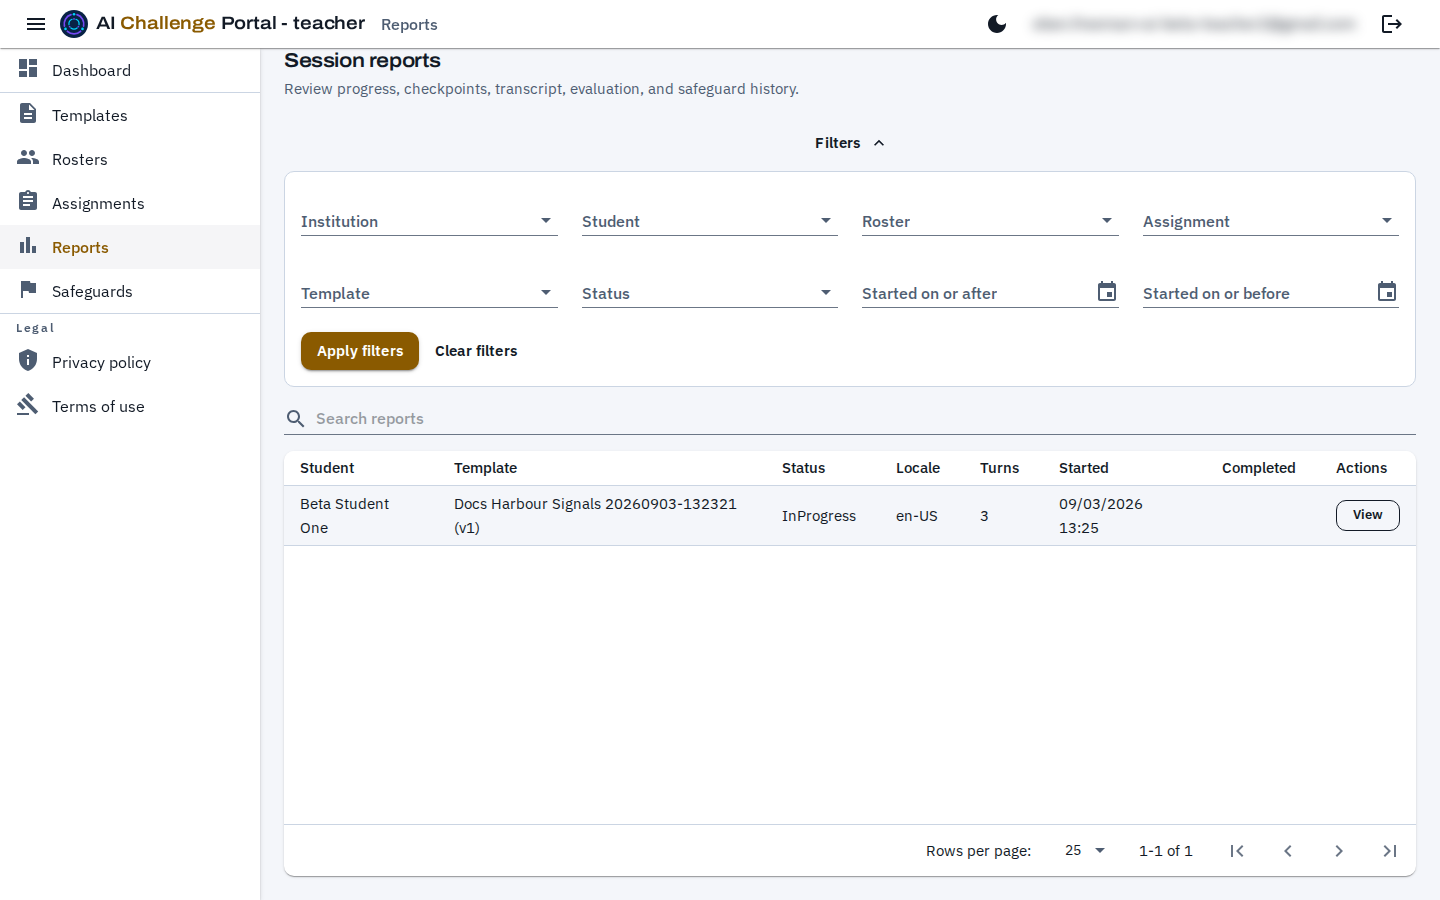
Use Reports filters for institution, student, roster, assignment, template, status, or start date. Choose Apply filters, then View on a row; Clear filters restores the list.
The Reports list with its filter panel open. Only sessions on work you set appear here.
Start with who and what
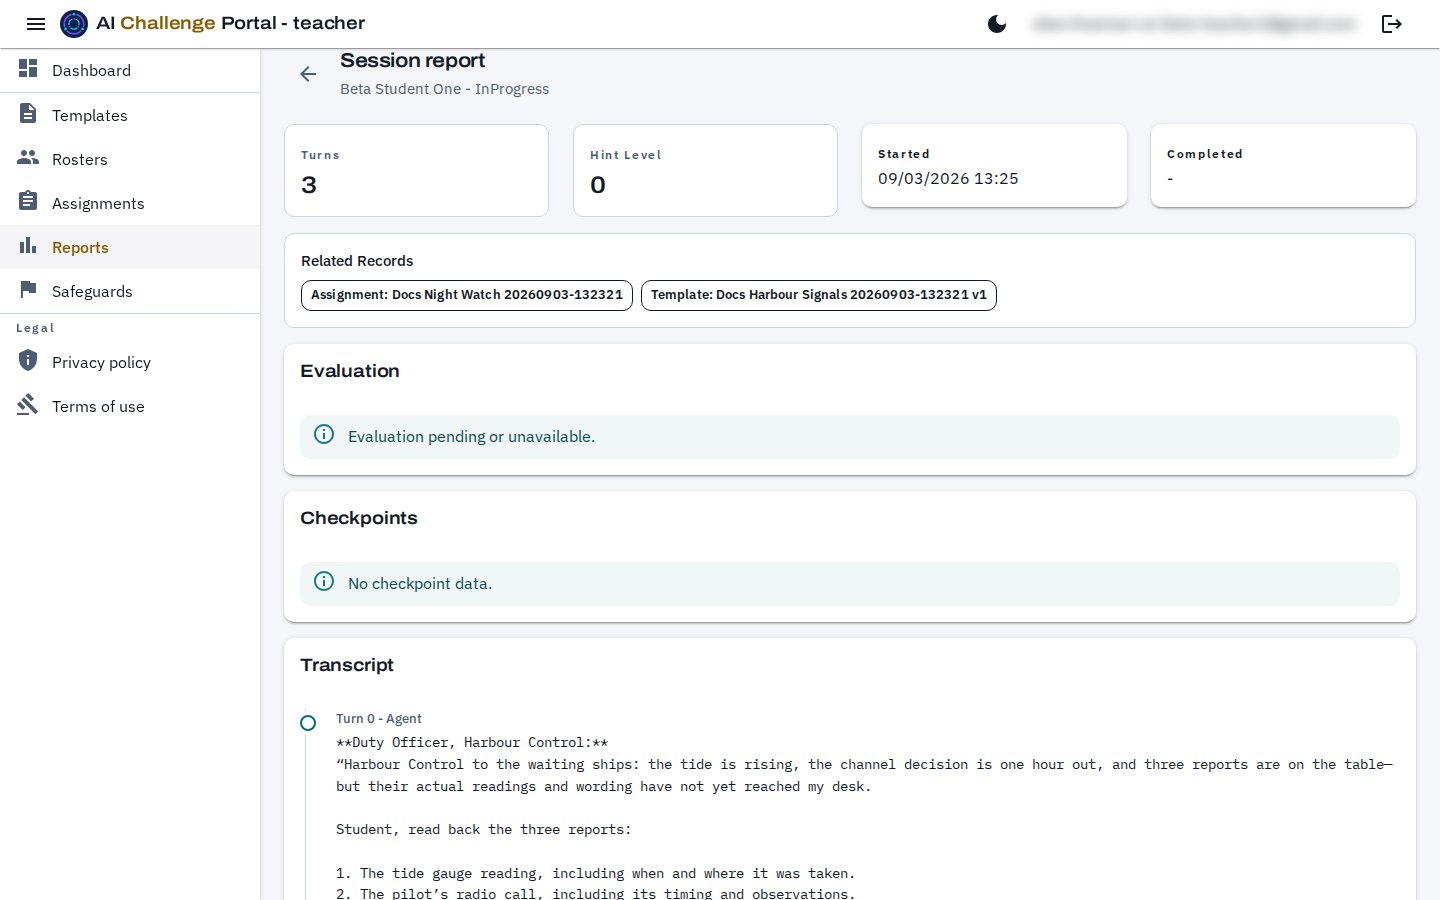
The report shows the student, status, turn and hint counts, the support mode, dates, and links to related assignment, template version, and roster. The Support mode tile shows the mode the run is in, which is Guided once a student stepped down, and whether stepping down was allowed.
Expect the evaluation to fill in at the end
Pending sessions show no evaluation. A session that ends Abandoned after the student sent at least one response is still graded, as a partial attempt on the work done before it ended; its report says so above the score. One abandoned before the student answered has no report, and says so. The hint count includes the hints the student asked for with I'm stuck. A finished session shows an overall score, a written summary, and, when enabled, four fixed dimension scores with a rationale each: conceptual accuracy, communication clarity, problem-solving approach, and completeness. See the challenge types reference for how the judge and the score are produced. Checkpoints list the milestones the judge tracked for the challenge type, whether each was met, and at which turn; the transcript marks a milestone where it happened.
Read mastery and step credit
The Mastery tile shows the run's band, read from the credit of its required steps (the template's steps, or the type's milestones when it has none). By default a step met without a hint earns full credit; met at hint level 1, 2 or 3 it earns 80, 60 or 40 percent; a step the student made real progress on without finishing earns 20 percent. The percentage under the band is that credit across the required steps; by default below 40 is Beginning, 40 up to 65 Developing, 65 up to 85 Proficient, and 85 and above Mastered. A platform administrator can change these credits and band edges. The checkpoints table shows each step as Met, Met with hint N, Attempted or Not met, with its credit, the support mode it was met in (Met in), and turn. The Reports list shows the support mode of every session and the band for every graded one.
See the student's progress across runs
Above the evaluation of a solo run, Student progress, marked "From runs you can open", shows what that student's counted runs whose reports you can open (their runs under assignments you created) add up to: their XP and, for each challenge type, their mastery (the average step credit over the latest of those runs, the last 5 by default), latest band and number of runs. Under the table, Evidence toward each framework lists the items those runs measured directly: the thinking skills the evaluation dimensions measure and the standards the templates are aligned to, each with the student's mastery (the average of the latest observations, the last 5 by default), its level when the framework has levels, the number of observations and when the latest was made, with the framework's copyright or licence notice under the table when it has one. It is formative evidence from the student's runs, not a test result. It counts only runs whose reports you can already open, never the student's other work or any outside assessment results their institution imports, so it shows no overall level and no badges: a badge is earned once per type, so which badges a student has would tell of runs you cannot open. The card is hidden when none of those runs has been counted. You see one student at a time and there is no ranking or class comparison. Each time you open it, the read is recorded in the access log the same way as other reads of student records. Students see the same figures, with their badges and a suggested next challenge, on their own dashboard (see the student guide).
Read the transcript last
The transcript is the student-visible conversation, labeled by speaker. Internal instructions and grading rules are excluded.
A report on a session that is still running. Identity and counts at the top, then the evaluation and checkpoints waiting on the session to finish, then the student-visible transcript.
Workflow 10
Safeguard flags
Check the Safeguard flags list
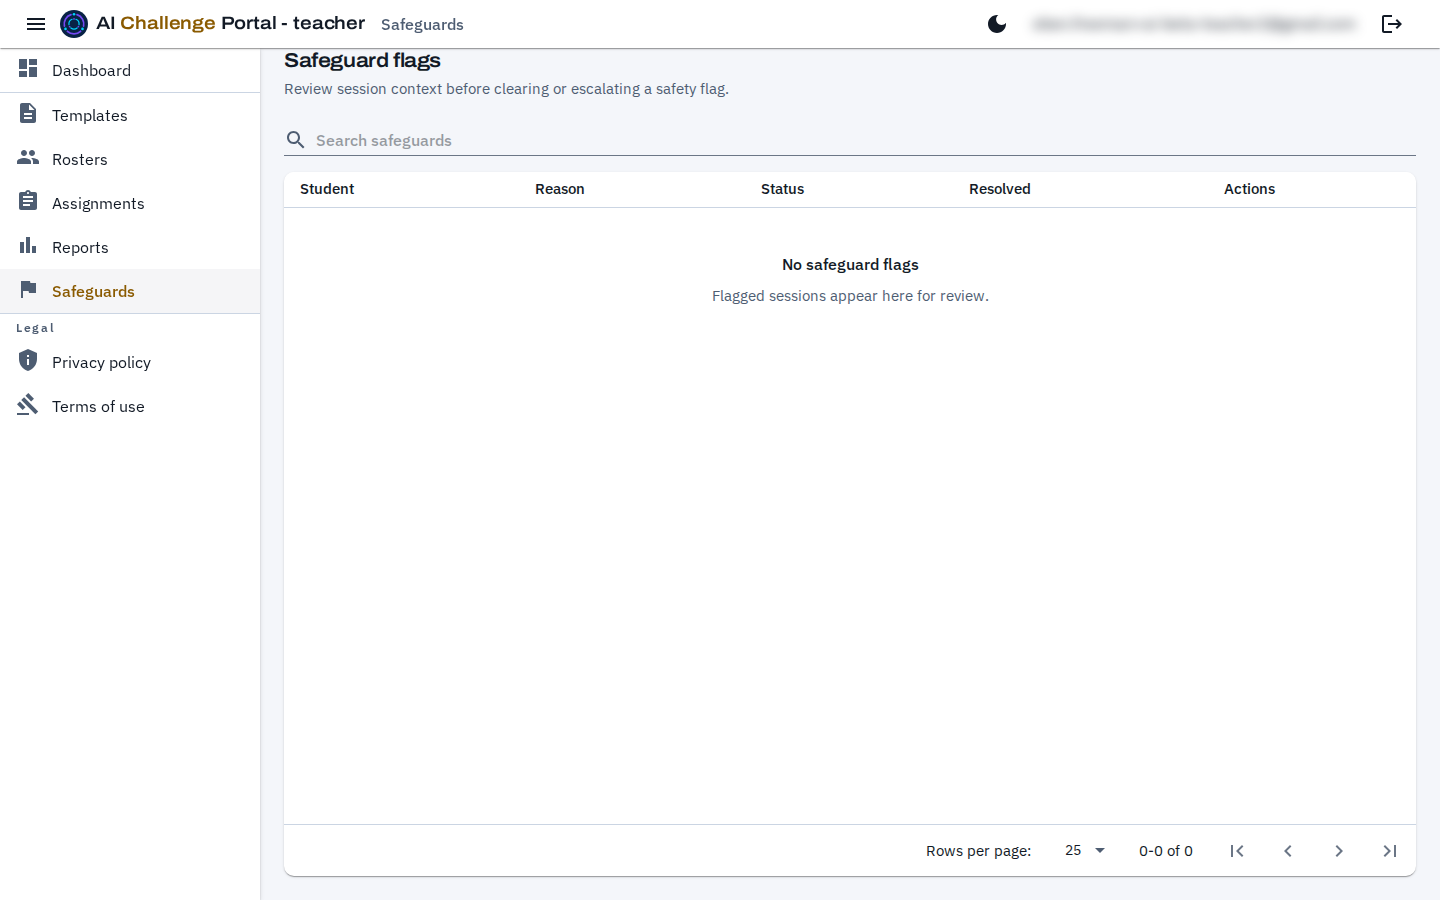
A flag is raised when the AI sees a disclosure of self-harm, abuse or serious distress in a student's message. The student gets a short supportive reply, the session pauses, and the student sees a paused message in place of the response box until the flag is reviewed. A flag with the reason "AI service content filter blocked a student message" is different: the AI service's filter blocked the message before the AI saw it, in any category the filter screens (not only disclosures). The student gets no supportive reply, only a note that the message was passed to a person and a suggestion to talk to someone they trust, and the session is not held: the student can choose Resume and carry on. Review it all the same. Flags appear in the Safeguard flags list, in the dashboard's Open Safeguards count, and as a notification on your Notifications page.
The Safeguard flags list. An empty list is the state you want; flagged sessions appear here for review.
Review the session before deciding
Opening a flag shows its context and the student-visible transcript.
Enter notes and clear or escalate the flag
Clear and Escalate both require reviewer notes and a reason. The notes and reason are saved with the flag. Clearing the last open flag on a session lets the student carry on where they left off; escalating leaves the session paused until someone clears it. A content-filter flag holds nothing, so clearing or escalating it records your decision without changing the session, which may already be finished.
Not yet available
The AI's own detection covers safeguarding disclosures only, not inappropriate language or academic-integrity concerns; a message the AI service's content filter blocks, such as hateful or sexual content, raises a content-filter flag as described above. The beta sends no email, so watch your Notifications page and the Safeguard flags list.
Workflow 11
Theme, small screens and signing out
Check your notifications
The bell in the app bar shows how many notifications you have not read, and opens the Notifications page, also in the navigation drawer. It reports work you set being published and students finishing a challenge you assigned. Assignment and safeguarding notifications are queued when the change is saved and may take a few seconds to appear. Opening the page marks what it shows as read. There is no email, and no way yet to choose which notifications you receive. By default, a notification is removed 90 days after you read it, or 180 days after it was sent if you never read it.
Switch the theme
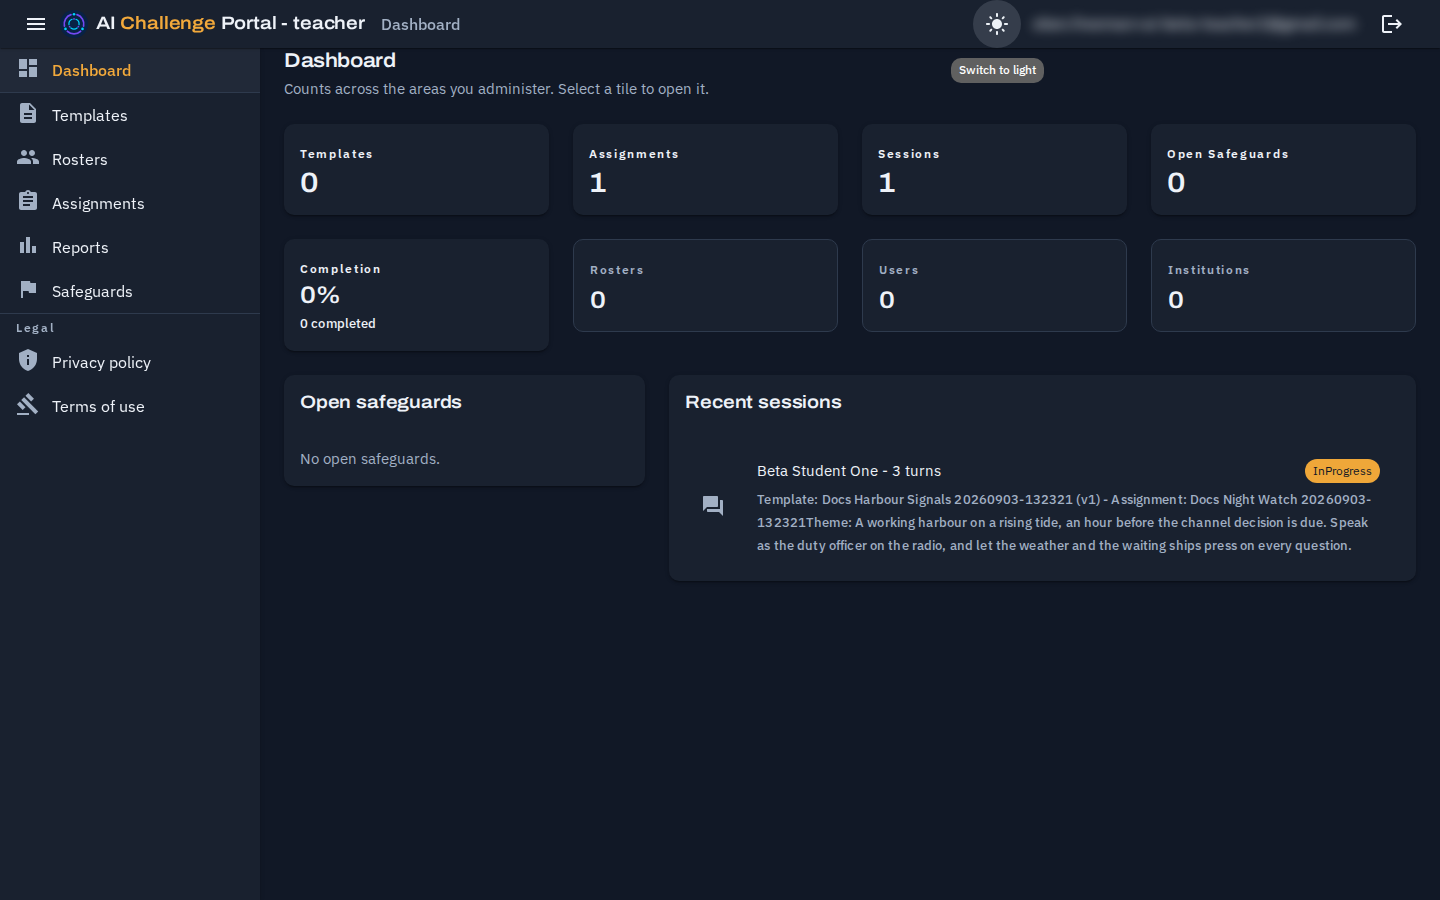
The top-right icon switches the portal between light and dark themes.
The dashboard in the dark theme, from the toggle in the app bar.
Work on a narrower window
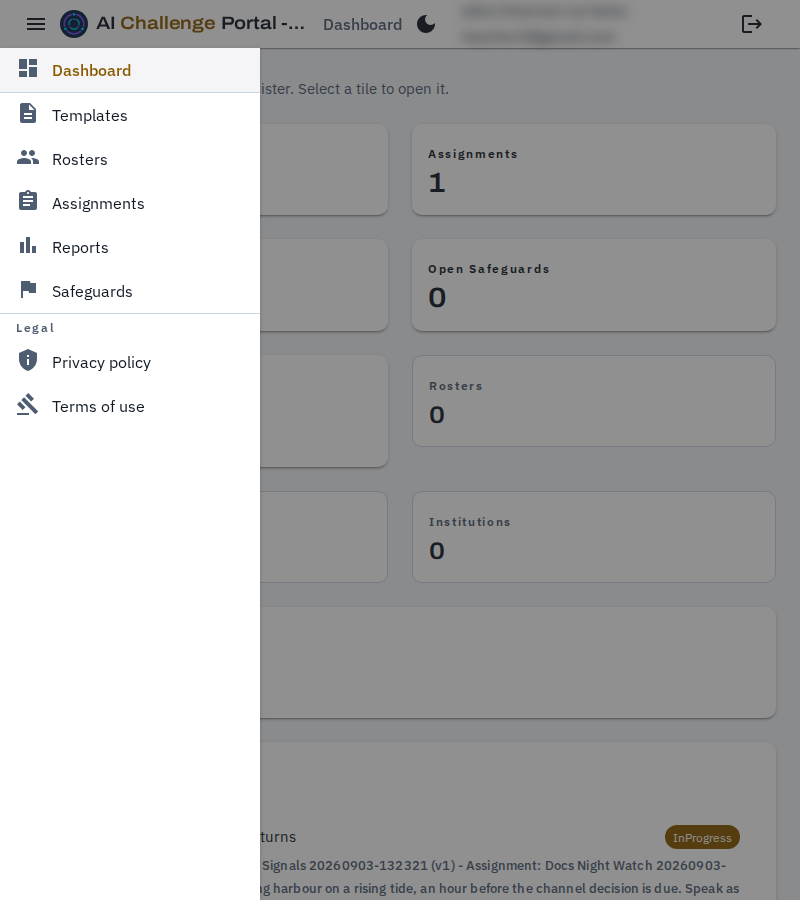
On a narrow window the drawer hides. Choose the menu button to open it over the page.
The drawer on a narrow window, opened from the menu button.
Pass on deletion requests
There is no delete button for your own account or your students'. Your account owns your classes, templates, and assignments, and your students' records belong to your institution. Send any request to erase an account to your institution administrator, who can erase students and teachers from Institution users after moving any of your classes still in use. Independent learners can delete their own accounts.
Sign out when you are finished
The sign-out icon ends your session. Use it on a shared machine.
After signing out. Nothing of your session is left in the browser.
Available in beta
What you can do now
Define, publish, assign, and review challenges, draft them with the teacher assistant, or start from the platform library. Build rosters, set turn limits and availability windows, cancel assignments, and clear or escalate safeguard flags.
Planned next
What is not yet a beta workflow
Programs, bulk operations, exports, and additional challenge types are planned. LMS content selection is available when LTI is enabled and accounts are linked. User accounts and institution settings belong to institution administrators.
Announcements banner
Open Banners in the admin portal to create a plain-text announcement of up to 500 characters, with Info, Warning or Critical severity. Teachers can target students in one or more rosters they own. Institution administrators can target their own institutions and narrow by role; platform administrators can target everyone or selected roles, institutions and rosters. When several target kinds are selected, a recipient must match every kind.
Set the start and stop dates in your browser's local time; the stop must follow the start. Active announcements appear above the portal header, with Critical announcements first. They refresh on sign-in or app load and every five minutes. Closing a banner in the admin site dismisses it for the browser session, including page reloads; a new browser session can show it again while its schedule is active.
Each selected date uses its own daylight-saving offset; times that do not exist during a clock change show a field error. Administrators can also narrow their audiences by roster. The roster picker lists active rosters within your banner authoring reach. Unavailable or archived saved targets remain visible and must be removed before saving; the server checks the audience when you save. Loaded announcements appear and disappear at their scheduled times even when a refresh fails. When several announcements are visible, scroll within the bounded banner area; you can focus it and scroll with the keyboard.
Inactivity sign-out
The admin site signs you out after your effective inactivity timeout, initially 60 minutes. Your institution administrator can set an institution override from 5 to 720 minutes, or leave it empty to use the platform's admin-site default. A platform administrator can change the separate defaults for institution students, independent learners, and the admin site in Configuration without a deployment or restart. Teachers cannot change these settings unless they also administer the institution. With multiple active institution memberships, the shortest effective timeout applies; platform administrators always use the admin-site default.
A dialog warns two minutes before sign-out, with a live countdown and Stay signed in. Typing, clicking, scrolling, touching, and returning to a visible tab count as activity across your admin tabs. Waking after the deadline signs you out immediately. Automatic or scripted scrolling does not count as activity. Continuing to work or choosing Stay signed in also renews your sign-in. Save work before stepping away; inactivity sign-out does not save drafts. Settings take effect on the next profile request when you reload the page. Student-portal inactivity sign-out is planned separately.
Request limits
Request allowances apply across the whole service. If you reach a limit, wait for the time shown before trying again. If AI requests are temporarily unavailable, wait and try again when the service recovers.