
Institution guide
Run the accounts your teachers and students sign in with.
Use the administration portal to manage institution users, roles, and sign-in access. This guide covers those screens in the order you use them.
Opening from your LMS
When LTI launch is enabled on the platform and your institution's LMS is registered, an LMS Administrator role alone grants no portal role. Institution administrators configure the LMS registration and account links through the admin API using their existing portal access. Instructors with permitted instructor access can launch to the teacher page and follow a configured assignment or roster link; the admin portal uses its own sign-in. The course must already be linked to a roster by an institution administrator. Learners open the activity in a new window by default and work without a separate portal sign-in. Overall or dimension grades return after evaluation; completion credit applies to fully or partially finished activities. See integrations for availability.
Course content through your LMS
When enabled on the platform and the institution's LMS is registered, with LTI launch and deep linking enabled, teachers can select their own published templates or course assignments from the LMS content picker. If account access cannot be resolved or the teacher lacks membership in the course institution, the picker asks the institution administrator to check the account. Publishing a template requires a course roster reachable by the linked teacher account, just as in the assignment editor. An institution administrator must first link the LMS account to the teacher's existing account through the admin API. If the picker has no content, ask your administrator to check that link.
Choose an overall score, a dimension from the selected challenge type, or completion credit. Unknown dimension names show the available names. Completion credit applies only to finished or partially finished activities, not timed-out runs. When the picker opens a new window, submit the selection there and return to your course within eight minutes; the original course frame has one extra minute to complete the placement.
How to use this guide
Follow the workflows in order
This guide is divided into numbered workflows. Each workflow is a task made of numbered steps, and workflows appear in the order you first need them.
Quick start
Get your institution ready for its teachers in a few steps. The portal starts with tutorial mode on and guides you through setting up your institution; see Tutorial mode.
Sign in
Open the administration address from your institution and sign in. Signing in.
Check your institution
Open Institutions to review its details and members. Your institution and its members.
Add a teacher
Choose New user, fill in the form with the Teacher role, and hand over the one-time password. Adding a user.
Confirm the person can sign in
Institution users shows Connected or Needs attention for each sign-in. The people in your institution.
Choose an escalation owner
Define who reviews flags, what escalation means locally, and how students receive support. Choose an escalation owner before launch.
Hand over to your teachers
Teachers choose a library challenge, build a roster and assign it. Teacher quick start.
Workflow 1
Signing in
Open the administration portal
Open the administration address from your institution. It sends you directly to the sign in form.
Enter your work email address
Enter the address your institution issued you.
Enter your password
Enter your password on the next screen. Use Forgot password? if needed; the portal cannot reset it.
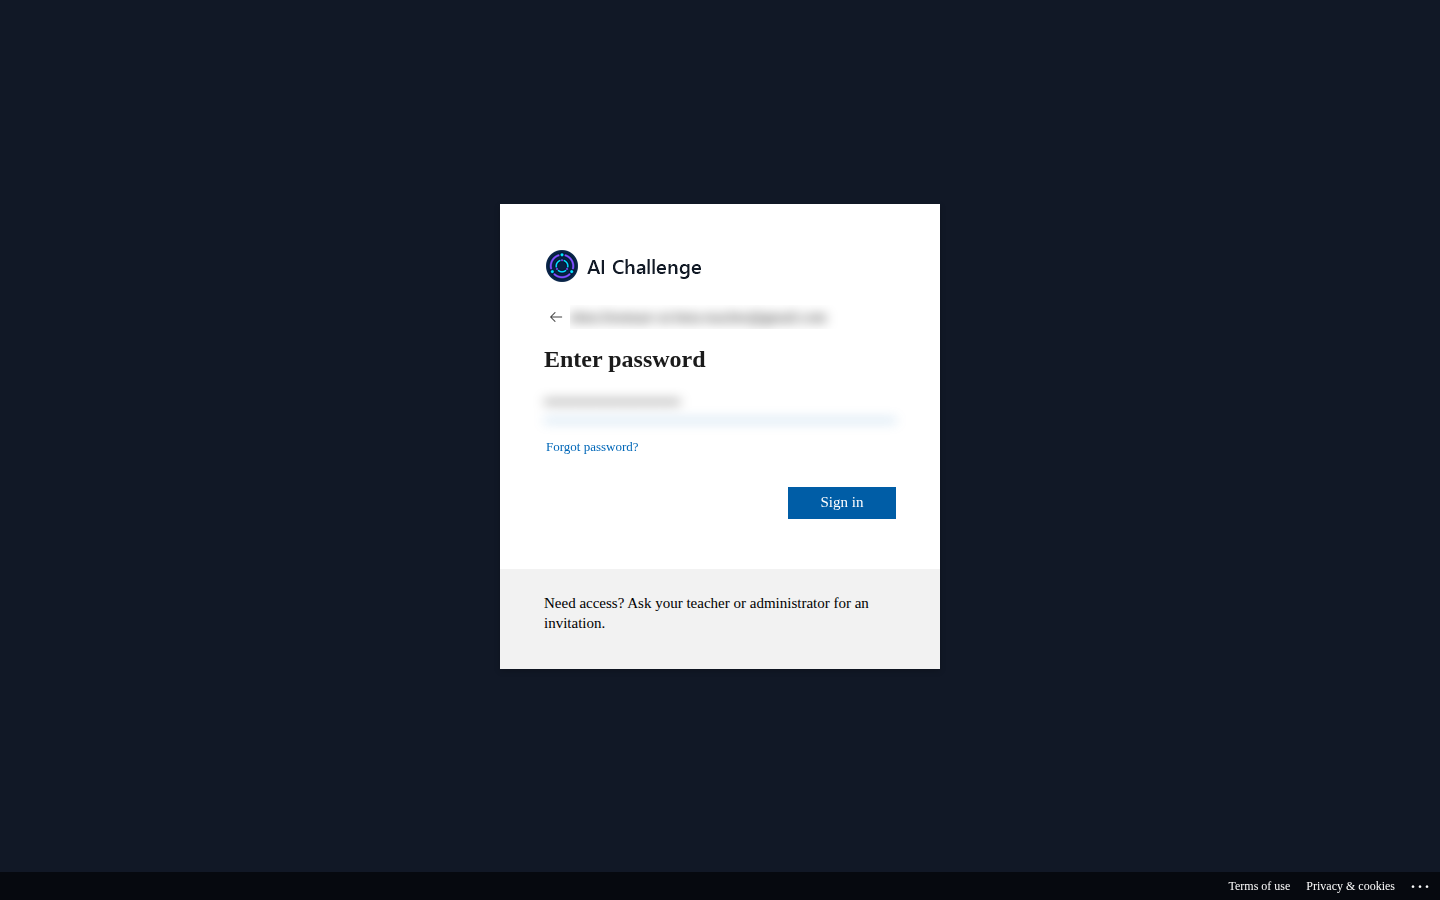
The password screen. The email address and the password box are deliberately blurred in this picture; on your screen they show normally. Wait for the portal to load
The portal comes back by itself and the dashboard appears. Nothing needs to be clicked in between.
The first time only: the privacy policy and terms
Read the privacy policy and terms of use, tick both boxes, and choose Agree. You are asked again when either document changes.
Workflow 2
Reading your navigation panel
Find the two halves of your role
The panel lists teaching tools, then Institution administration with Institutions and Institution users. About links to the legal documents.
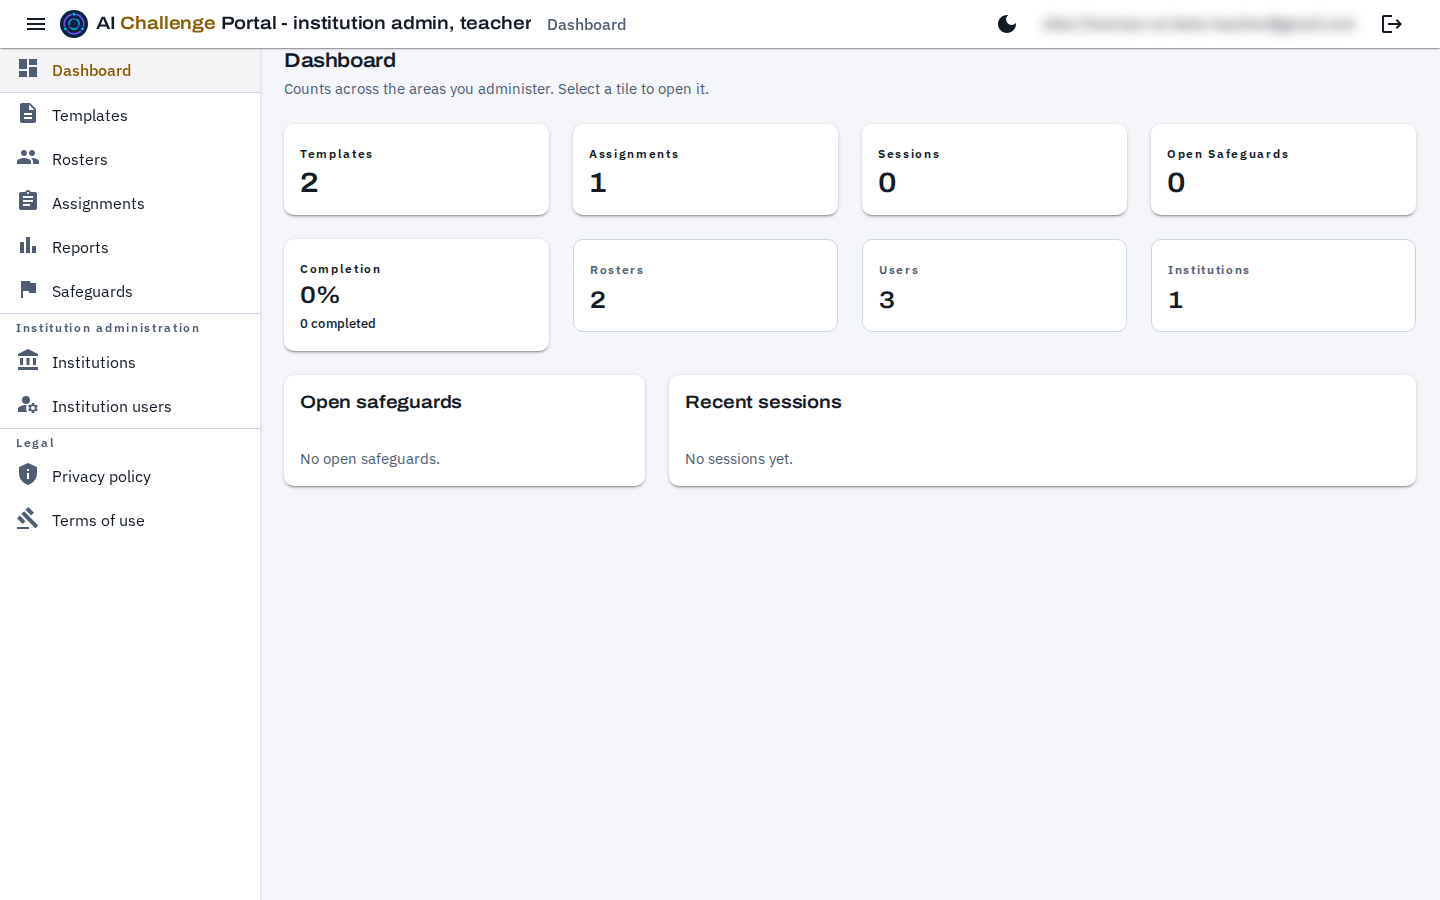
The dashboard as it appears after signing in. The Institution administration group is what your administrative capacity adds; your email address is shown at the top right. Know why a group is there
Teaching tools appear for teaching or administration. Institution administration appears when you administer at least one institution.
Read the counting tiles
Tiles count templates, assignments, sessions, open safeguards, completion, rosters, users, and institutions. Each opens its list; the lower panels show safeguards and recent sessions.
Use the menu button
Select the menu button (three horizontal lines, top left) to open or close the navigation panel.
Find the template library in Teaching tools
Teaching tools also lists Templates, which includes the platform's library of ready-made challenges, filed by Subject with an age rating where one applies. As an institution admin you can clone a library template into your own the same way a teacher does. See the teacher guide's library section for cloning, Subject tags, and age ratings.
Know the support modes and difficulty ratings
Every assignment runs in a support mode, Guided by default: Guided shows students the steps as they go and allows hints, Standard hides the steps until the report and still allows hints, and Challenge shows no steps and allows no hints. Teachers set the mode per assignment, can override it for one challenge in the chain, and decide whether students may step down to Guided mid-run (allowed by default). Independent learners pick their own mode, with Guided preselected. Reports show the mode of every session and the mode each step was met in. Templates can also carry an optional Difficulty rating (Introductory, Intermediate or Advanced) that students see and filter on in the library. The teacher guide covers both.
Know what learner progress shows
Each learner has a progress record built from their graded solo runs: XP, a level from 1 (Curious) to 8 (Sage), badges, and mastery per challenge type, the average step credit over their latest runs of that type (the last 5 by default). Students see their own on the portal dashboard with a suggested next challenge. On a session report, the Student progress card, marked "From runs you can open", shows staff only what the student's counted runs whose reports they can open add up to (XP and mastery per type, with no overall level and no badges, since a badge is earned once per type and would tell of runs they cannot open), never work they cannot open. The same card lists the evidence those runs give toward each thinking skill and aligned standard (mastery, level, number of observations and when the latest was made), from the same runs only; an item of an assessment framework shows no level, since run mastery placed on an assessment's levels would read as a predicted result. Results of outside assessments your institution imports, where it has them turned on, appear on the same card for your institution's administrators and platform administrators, never for teachers. Platform administrators see the same figures over all counted work, marked "All counted work". There is no ranking or leaderboard. Staff with access to a class can open one Gap view item's learners: a per-learner list for that class, weakest first, so they can see who needs help. Each read of another person's progress is recorded in the access log, and each Gap view read of a class (its table, one item's learners or its CSV) is recorded there once, for the class. A platform administrator can change the XP multipliers, the level thresholds and the mastery window. Erasing a person's personal data deletes their progress record and their evidence. See the student guide for how XP and badges are earned.
Label and align templates to standards
Institution templates carry Labels and Alignments like any other template, set in the template editor and used by the Label, Framework, Item code and Grade filters on the Templates list. Grade lists the grades the available items cover, starting at grade 7 (learners are 13 or older), narrowed to the selected framework when one is chosen; it is hidden when the available items (or the selected framework) cover no grade from 7 up. A template matches a grade only through an item whose grade band includes it, so an item with no grade band matches no grade. Filtering by an assessment target or claim (CAASPP Smarter Balanced, California Science Test) also finds templates aligned to the standards it assesses, and the editor shows what each alignment also supports; a framework private to your institution never shows its links outside it; the teacher guide covers the fields, the limits (10 labels of up to 40 characters, 10 alignments) and the framework notices. Library templates come with labels and standards already set, and a clone keeps them. Labels are shared across the platform and visible to everyone who can see the template. To remove an unsuitable label from one of your institution's templates, open the template, remove the label's chip and save; this does not create a new version. A label that does not belong anywhere can be reported to a platform administrator, who can rename, merge or delete it.
Workflow 3
Your institution and its members
Open Institutions
Institutions lists only institutions you administer. Rows show name and domain; search matches part of either without regard to capitalization.
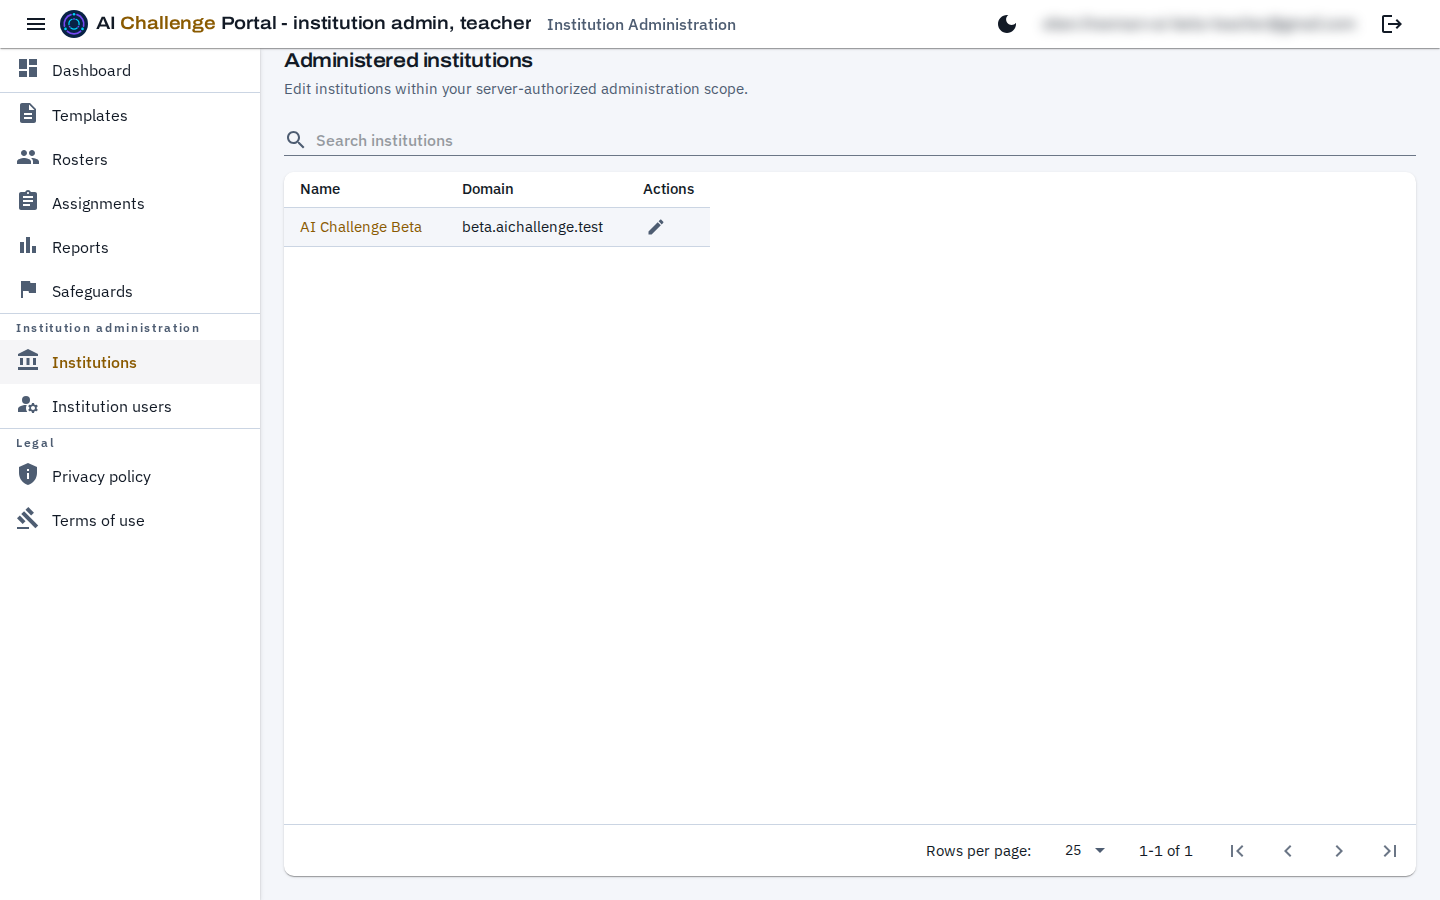
The institutions you administer. Most administrators see exactly one row here. Open the institution details page
Select the institution's name link. Institution admins can open
/institutions/{id}to edit Name and Domain and manage members; Save applies changes. The page also shows the institution's cap on how many student turns a teacher may allow per assignment; you can see the current value here, but only a platform administrator can change it.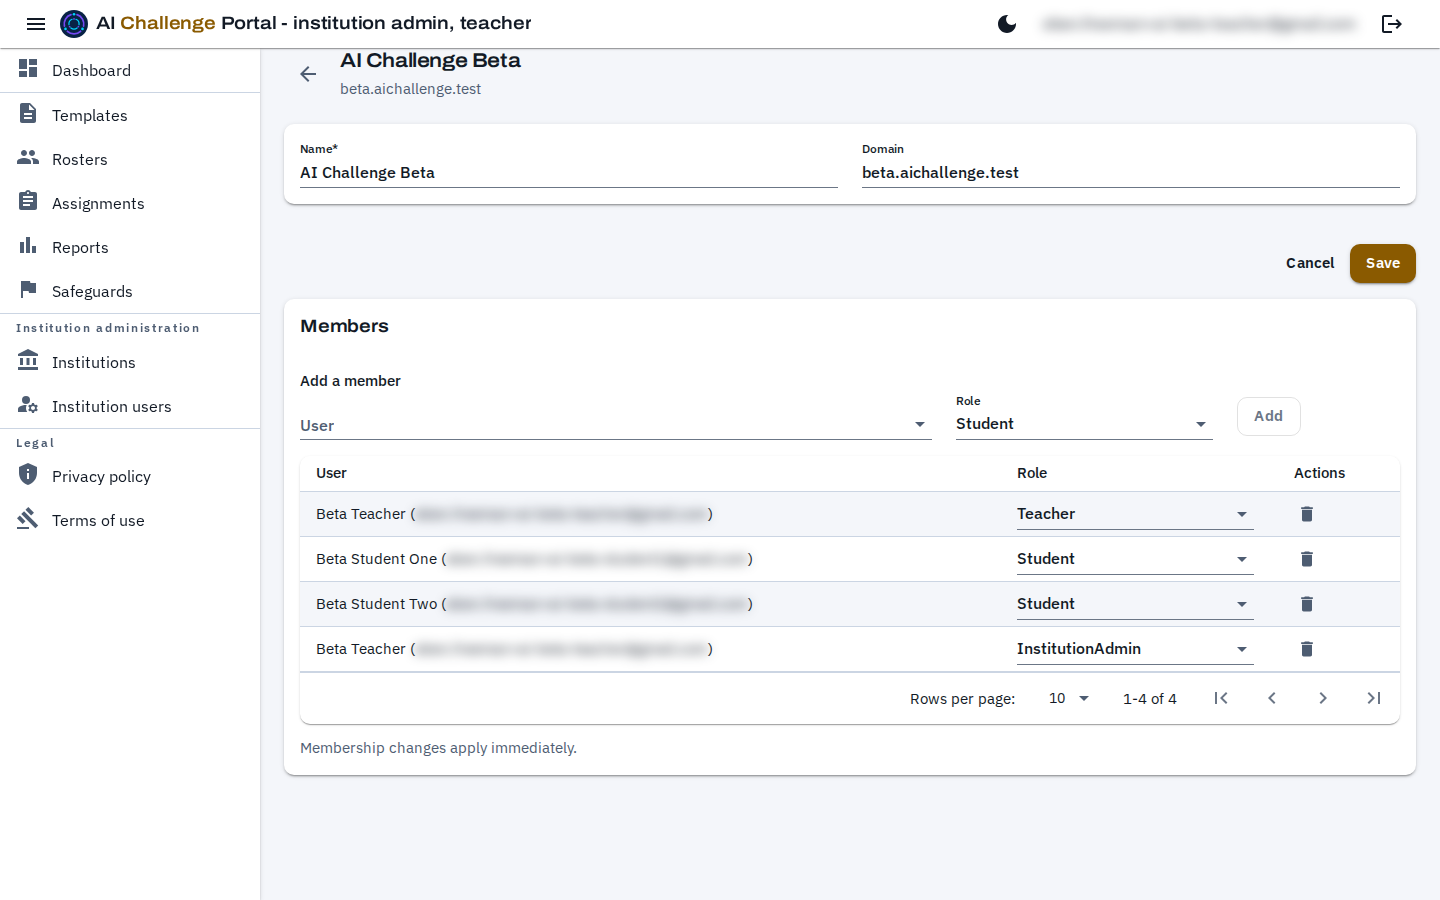
The institution page. The membership grid is the lower half; the email addresses beside each member's name are blurred in this picture. Set inactivity sign-out
On the institution details page, set Inactivity sign-out (minutes) to a whole number from 5 to 720 and choose Save. Leave it empty to use the current platform defaults shown beside the field. You can change this setting only for institutions you administer; a platform administrator can change any institution. The override applies to both students and staff. For someone with several active institution memberships, the shortest effective timeout applies.
The platform starts with separate 60-minute defaults for institution students, independent learners, and the admin site. A platform administrator can change these LIVE values in Configuration, under Inactivity sign-out; no deployment or restart is needed. Changes are resolved on the next profile request, so a newly loaded admin page takes the new value.
The admin site warns two minutes before sign-out with a live countdown and Stay signed in. Typing, clicking, scrolling, touching, or returning to a visible tab counts as activity, shared across admin tabs. Returning after the deadline signs you out immediately. Automatic or scripted scrolling does not count as activity. Continuing to work or choosing Stay signed in also renews your sign-in. Save work before leaving; this feature does not save drafts. Student-portal inactivity sign-out is planned separately.
Read the membership grid
Rows represent capacities, so one person can appear as both Teacher and InstitutionAdmin.
Grant someone a capacity
In Add a member, choose a role, find the person, and choose Add. Membership changes apply immediately.
Expect administrator access to apply at once
New InstitutionAdmin access applies the next time the recipient loads or refreshes the admin portal; they do not need to sign out. Removing it takes their access to that institution away just as quickly.
Change or withdraw a capacity
Change the role control or choose the bin to remove that capacity. The account and other institution memberships remain. Removing a Teacher capacity also takes that person's rosters in this institution out of their reach - the classes, their students, and assigning to them - until a teacher who still teaches here is assigned to them.
Workflow 4
The people in your institution
Open Institution users
Institution users lists people in the selected institution. The Institution box selects the institution when you administer more than one.
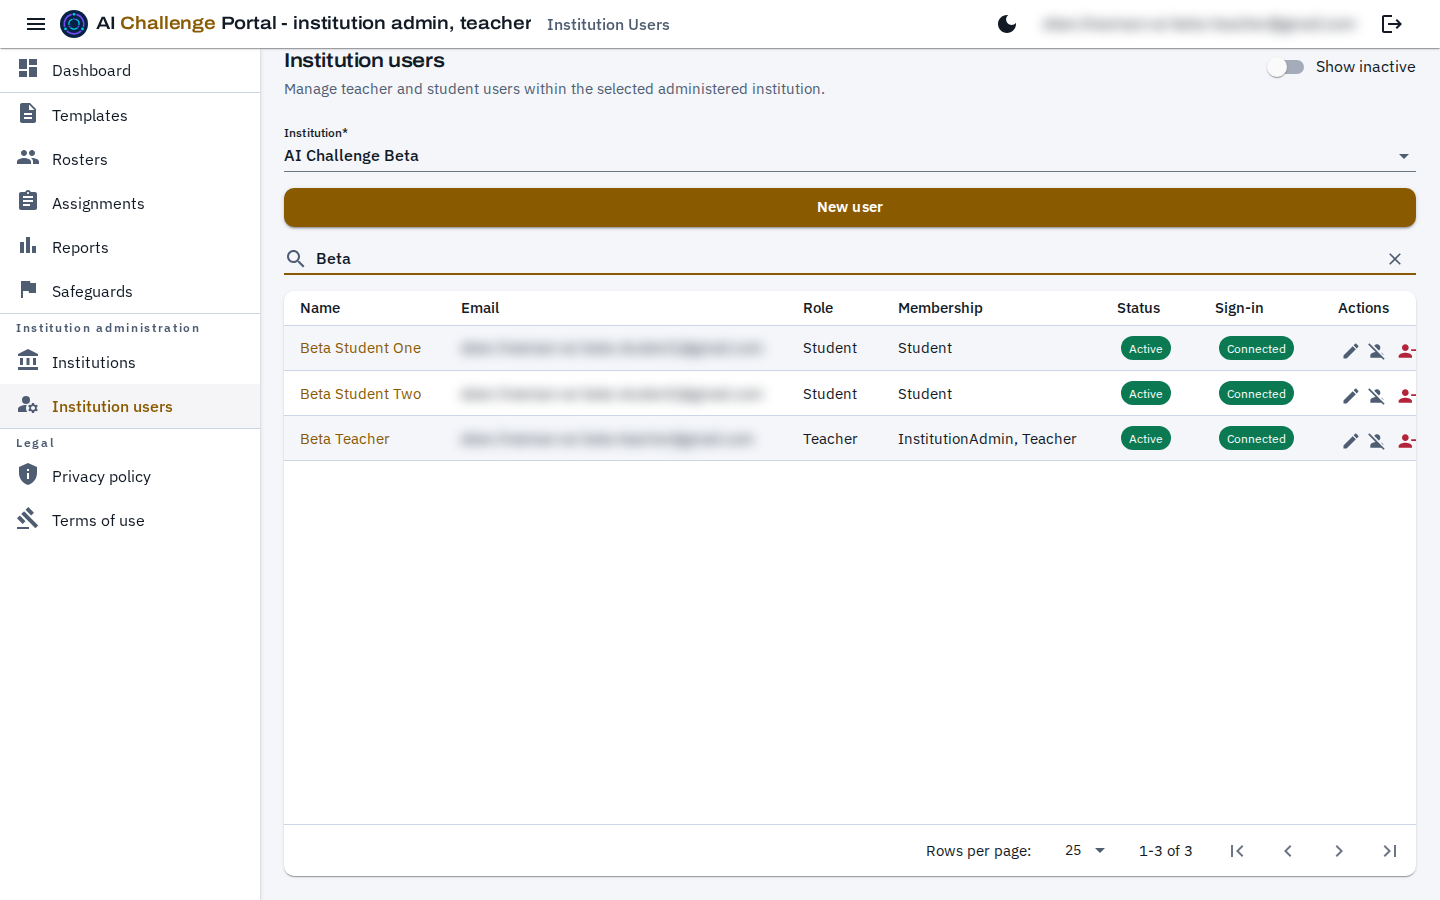
The institution users list, narrowed by its search box. The email addresses in the second column are blurred in this picture. Read the columns
Membership lists the person's capacities. Status is Active or Inactive. Sign-in is Connected or Needs attention.
Narrow a long list
Search by part of a name or a full email address, without regard to capitalization. Leading and trailing spaces are ignored. Use Show inactive to include deactivated people.
Know what Needs attention means
The portal has a record for this person, but no sign-in is connected in the Authentication module yet.
Repair a sign-in that says Needs attention
Connect to Authentication module creates the person's sign-in account and shows a temporary password. If the address already has an account there, it links it instead and shows no password. Resync roles re-applies the roles the person's memberships say they should hold.
You do not have to pre-create every student. A teacher's roster carries its own class join code, and a student who signs up with that code - or opens the teacher's join link - gets a Student account on that roster without an administrator creating it first. Code-less self sign-up is a separate switch, and it is off in the beta.
Workflow 5
Adding a user
Choose New user
New user opens a form for the selected institution. Check the Institution box first.
Fill in the form
Display Name and Email are required. Email cannot change later; Role is Teacher or Student; Locale defaults to en-US; Date of Birth is optional.
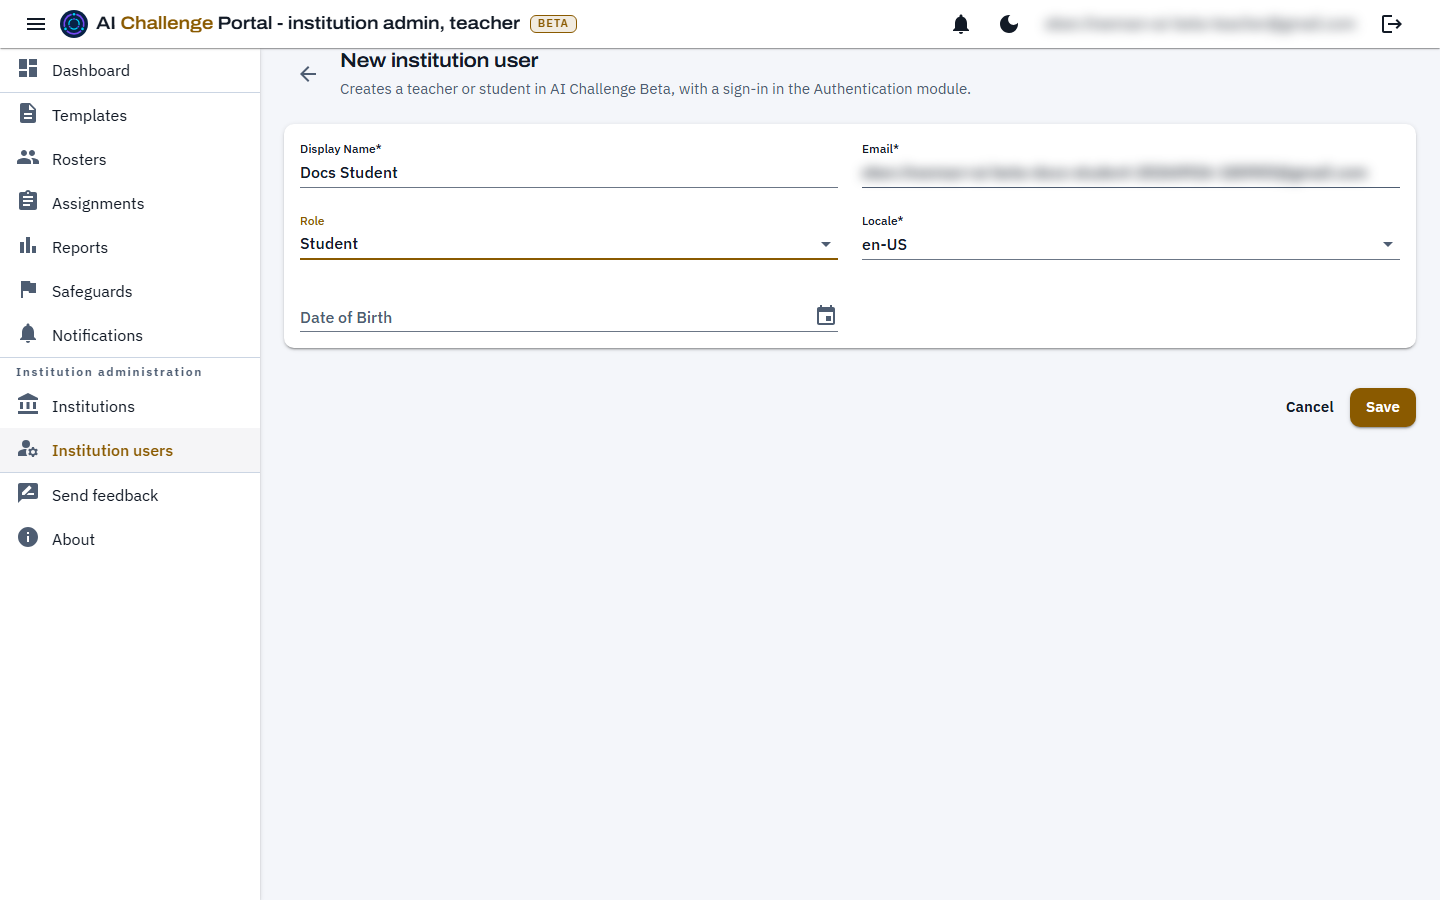
The create form, filled in and ready to save. The address is blurred in this picture; type the person's real address here. Save, and copy the temporary password
Saving creates the portal record, the sign-in account in the Authentication module, and role permissions, then shows a one-time password. Copy it before closing; it cannot be shown again.
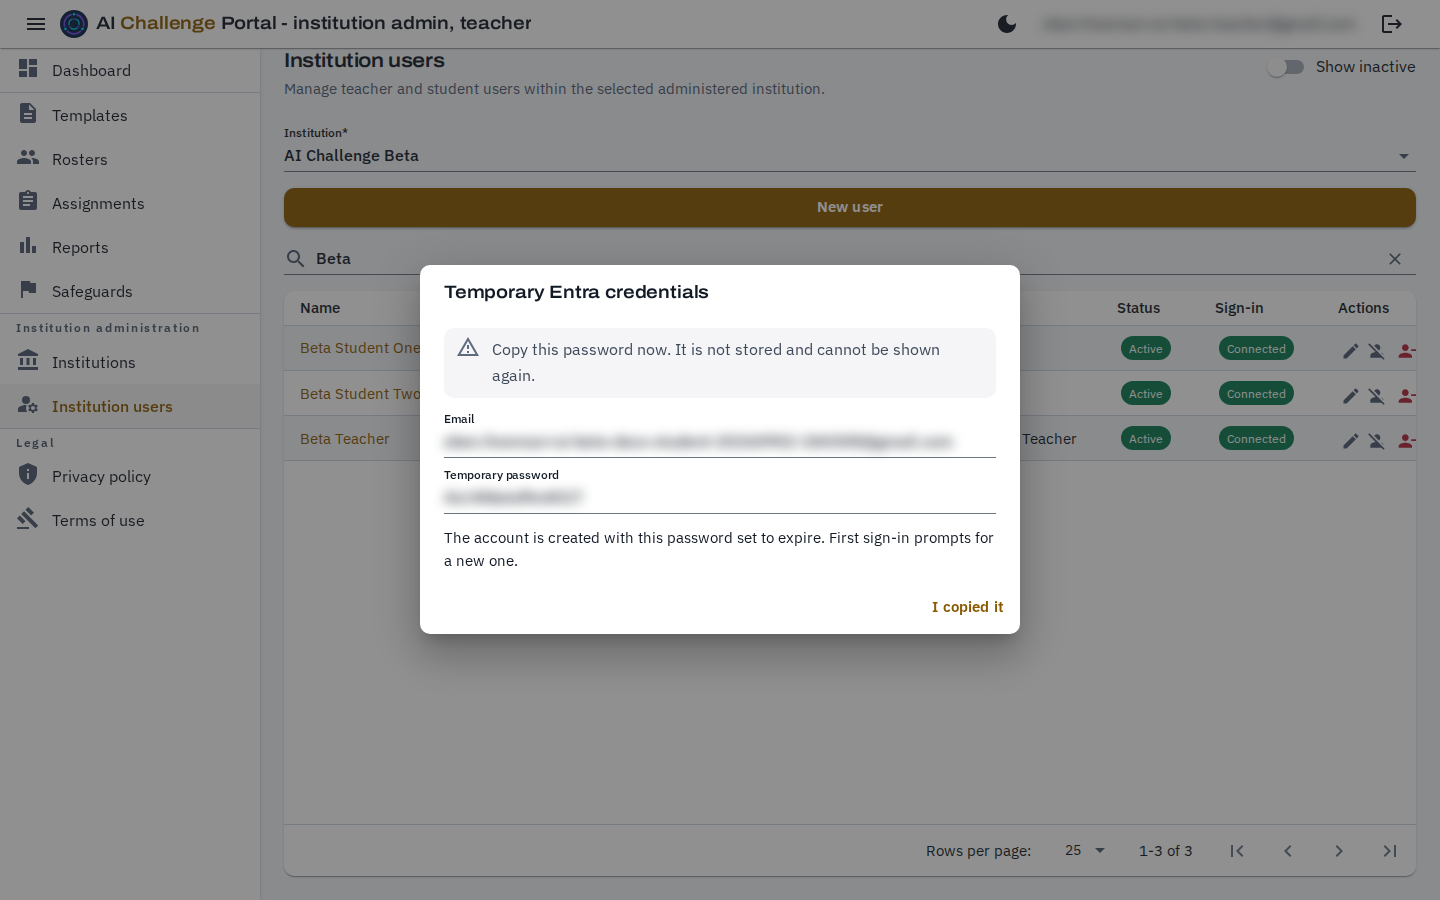
The one-time password reveal. Both the address and the password are blurred in this picture; on your screen the password is readable exactly once. Hand it over safely, and only once
Send the address and password only to that person. They must choose a new password at first sign-in.
Read the dialog when it warns you
If the Authentication module side only partly succeeds, the dialog says so. Use Connect to Authentication module or Resync roles from the row menu instead of creating a duplicate.
Workflow 6
Editing a user, withdrawing access, and erasing data
Open a person's page
Select the name link to edit Display Name, Locale, and Date of Birth. Email is fixed, and Primary Role is read-only.
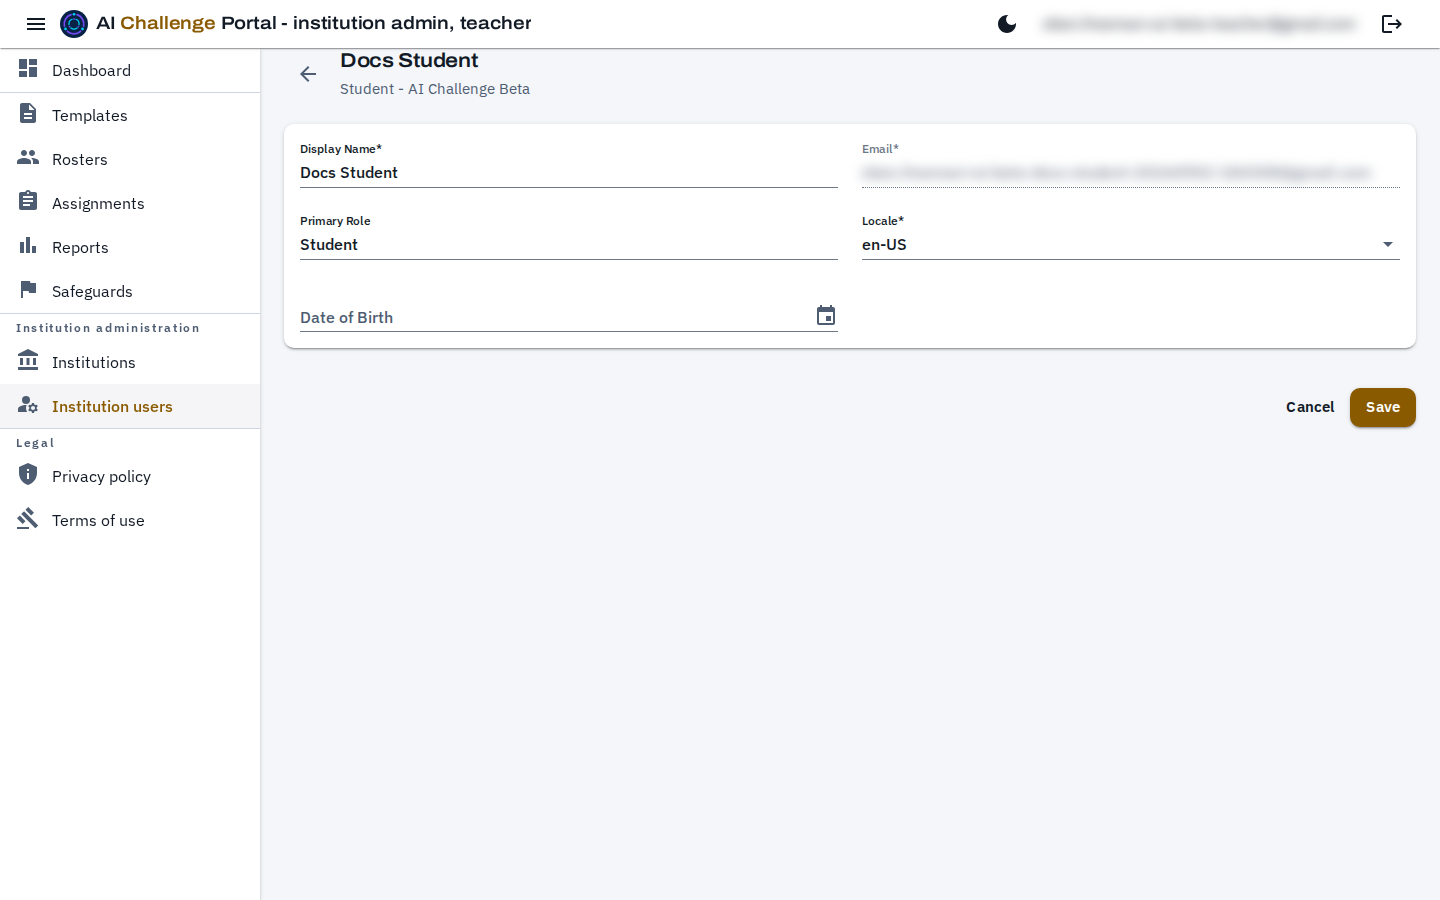
An existing user's page. The grayed fields are the ones fixed at creation. Use the Actions column
The name is the link to Edit; there is no separate edit icon. Deactivate or Reactivate changes sign-in status; Remove from institution removes this membership. The vertical-dots menu offers Connect to Authentication module and Resync roles. Change roles on the institution page, not this list.
Confirm the removal
Confirming removes this institution membership and keeps other memberships intact.
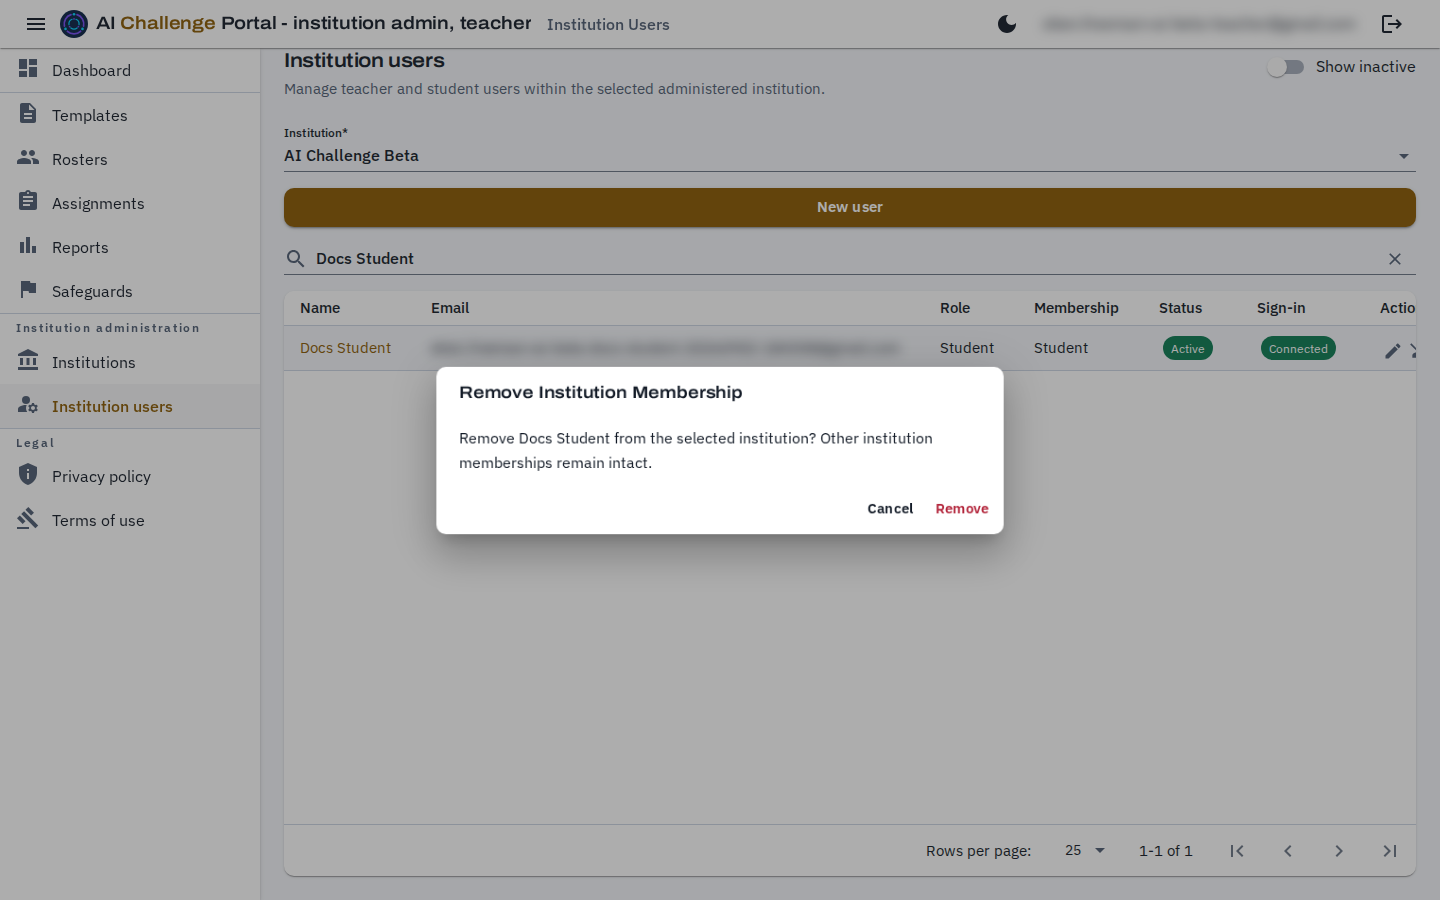
The removal confirmation. Deactivation asks in the same way, and says what it will do instead. Deactivate an account when access should stop
Deactivation turns off the person's sign-in in the Authentication module, then disables local access, while keeping memberships and history. Reactivate turns sign-in back on and resyncs roles.
Erase personal data on a deletion request
When a student, parent, or teacher asks your institution to delete their data, choose the Erase personal data icon in the person's Actions column. The dialog explains what is removed: the sign-in, the name, email, date of birth, conversation text, feedback, and notes are replaced with placeholders, while scores, counts, and the records other people rely on stay in anonymous form. Tick I understand this account cannot be recovered, then choose Erase personal data; the button stays disabled until the box is ticked. Erasing also removes queued notifications about the person and prevents deliveries already in progress from restoring their details. Erasing is permanent, and every erasure is recorded in the access log.
The action is offered for teachers and students. Before erasing a teacher, move any classes, templates, or assignments still in use to another teacher, because they stay with the anonymous account. A person who also belongs to another institution, and institution administrators, cannot be erased here; contact cognificance.com and we will handle the request. Deactivation, not erasure, is the right step when someone only needs to lose access.
Beta boundary
What is live now, and what is not
Live today: managing institutions, users, memberships, sign-ins, and teaching tools when you also teach. Not yet built: seats and billing, email invitations, bulk import of users (for example, from a CSV file or a student information system), institution-wide dashboards, and institution-level report export.
Workflow 7
Legal documents and signing out
Read the documents your people accepted
About shows the running version and links the Privacy policy, Terms of use, and Third-party notices.
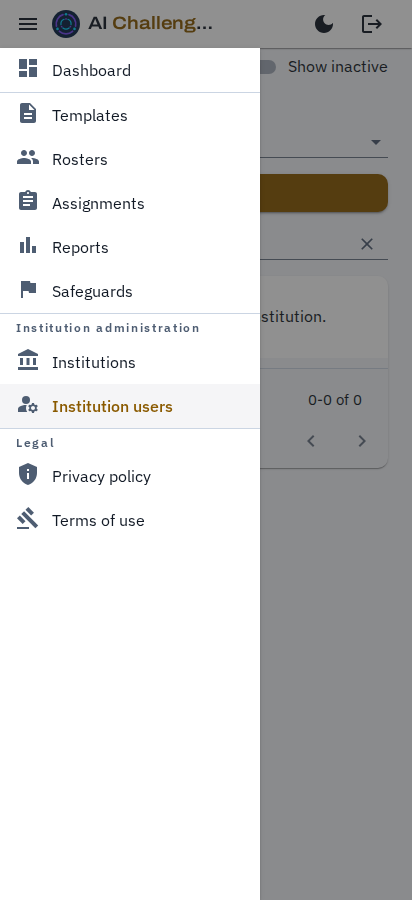
The navigation panel on a narrow screen, opened from the menu button. It carries the same three groups the docked panel does. Sign out when you are finished
Sign out ends your session and shows a confirmation page.
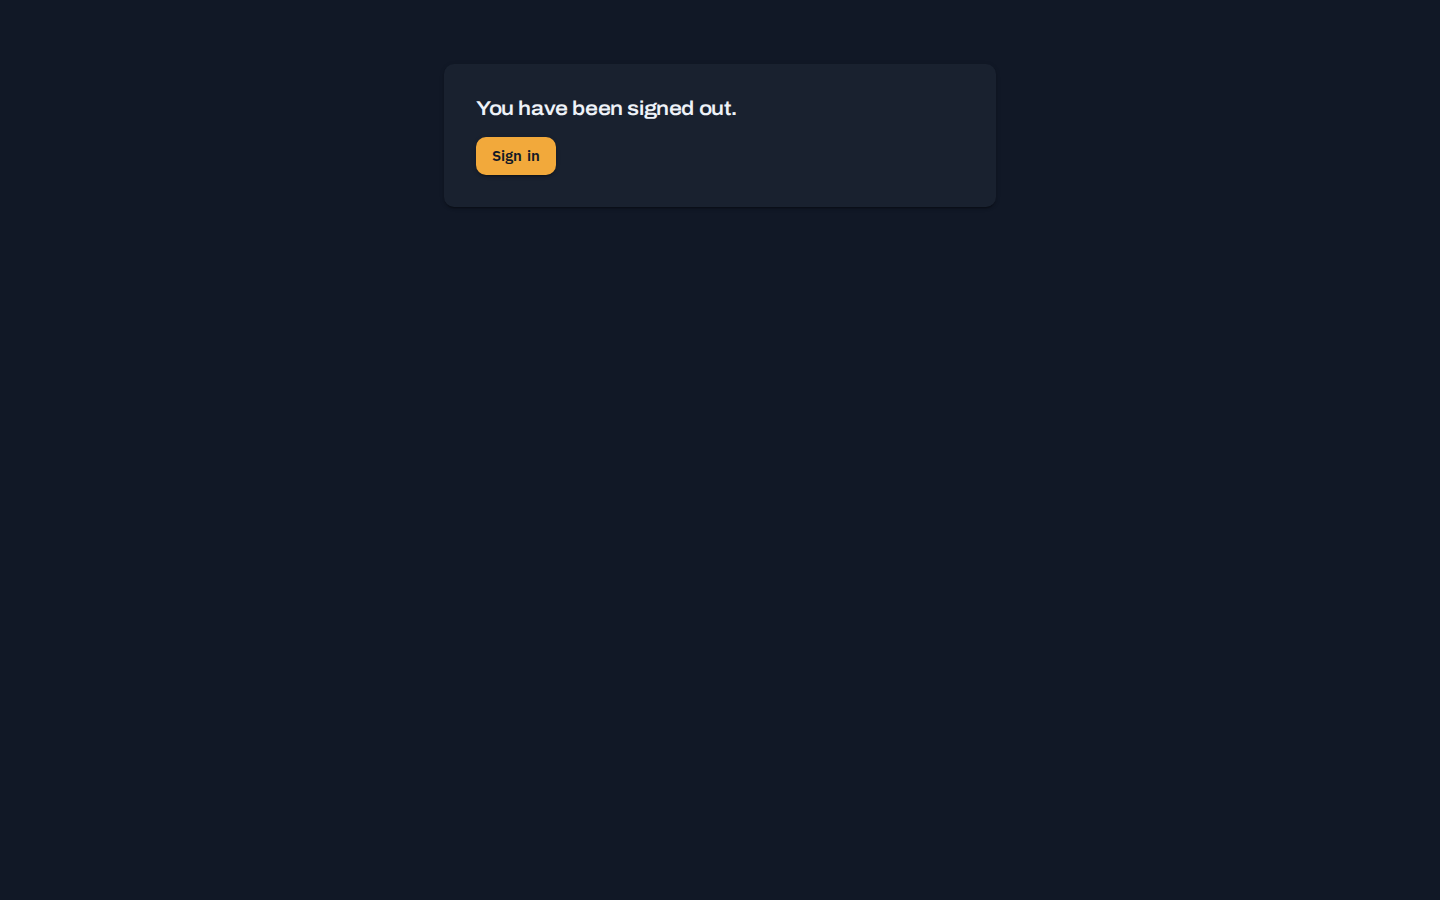
After signing out. Signing in again starts the sign-in from the beginning.
Using an LMS?
Launch the portal from your LMS
Schools that use Canvas, Moodle, Schoology, D2L Brightspace or Blackboard can ask about LTI 1.3 integration. It defaults off and is available only when configured and enabled by arrangement. See Integrations.
Choose an escalation owner before launch
Define who reviews flags, what escalation means locally, and how students receive support.
Tutorial mode
The admin portal starts with tutorial mode on. The dashboard shows a Getting started checklist, and each workflow page shows a guide card reading Step n of m, with a link to the matching section of this guide and a Turn off tutorial button. The institution track has five steps:
- Check your institution (Institutions).
- Review the people in your institution (Institution users).
- Add a teacher (New user).
- Choose an escalation owner.
- Import your framework in Catalog.
The institution steps are pointers and are never ticked, because the dashboard counts for an institution administrator cover the whole institution rather than your own work. If you are both a teacher and an institution administrator, you see both tracks; the teacher guide lists the teacher steps.
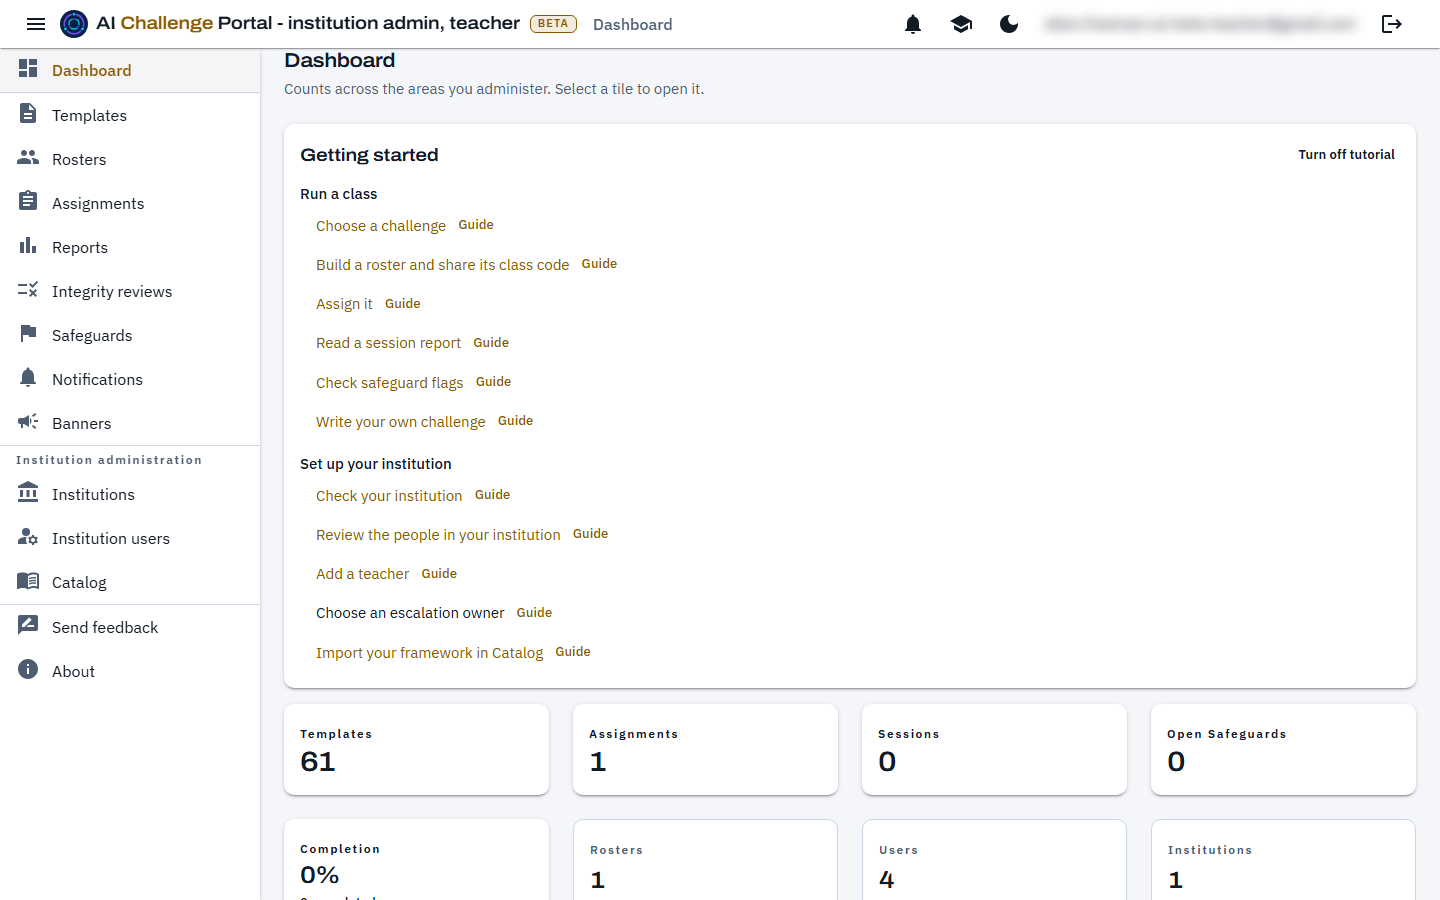
To turn the tutorial off, use Turn off tutorial on a guide card. To bring it back, select the school icon in the app bar. The setting belongs to your account, so it follows you across devices and browsers.
Announcements banner
Use Banners in the admin portal to create plain-text announcements of up to 500 characters, with Info, Warning or Critical severity. Institution administrators must select one or more institutions they administer and can narrow the audience by role or rosters in those institutions. Teachers can target only students in rosters they own. Platform administrators can target everyone or selected roles, institutions and rosters. A recipient must match every selected target kind.
Enter the start and stop dates in your browser's local time, with the stop after the start. Active announcements appear above the portal header, with Critical announcements first, and refresh on sign-in or app load and every five minutes. Closing a banner in the admin site dismisses it for the browser session, including page reloads; a new browser session can show it again while its schedule is active.
Each selected date uses its own daylight-saving offset; times that do not exist during a clock change show a field error. The roster picker lists active rosters within your banner authoring reach. Unavailable or archived saved targets remain visible and must be removed before saving; the server checks the audience when you save. Loaded announcements appear and disappear at their scheduled times even when a refresh fails. When several announcements are visible, scroll within the bounded banner area; you can focus it and scroll with the keyboard.
The assistant's daily limit
The teacher assistant on the template editor has a daily limit for each teacher and institution administrator: by default 100 messages a day, counted from midnight UTC. A person who reaches it sees "Daily assistant limit reached. It resets at midnight UTC." above the message box, and can keep editing the template by hand. Platform administrators are not limited. The limit is set by a platform administrator in Configuration (ai.assistant.daily-limit; 0 means no limit). A request the AI service declines under its content policy does not use a message; a reply that fails because the AI service is unavailable or slow, a reply cut off for length, and a review of a saved version that could not complete still count.
When AI features are paused
During a provider outage a platform administrator can pause new AI work from Configuration (Accept new AI sessions). While it is off, starting a challenge, sending a message in a run, the teacher assistant and the team features answer "AI sessions are paused for a short while" and ask people to try again in a couple of minutes. Nothing is lost: a student's message goes back in the response box, open runs are kept, a finished run's report waits until the switch is back on and is then prepared automatically, and everything works again as soon as the switch is turned back on. AI work also pauses on its own when the platform reaches its daily AI spend limit: people are told AI work is paused for the rest of the day, and it resumes at midnight UTC, or sooner if a platform administrator raises the limit. Nothing is lost in either case, and there is nothing to do on the institution side.
Request limits
Request allowances apply across the whole service. If you reach a limit, wait for the time shown before trying again. If AI requests are temporarily unavailable, wait and try again when the service recovers.
Partner subscriptions
When the partner API is enabled and your institution uses a headless partner integration, a platform administrator assigns that client its own subscription. It cannot share a subscription with another client or use one with existing seat assignments. Partner subscriptions cannot receive learner or teacher seats. Partner learner identifiers keep their exact value; /, % and leading or trailing whitespace are refused when creating or looking up a learner. Hash URL-shaped identifiers or encode them without / or %. Partner integrations submit new turns only while a session is active. If a session changes during submission, the integration reads the session and retries; a pending turn must finish first. Failed queued dispatches are recovered when the integration next reads or submits a turn, after any active turn finishes.
Your standards and assessment frameworks
Align challenges to standards, competencies or assessment targets in the catalog. Need another framework? Teachers and institution administrators can use Request a framework or assessment in the alignment picker, or choose that category on Contact. Institution administrators can also bring their own district or school framework: in Catalog, choose your institution under Import into, upload a CASE CFPackage or catalog JSON, review the preview and apply it. The framework is private to your institution: only its members see it and only its templates can align to it, and it is available at once. Uploading confirms your institution has the right to share it and grants the licence in the Terms; a platform administrator may later promote it to the shared catalog, at no cost to any school, with your institution named as contributor. The codes of the platform's curated frameworks are reserved: if a later release adds a curated framework under a code your framework uses, your framework is given a new code (such as SCHOOL-2) and keeps its items and the templates aligned to it, and a platform administrator can change it to another code on request. Platform administrators import shared frameworks, which start disabled until enabled. See Standards and assessments.
Drafting the file. If your framework is a document rather than a data file, open Framework assistant on the Catalog page with your institution chosen under Import into, paste the document's text (up to 5,000 characters) or, for a longer document, choose a text, Markdown or CSV file (not PDF) of up to 60,000 characters, and send a message such as "draft it, code: MAPLE-MATH". To change the draft on show, send a follow-up message such as "relabel MR.1"; the assistant revises that draft. The assistant asks for anything the format needs that the document does not say, such as the jurisdiction or the licence, and checks each draft with the import's own validator. Choose Load draft into the import, then Validate and preview, read the preview, and Apply import yourself: the assistant cannot import, enable or promote anything, and it ignores instructions written inside the document. Your messages count toward the daily assistant allowance shared with the teacher assistant, a few messages a minute per person, and a per-minute allowance for your institution. Prefer your own AI tool? Download the framework skill and the schema; see Turn your standards document into a framework file.
State and national assessment results (on request)
Not available in the beta. When a platform administrator turns it on for your institution, after recording that a data processing agreement is on file, open External results in the admin portal. Record each student's state or district id (External student id; one student per id in your institution), then choose the assessment framework, enter the test window (for example 2025-26 Spring) and upload a CSV with the columns external_student_id, overall_level, optional scale_score, and optional category columns named by item code, using the framework's level codes. Test windows that differ only in capital letters or spacing are the same window. Changing the framework, the test window or the file clears the preview, so preview again before applying. The preview counts accepted and rejected rows and gives each rejected row's number and reason (no roster match, an id on two rows, an unknown level); students are never created from the file. Apply writes the results; uploading the same test window again replaces those students' earlier results, and the list of uploads shows how many of each upload's results are still current. A student whose data is erased, or whose external student id changes, while an upload is being applied is left out of it and listed as rejected. The file is checked on the server (up to 1 MiB and 10,000 rows) and is not kept. The preview refuses a framework with more than 10 top-level items, a file that would record more than 100,000 results, and a category column that names a top-level item (the overall_level column already reports it). A student whose role changes from Student loses its external student id. Your institution's administrators and platform administrators see the results, under External assessment results on the Student progress card of a session report, beside the challenge evidence; teachers and students do not. In the admin portal the results appear once the student has a session report you can open; the API returns them either way. Results last until a new upload of the same test window replaces them or the student's account is erased; they stay with your institution if the student leaves it. Turning the feature off, or archiving your institution, hides them without deleting them. See Privacy.
Gap view: evidence and coverage
Open a class or assignment and select Gap view. Choose an enabled framework, including your institution's own. Review its hierarchy, learner coverage, mean mastery and level (no level on an assessment framework, where it would read as a predicted result), observation count and last observed date. For frameworks with rated standards or assessment items, choose a Thinking demand rating (1-4) to filter, or Highest thinking demand first to order by demand; both apply before the 100-item cap. Each item lists its demanded Cognificance skills. Cognificance Domain, Strand and Skill rows are not rated, so their demand filter and demand order are disabled. Cognificance and the Cognificance Critical Thinking Profile are available in the same framework list; the Profile is formative only, with no predicted or certified score. Choose Weakest first, or open an item's learners, including learners with no evidence. Evidence on standards also contributes to the assessment targets that assess them and to their claims; contributing items are listed. Missing evidence is never scored as zero. These are formative observations, never predicted assessment scores.
Teachers read their own classes and runs under assignments they authored; institution administrators read their institution's scope. Views support up to 500 current learners and show up to 100 items in the selected demand filter and order (by code otherwise). Each item uses itself plus at most 99 contributing items, and one view reads at most 1,000 distinct items; warnings identify capped data. Weakest ordering applies to the listed subset. Class tables can be downloaded as CSV when exports are enabled. Only owning institution administrators and platform administrators see imported external levels, by administration and learner count, when both external-results switches are on. Teachers never see the overlay; external results never enter mastery or coverage. See Standards and assessments.
Cognificance thinking skills
The Gap view excludes descriptive Progression and Indicator rows in every framework. Domain, Strand and Skill rows remain. Demand filtering hides unrated items, including parents. Highest demand first uses weakest mastery as a tiebreak when both orders are selected. Contributing evidence reached only through Demands is marked "via Cognificance skill". Template filtering and "Also supports" do not follow Demands.
The Cognificance layer and Profile are included with AI Challenge. Alignment items show a 1-4 thinking-demand rating and the skills they demand where annotated. The reference describes domains, strands, grade-band progressions and observable indicators. The Profile is formative only, with no certified or predicted score. AI-literacy skills, persistence and evidence evaluation are defined for mapping but are not separately scored by current dimensions.